| Audience | Marketers and operations teams who want to automate and personalize campaigns based on user actions, attributes, or timing. |
| Prerequisites |
|
Journeys help you automate multi-step lifecycle flows such as welcome flows, winback sequences, lifecycle messaging, nurture tracks, and more.
Learning objectives
After reading this article, you’ll be able to:
- Create and configure journeys
- Choose audience-based or event-based entry criteria
- Build logic using delays, conditional branches, and experimentation
- Trigger downstream syncs as users progress
- Configure evaluation schedules, exit rules, and alerting
- Test journeys safely before launch
- Monitor performance and troubleshoot issues
- Use templates to speed up journey creation
Overview
Journeys let you design multi-step customer flows using a visual, tile-based canvas. Each tile represents a step in the lifecycle, such as waiting, branching, checking conditions, or triggering downstream actions.
You can drag tiles onto the canvas, connect them, and configure logic for each step.
How journeys work
Journeys evaluate users on a fixed schedule. At each evaluation run, Hightouch:
- Identifies users who qualify to enter
- Moves active members forward through tiles
- Triggers any configured
Send to destinationsyncs - Applies exit criteria
- Logs progress for reporting
Syncs inside a journey ignore their own schedules. They run only when the journey evaluates.
Journeys are made of tiles, each representing a logical step or branching point:
- Start — defines who enters
- Time delay — pauses progression
- Hold until — waits for a condition
- Segment — branches based on user attributes or behaviors
- A/B split — randomly assigns users for testing
- Send to destination — triggers a downstream sync
Required setup
Journeys rely on the parent model defined in your data schema.
Your parent model must:
- Come from a supported warehouse source
- Use the Lightning sync engine
Journeys trigger downstream actions through syncs such as sending messages, updating user profiles, or adding members to advertising audiences. Make sure required destinations and syncs are connected before publishing a journey.
Recommended sources
- Snowflake
- BigQuery
- Databricks
- Redshift
Don’t see your source? to confirm compatibility.
Create a journey
Step 1: Open the Journeys list
-
Go to Customer Studio → Journeys.
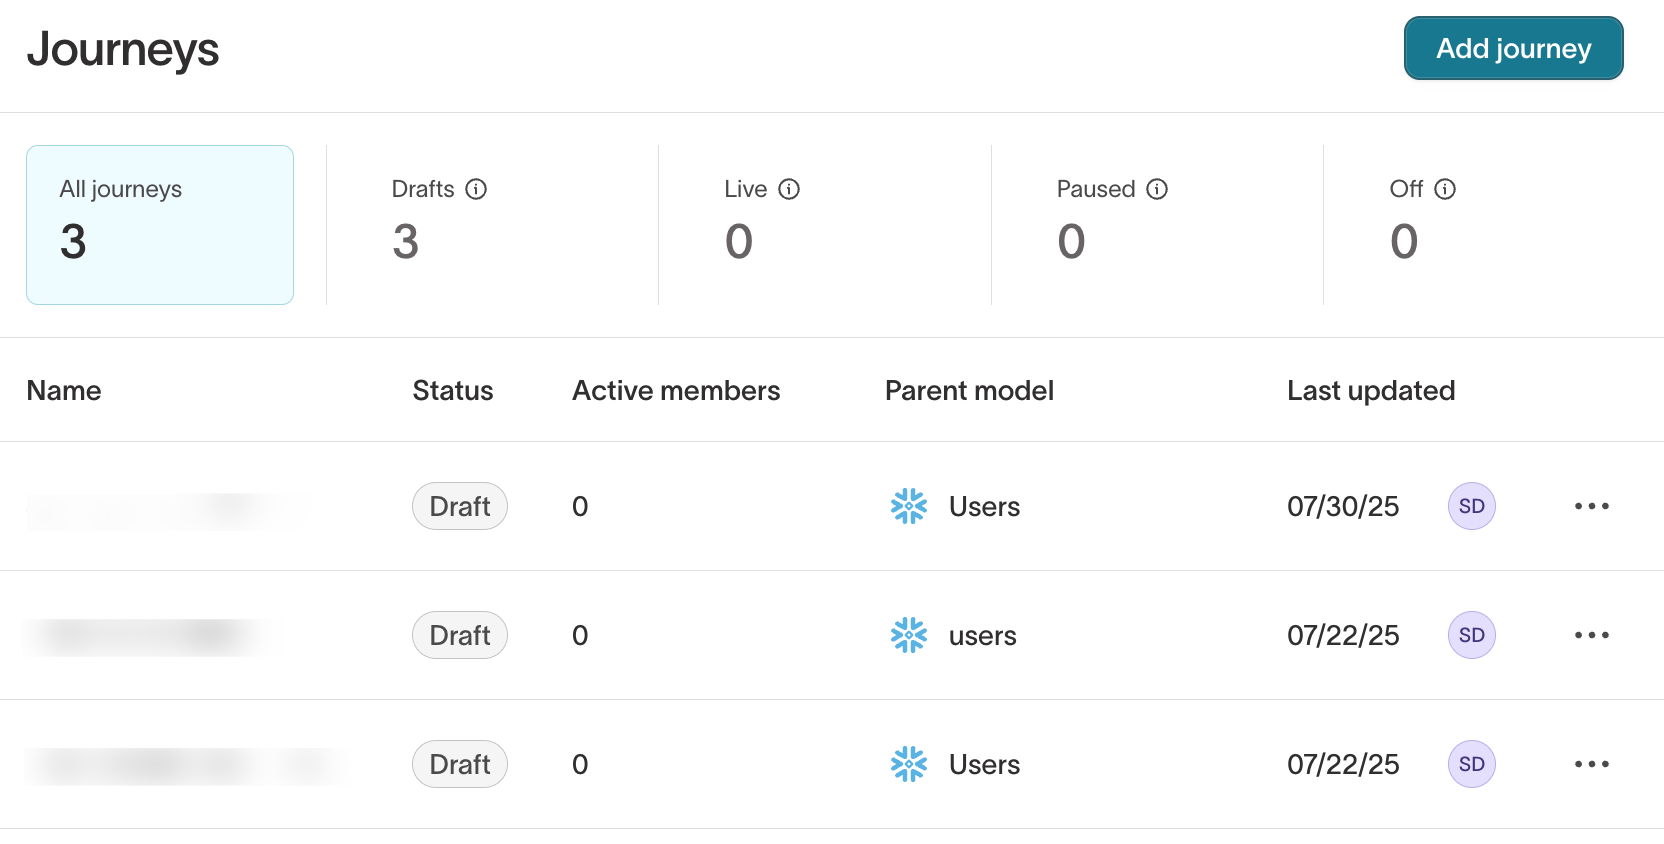
-
Click
Add journey. -
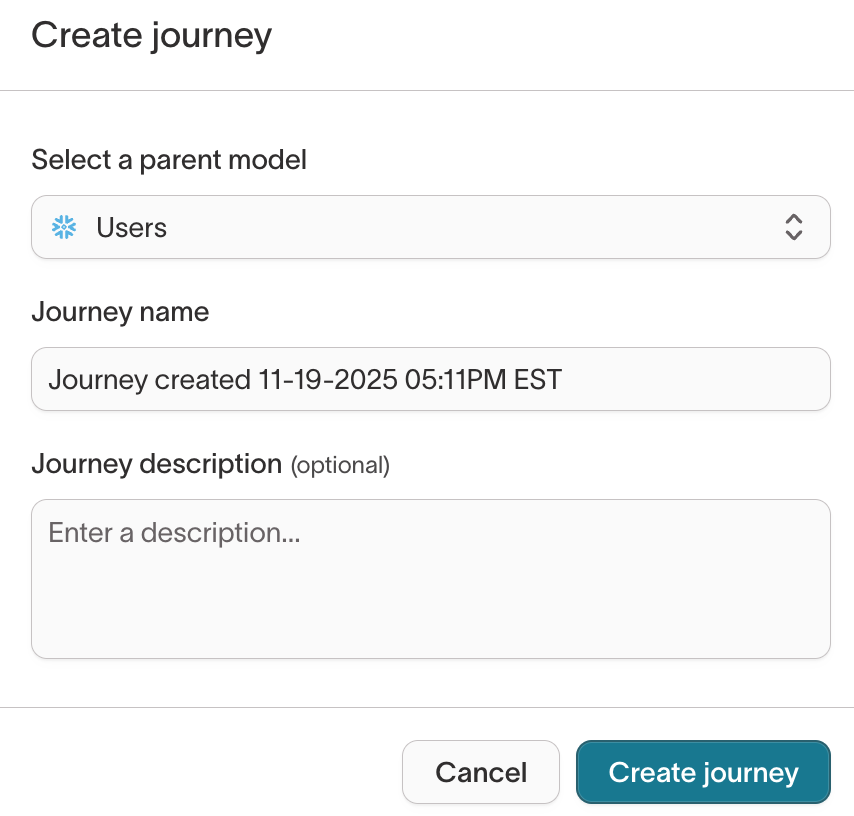
In the modal:
- Select a parent model.
- Enter a journey name.
- Add an optional description.
-
Click
Create journey.
You will be taken to the journey canvas in Draft mode.
Step 2: Configure the Start tile
The Start tile defines who enters the journey and how often they can enter.
-
Click the Start tile to open its configuration drawer.
-
Choose between two entry types:
- Enters audience — users enter when they join an audience
- Performs events — users enter when they perform an event
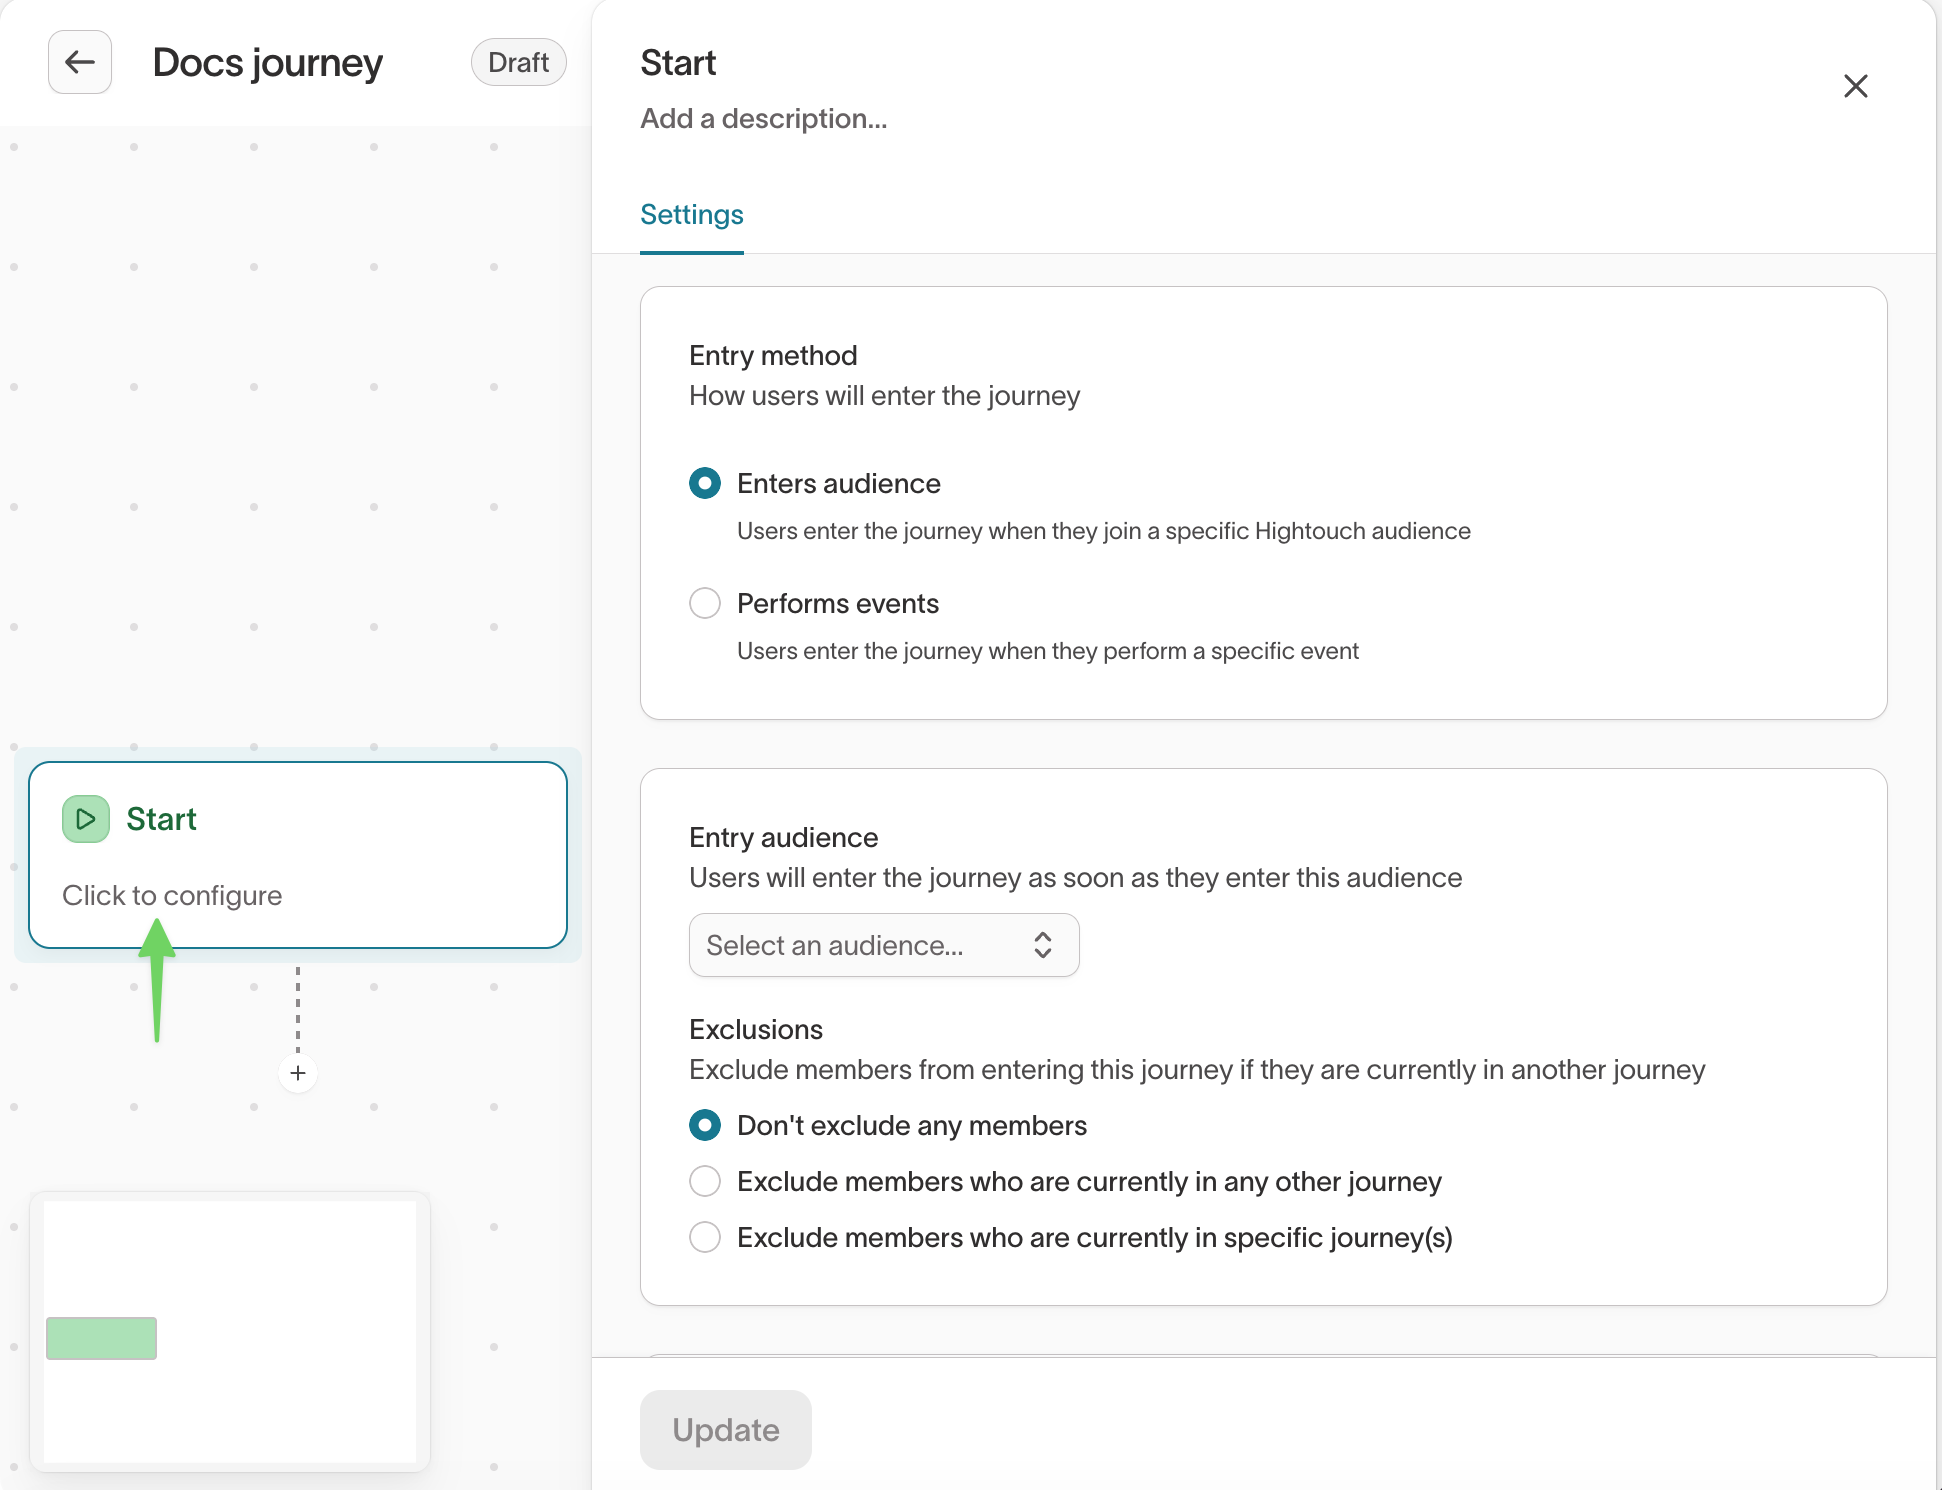
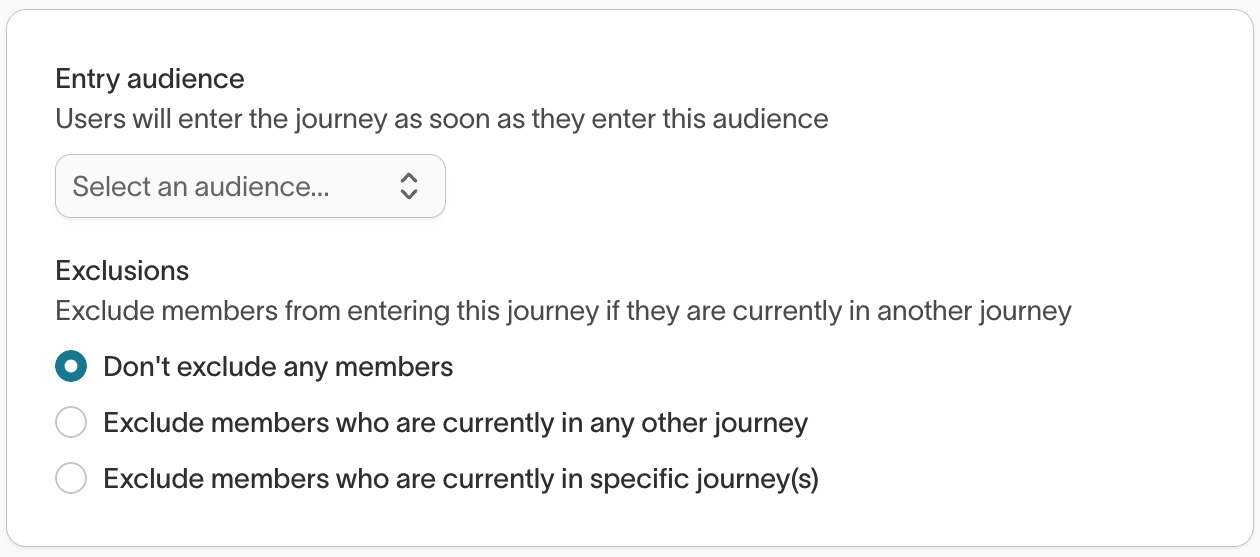
Audience-based entry configuration
-
Select an entry audience.
-
(Optional) choose exclusions:
- Don’t exclude any members (default)
- Exclude members currently in any journey
- Exclude members currently in specific journeys
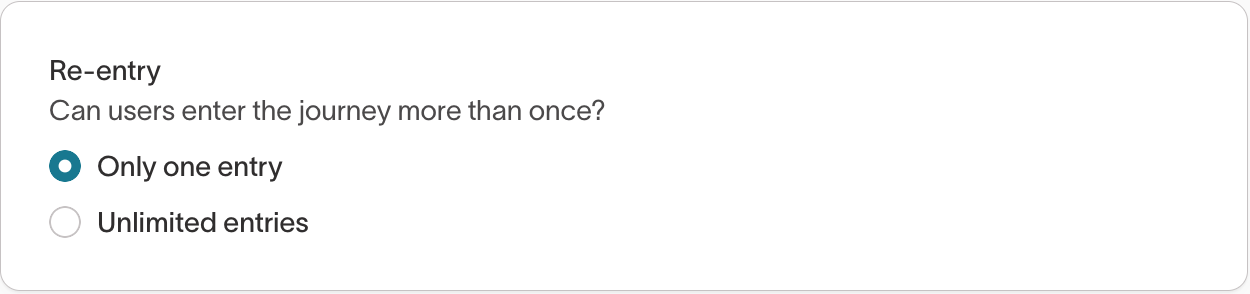
- Choose a re-entry behavior:
- Only one entry (default)
- Unlimited entries
- Click
Updateto save your Start tile settings.
Event-based entry configuration
- Select the event that should trigger entry.
Only events with assigned primary keys can be used to enter a journey. A warning appears if the event model lacks a primary key.
-
(Optional) enable Include past events:
- When enabled, you can specify a lookback window
- When disabled, only events occurring after the journey starts qualify
-
Choose exclusions:
- Don’t exclude any members (default)
- Exclude members in any journey
- Exclude members in specific journeys

- Select a re-entry behavior:
- Only one entry (default)
- Unlimited entries
- Click
Updateto save.
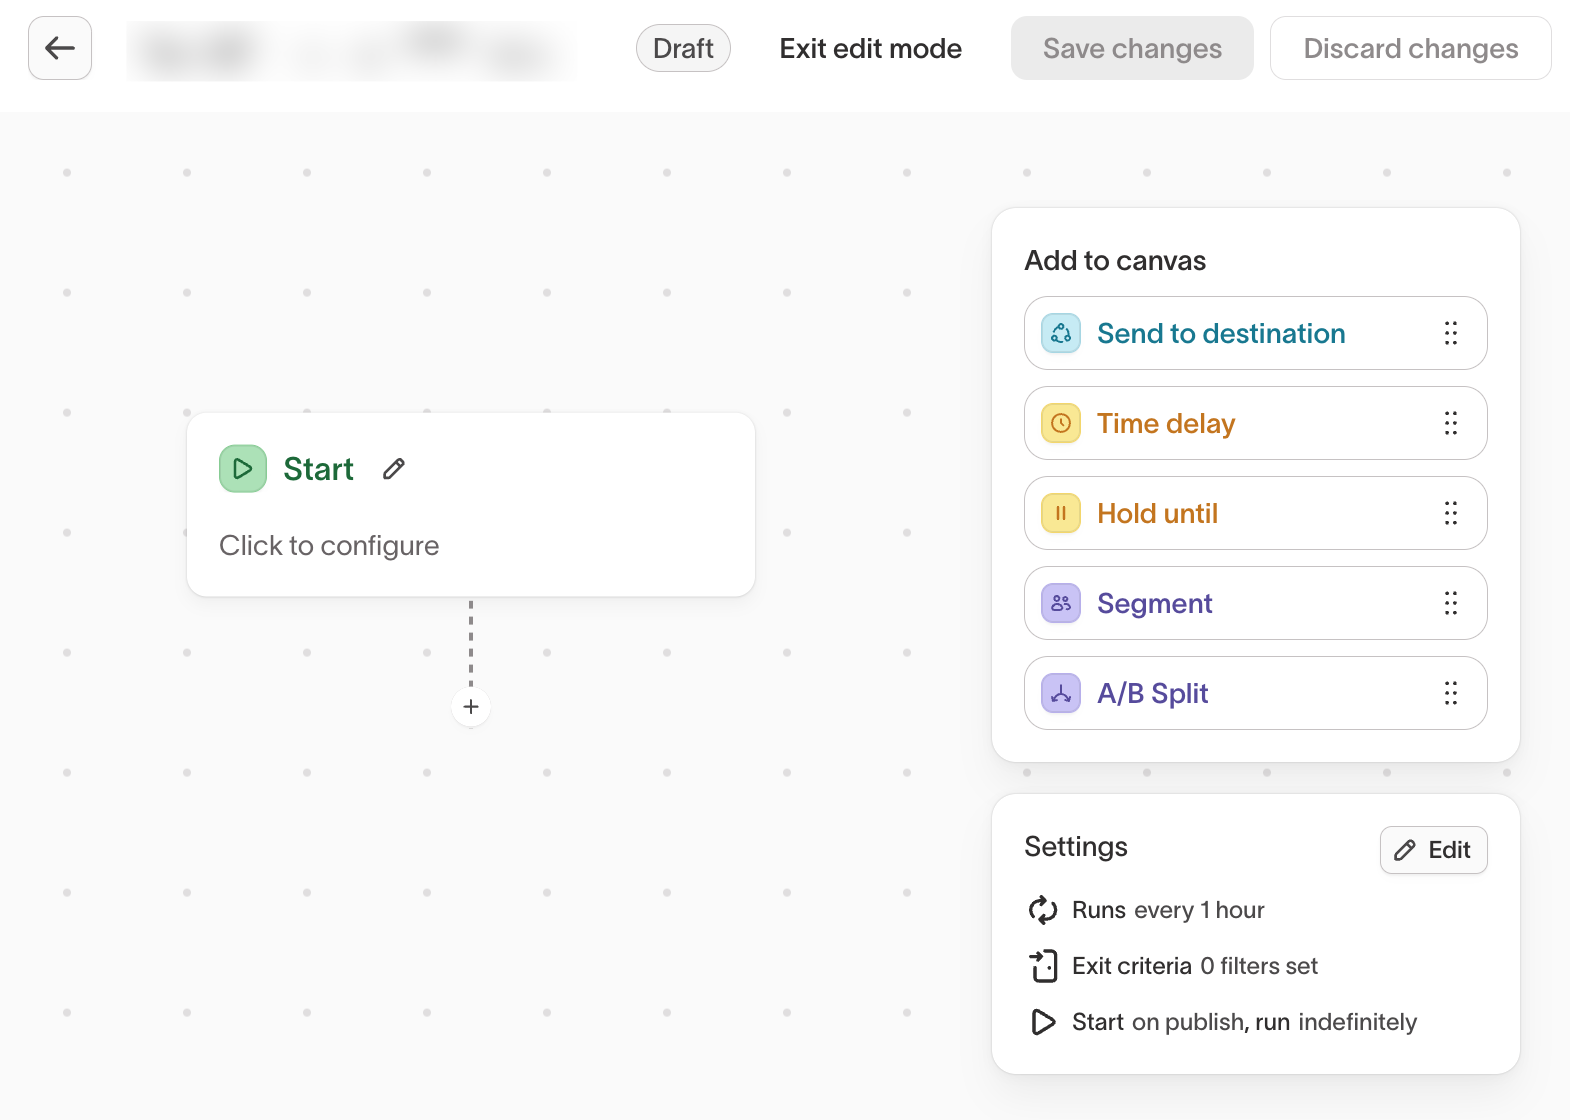
Step 3: Add tiles to the canvas
Use the Add to canvas panel to add steps to your journey:
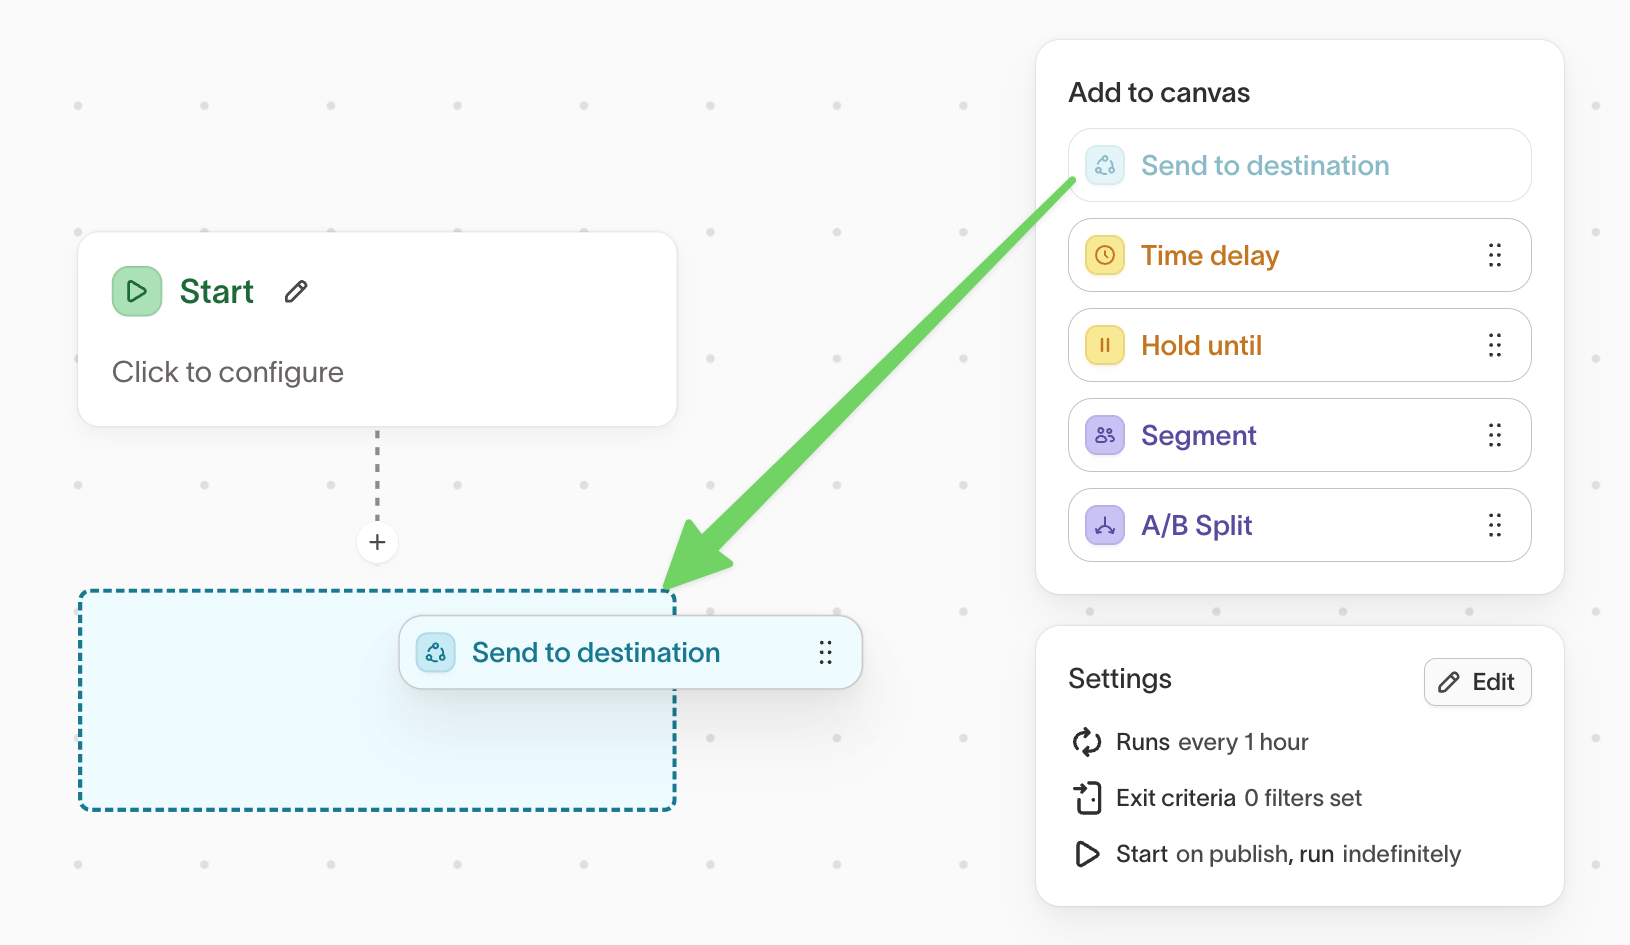
Available tiles:
Send to destinationTime delayHold untilSegmentA/B split
Drag tiles onto the canvas or click the + below any tile.
Interacting with the canvas
- Pan by clicking on empty space and dragging or scrolling on a trackpad
- Zoom by using the +/- buttons or pinching on a trackpad
- Create a tile by dragging one onto the canvas from the library on the right
- Move a tile by clicking and dragging it around the canvas
- Edit a tile’s configuration by clicking on the tile
- Delete a tile by hovering over it and clicking the trash icon (note: the start tile cannot be deleted)
- Duplicate a tile by hovering over it and clicking the copy icon (note: the start tile cannot be duplicated)
- Clean up a messy canvas by clicking the clean up icon on the top left of the canvas
- Select multiple tiles by holding Shift on your keyboard while clicking and dragging around a set of tiles. Once they're selected, you can then move all of these tiles as a group, copy them, or delete them.
- Expand and collapse tiles using the compact mode and detail mode buttons
Step 4: Configure each tile
Each tile on the canvas opens a configuration drawer where you define its logic.
Time delay
Pause each member for a fixed amount of time before advancing.
Members move forward at the next journey evaluation after the delay elapses.
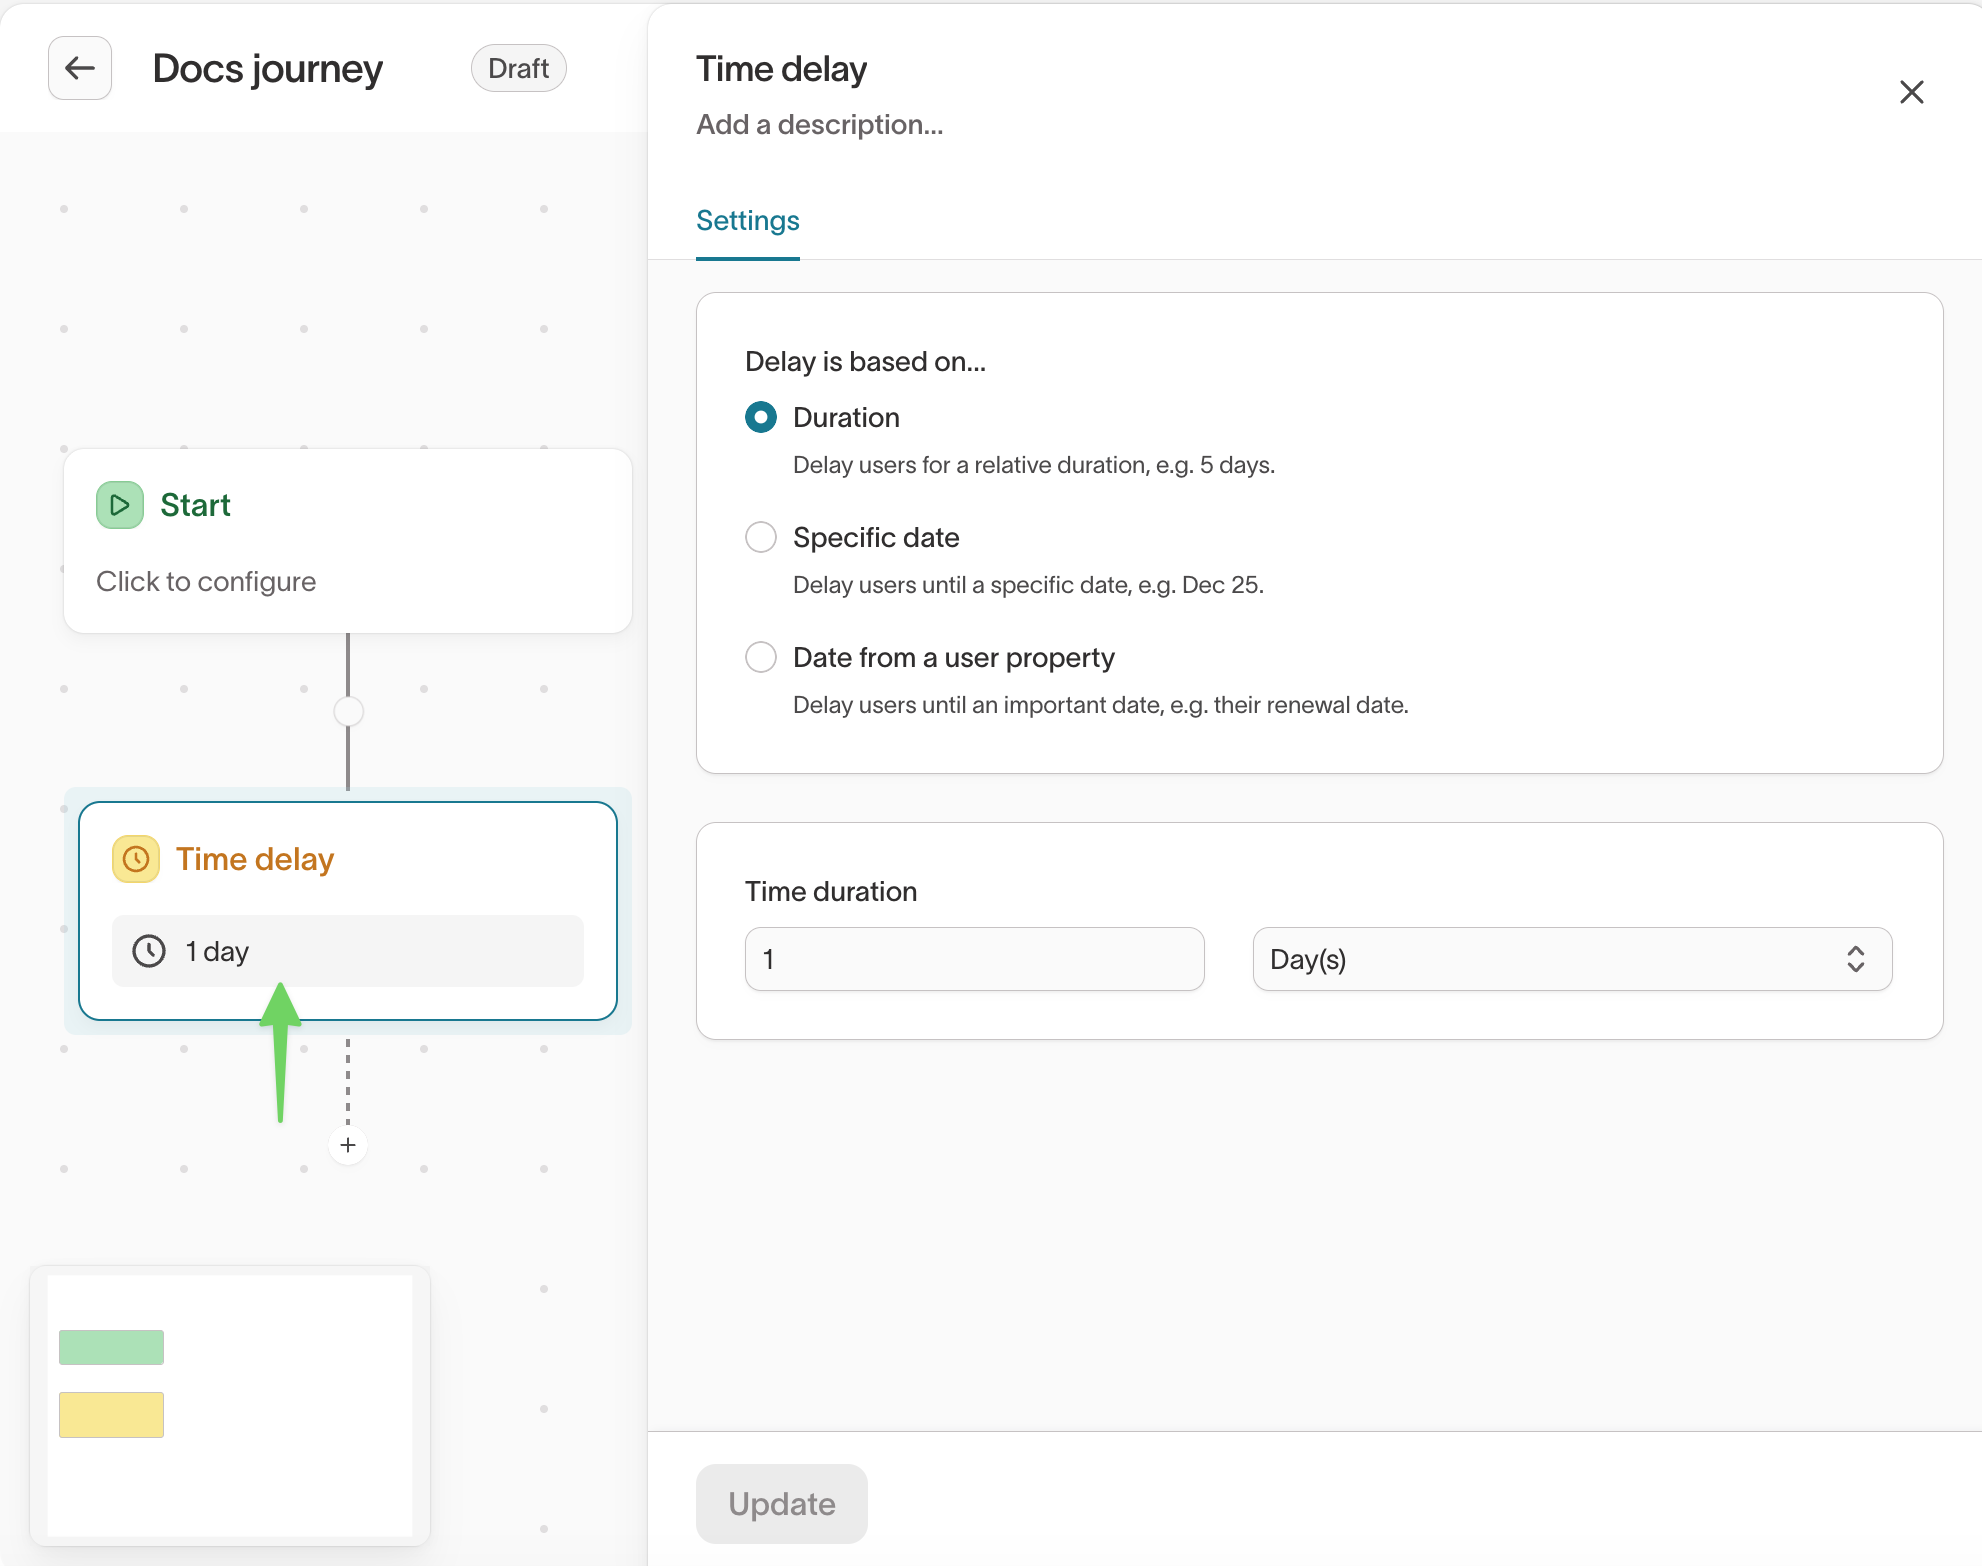
Delay duration should be equal to or longer than the journey evaluation interval. For example, with an hourly evaluation schedule, a 15-minute delay advances on the next hourly run.
Hold until
Wait until a condition becomes true.
Examples of rule conditions:
Order completedwithin last 7 daysloyalty_tier = GoldPurchase amount > 50
Members move forward during the first evaluation where the condition is satisfied.
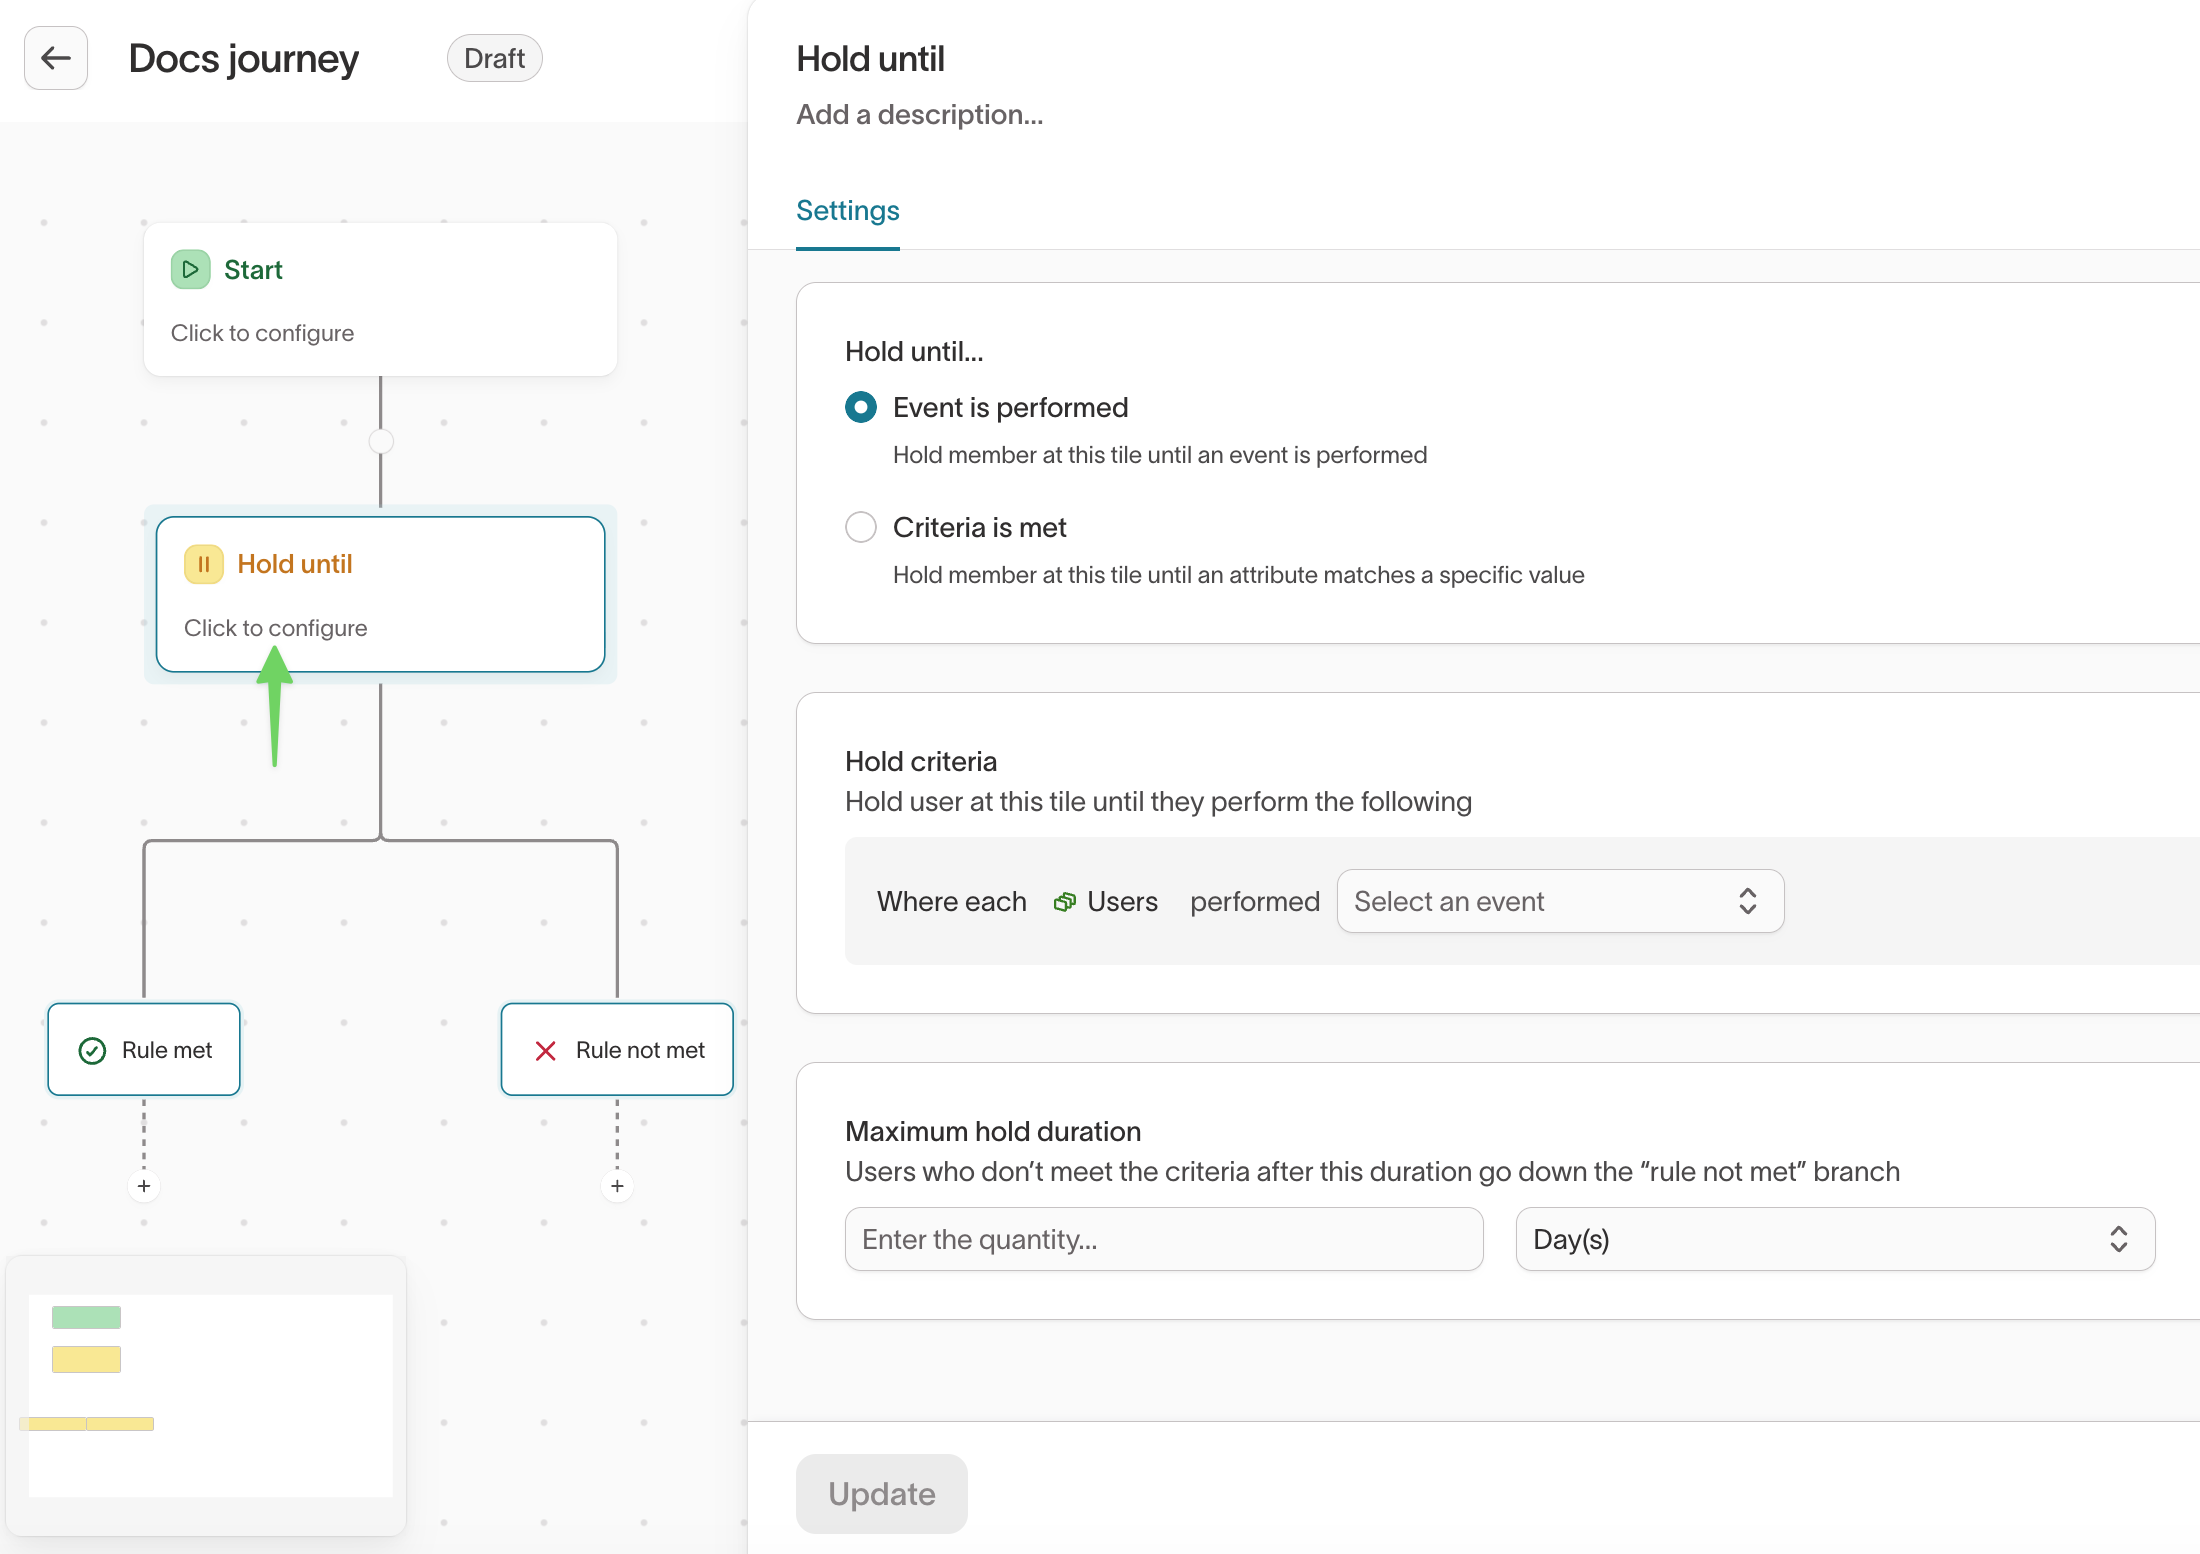
If the condition never becomes true, the member remains in the tile indefinitely or until they meet exit criteria.
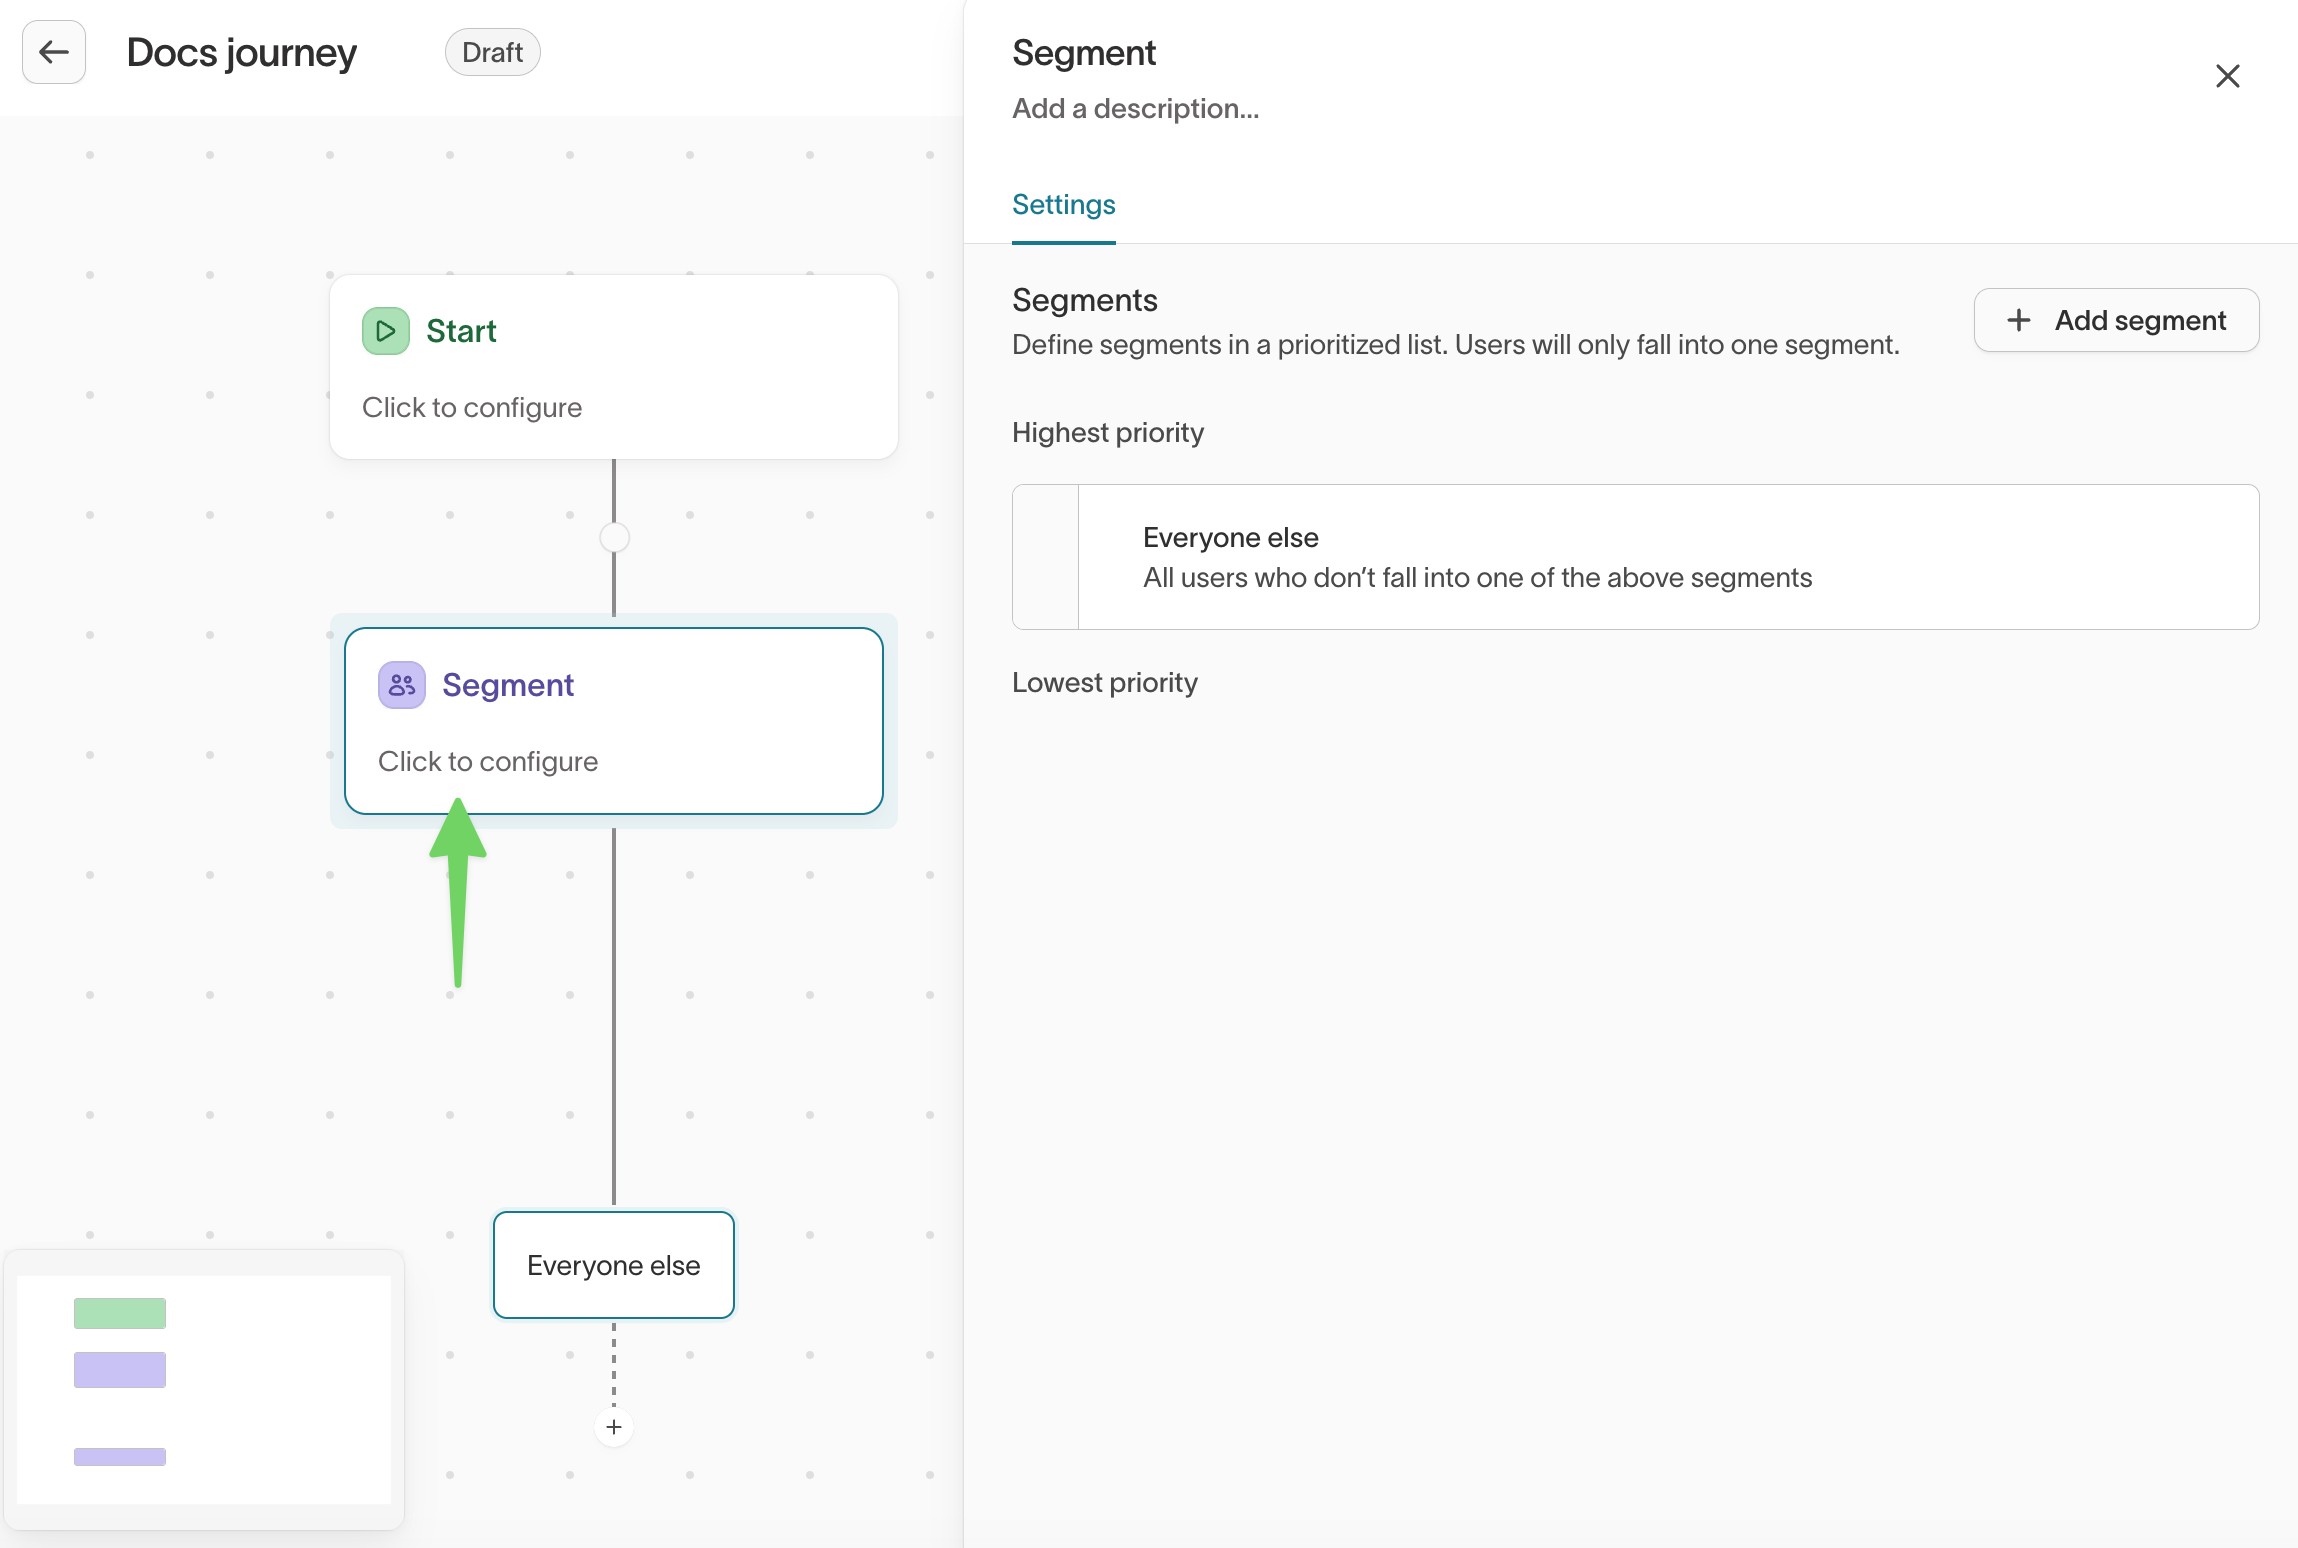
Segment
Branch journey logic based on conditions.
Branches evaluate top-to-bottom. The first matching branch wins.
Segment tiles support branching using:
- Properties
- Traits
- Audience membership
- Event history
- Relationships
A/B split
Randomly assign members to branches for controlled experimentation.
Configure:
- Number of branches
- Percentage allocation per branch
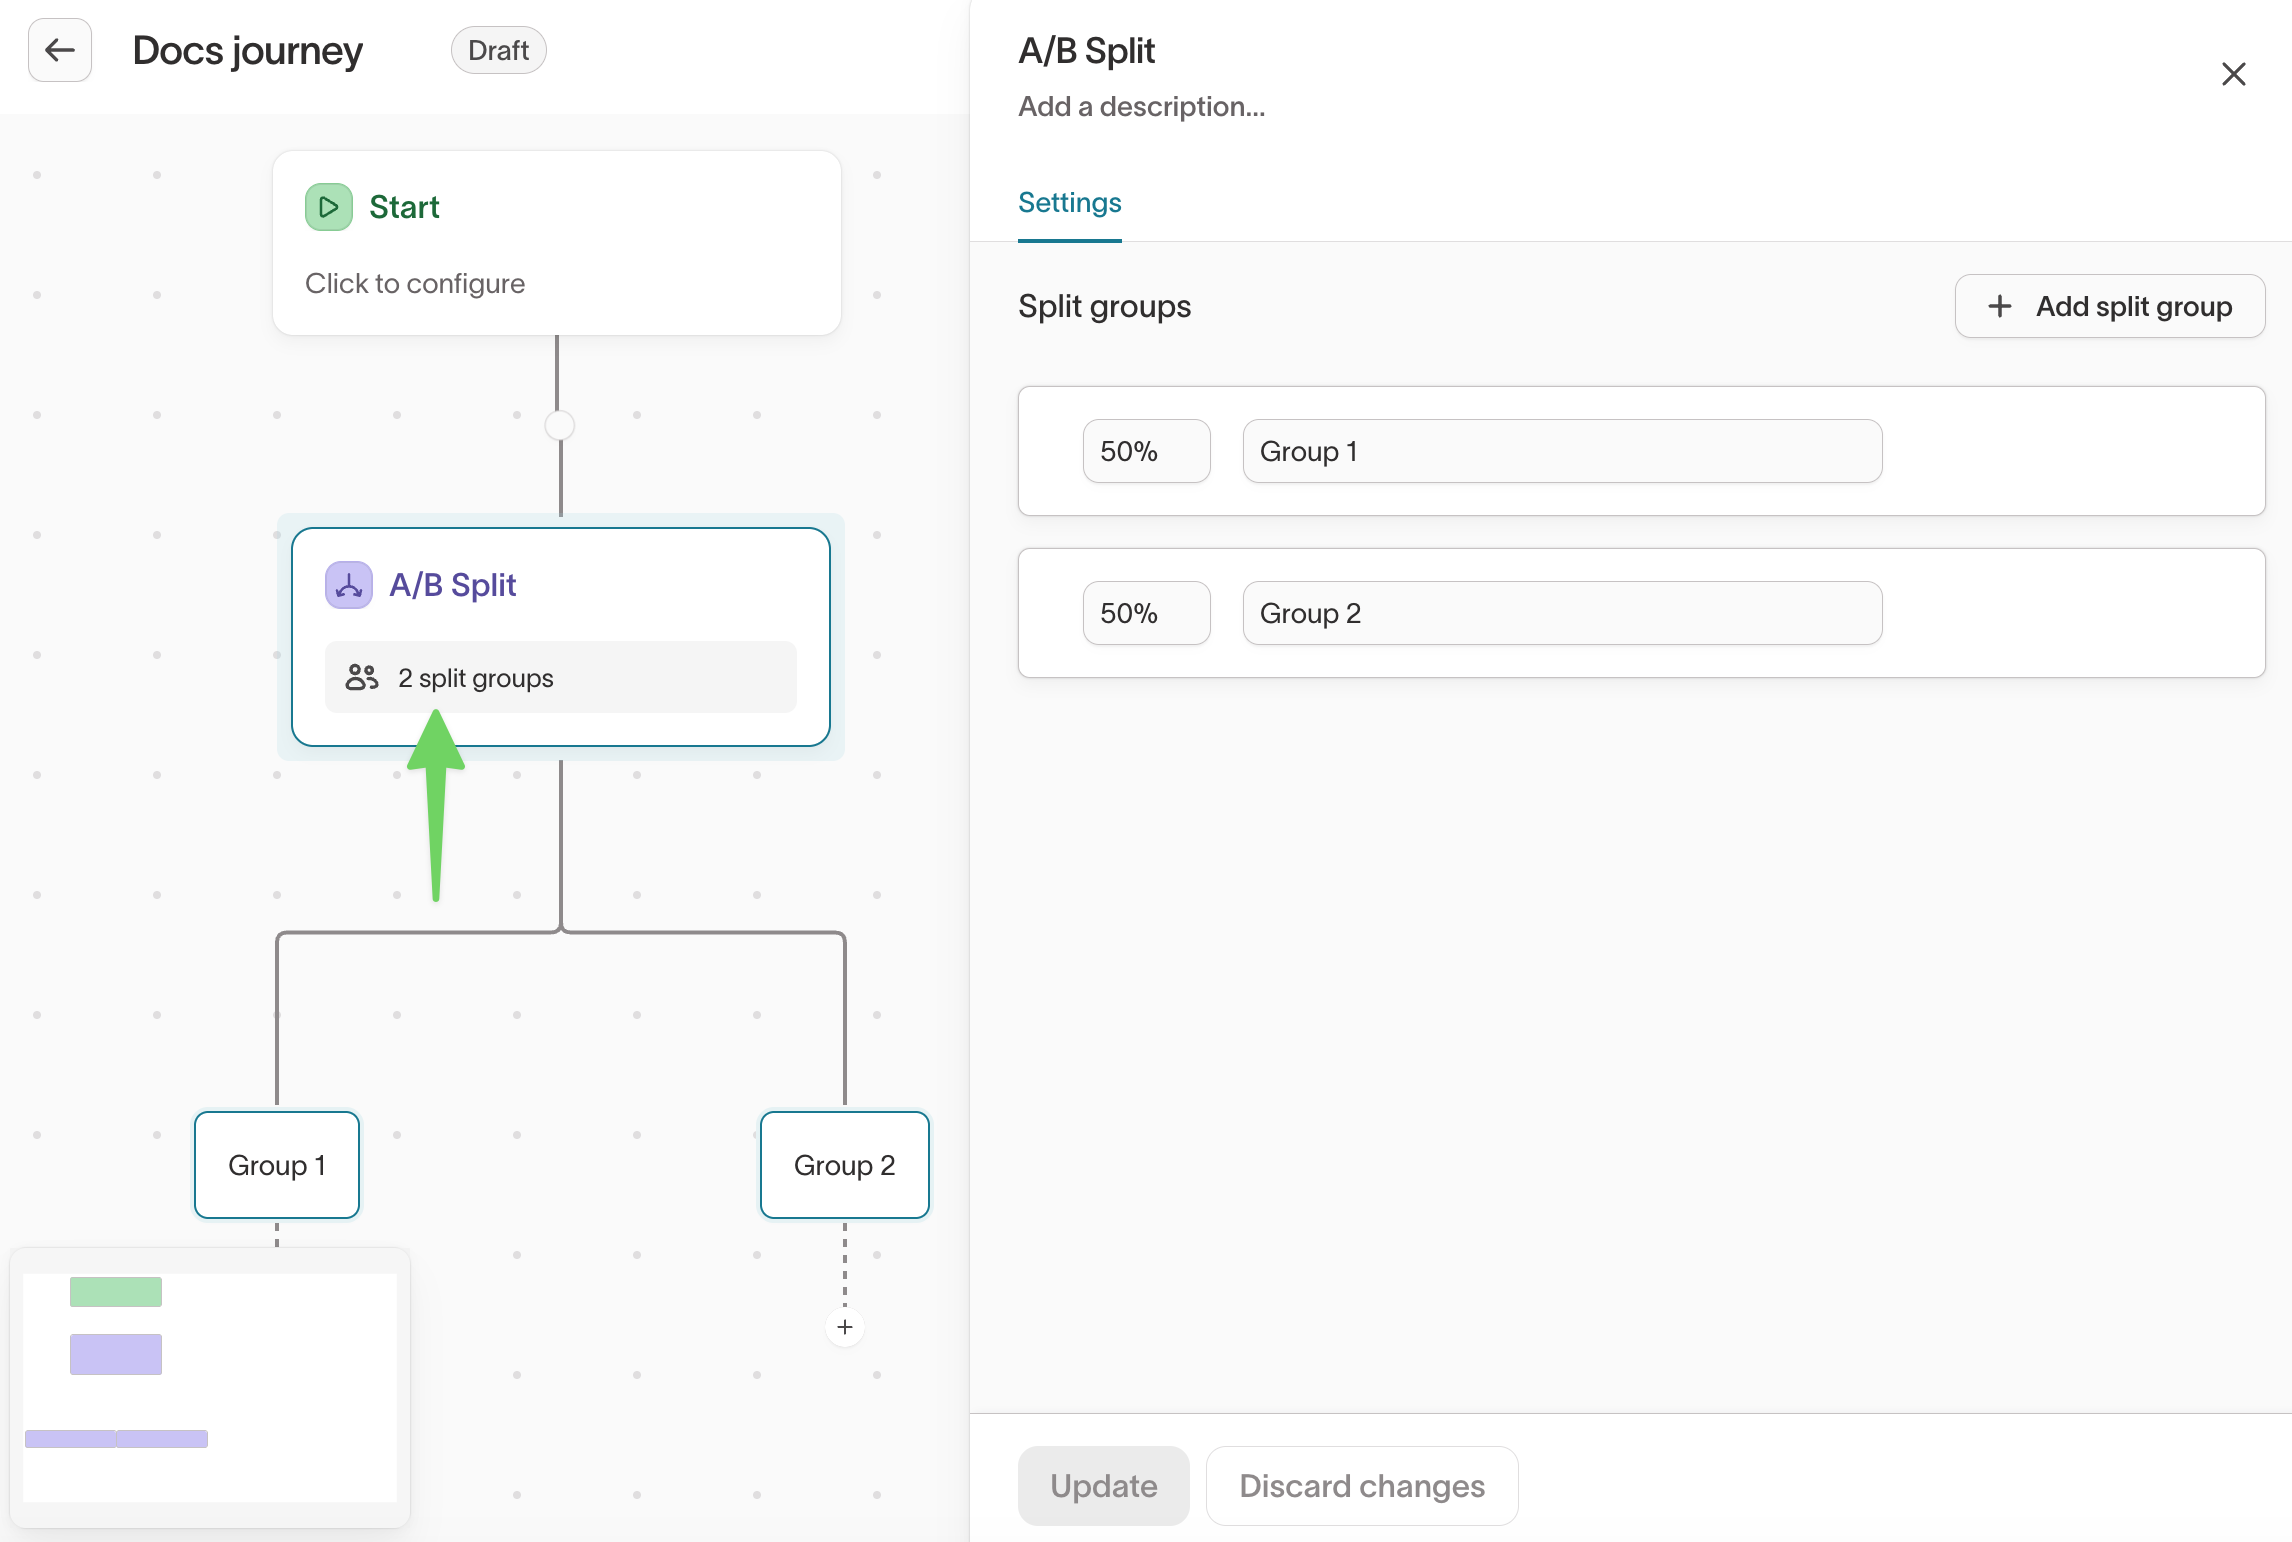
For clean experimental results, avoid changing split percentages after the journey goes live.
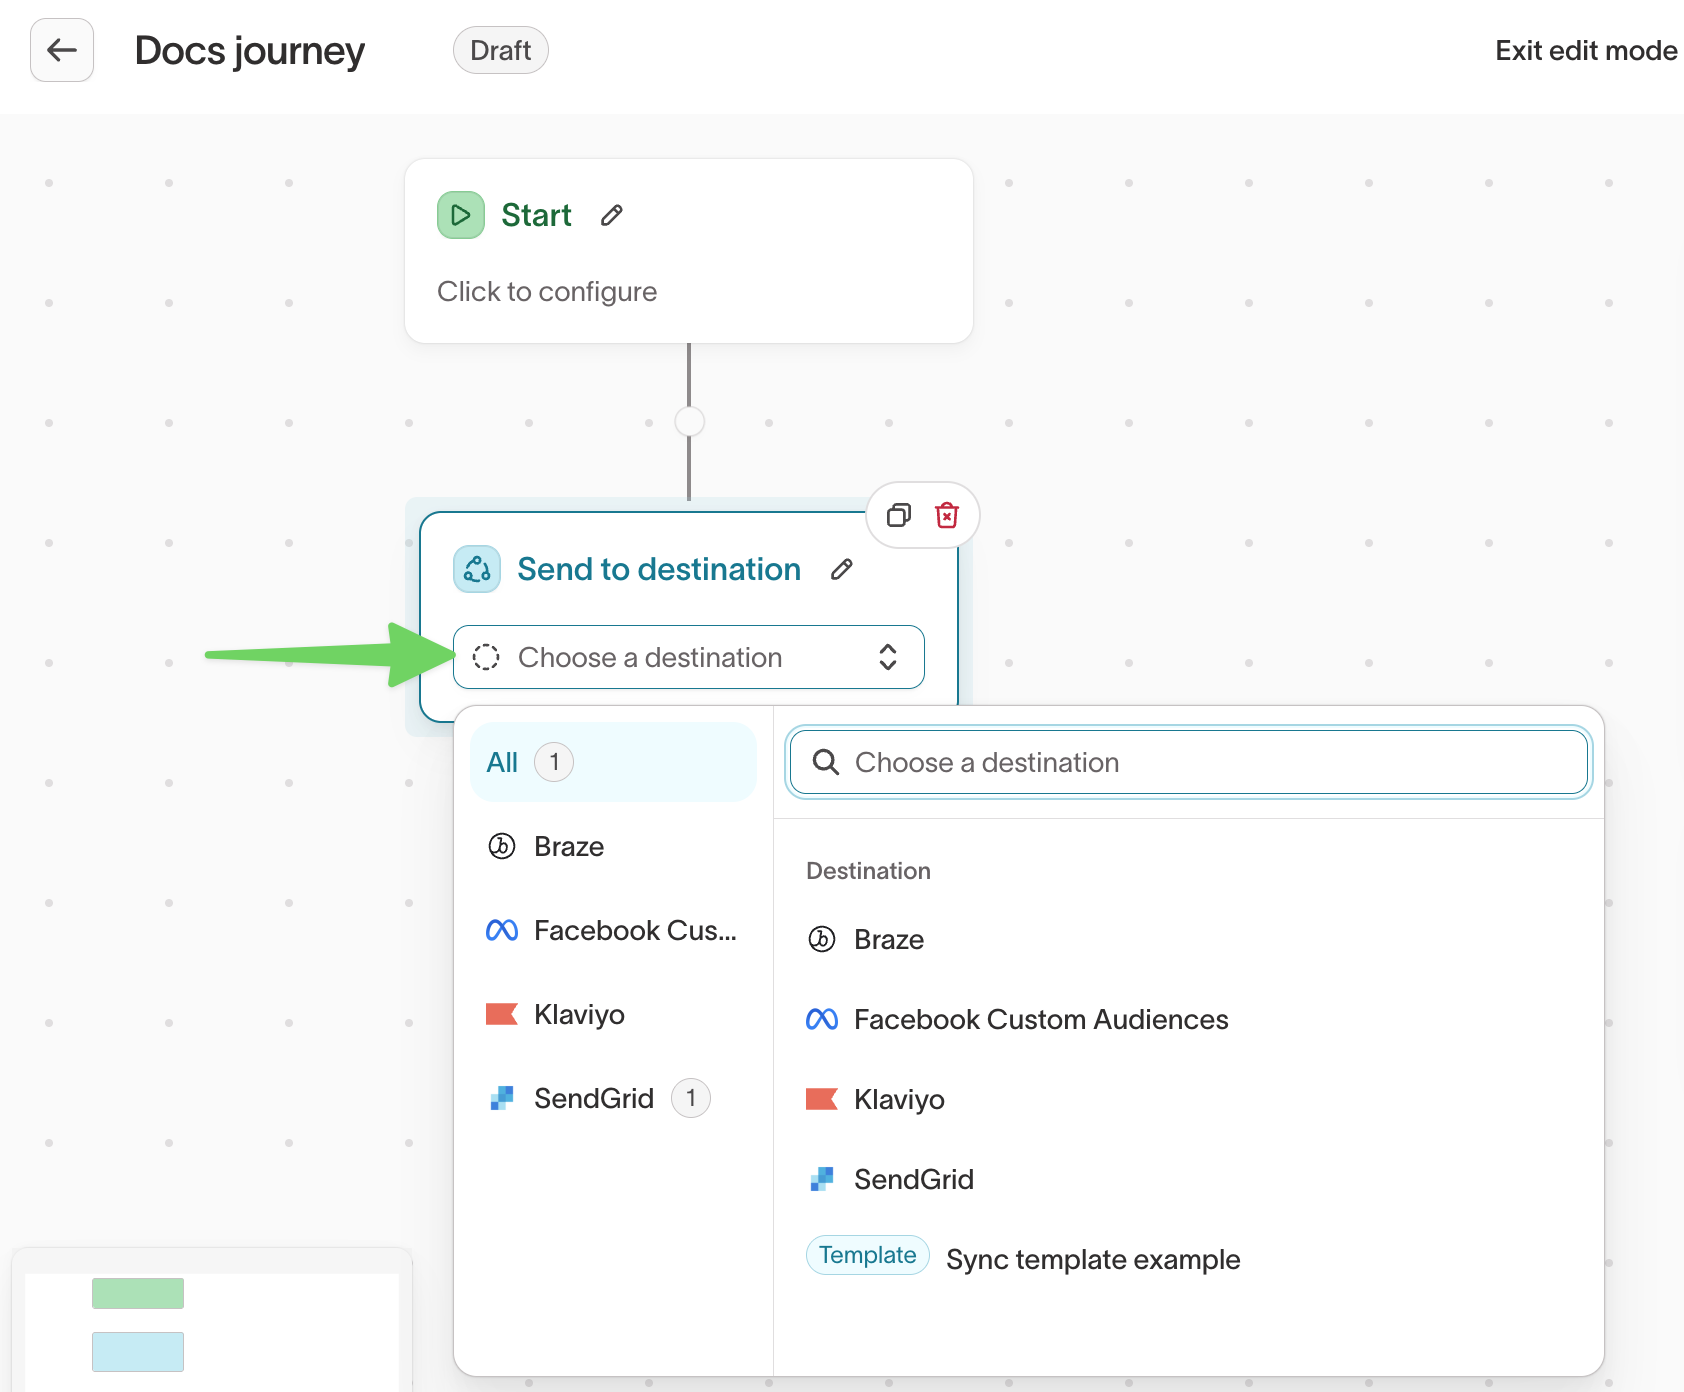
Send to destination
Trigger a sync to a downstream tool.
You can select an existing sync or create a new one from the tile.
Sync schedules are ignored inside journeys. All syncs trigger only when the journey evaluates.
Edit a journey
Click Edit at the top right of the canvas.
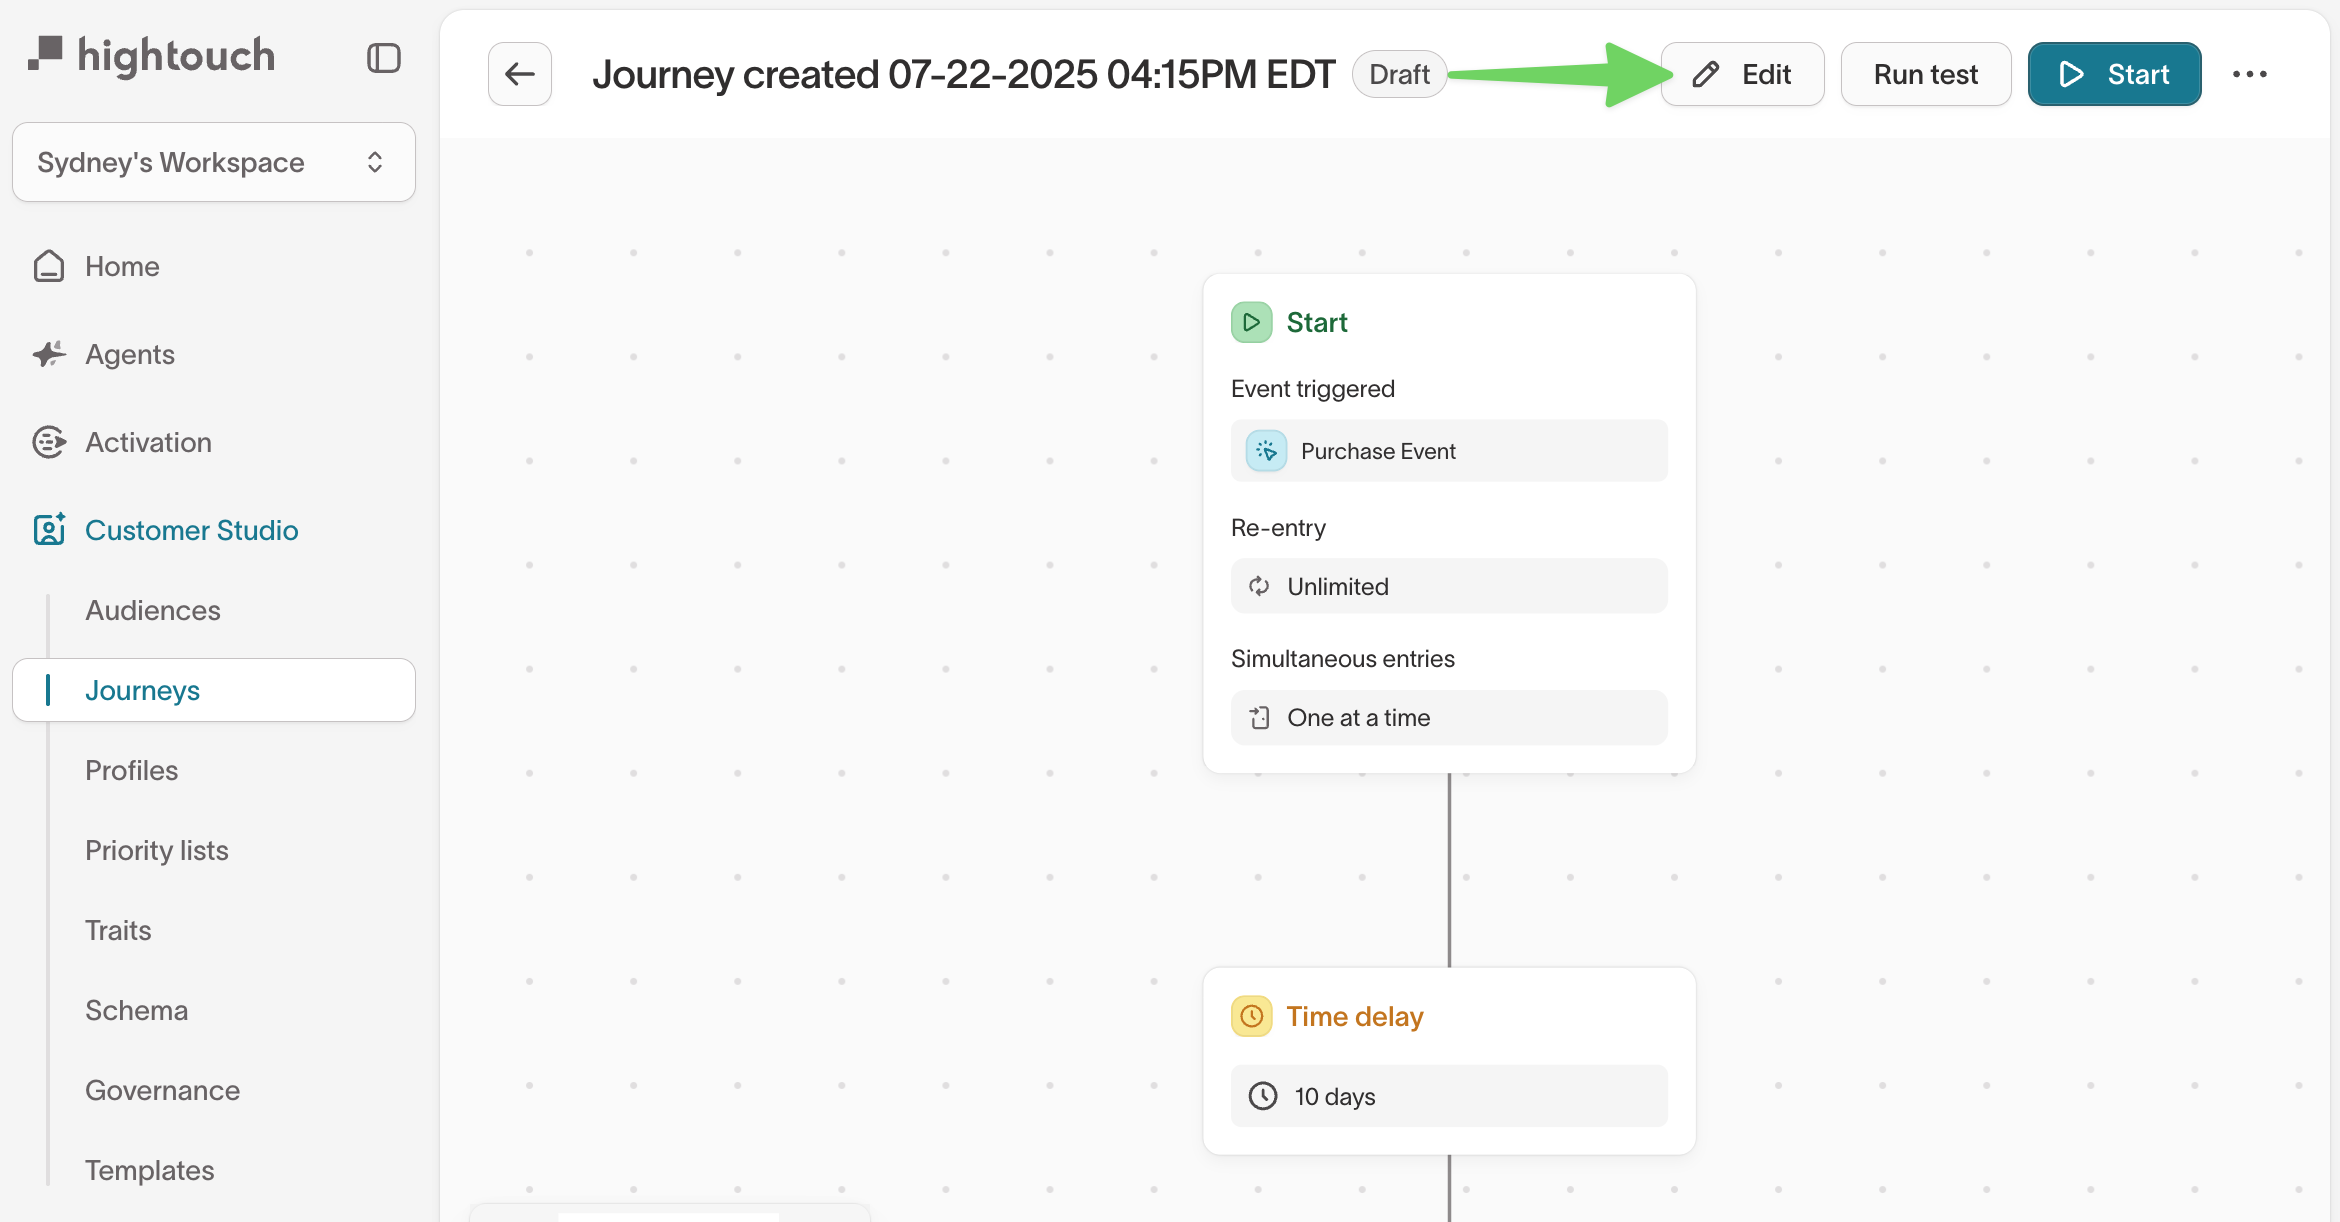
Journey settings
Enter Edit mode to access settings.
In edit mode, the Settings panel appears on the right.

Click Edit to update:
- Journey name and description
- Evaluation schedule
- Exit criteria
- Alerting recipients and triggers
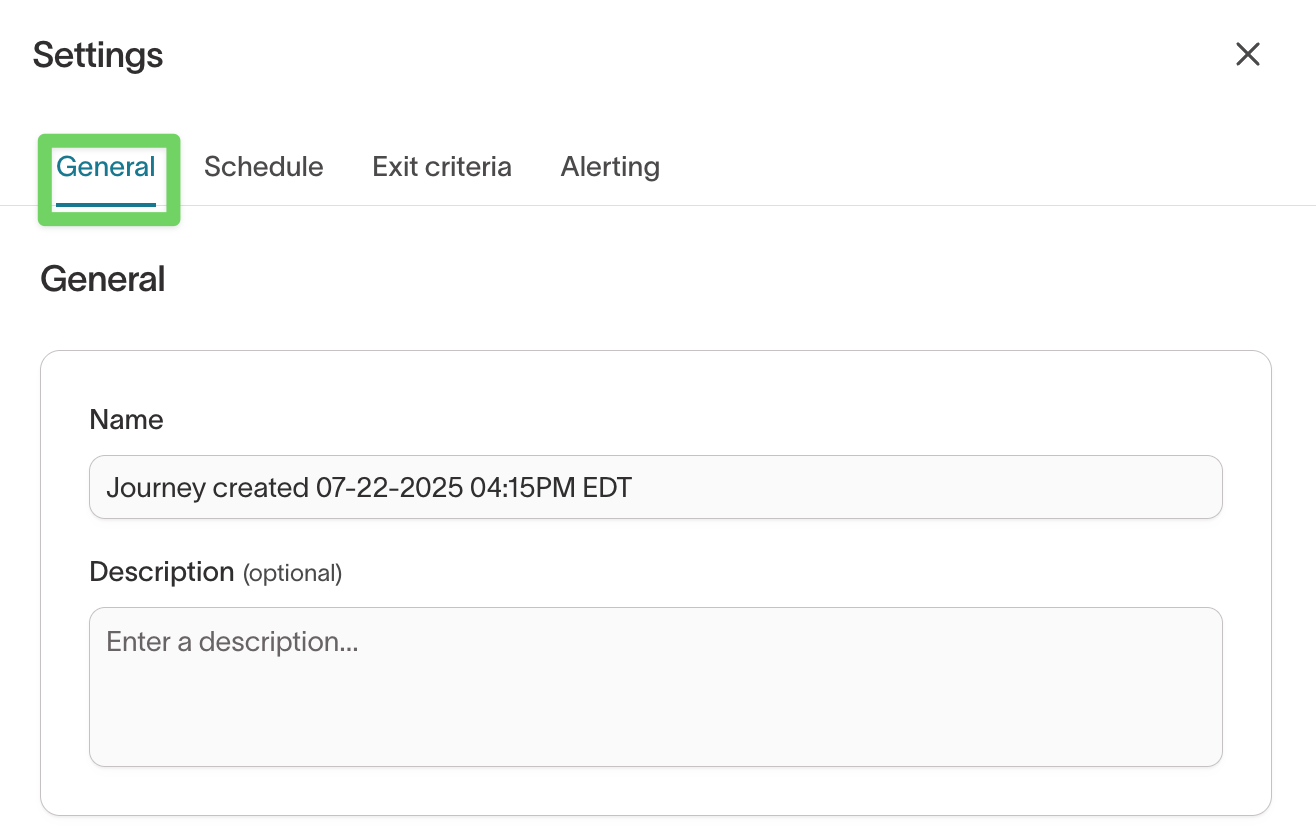
General
In the General tab, you can edit the journey's name and description.
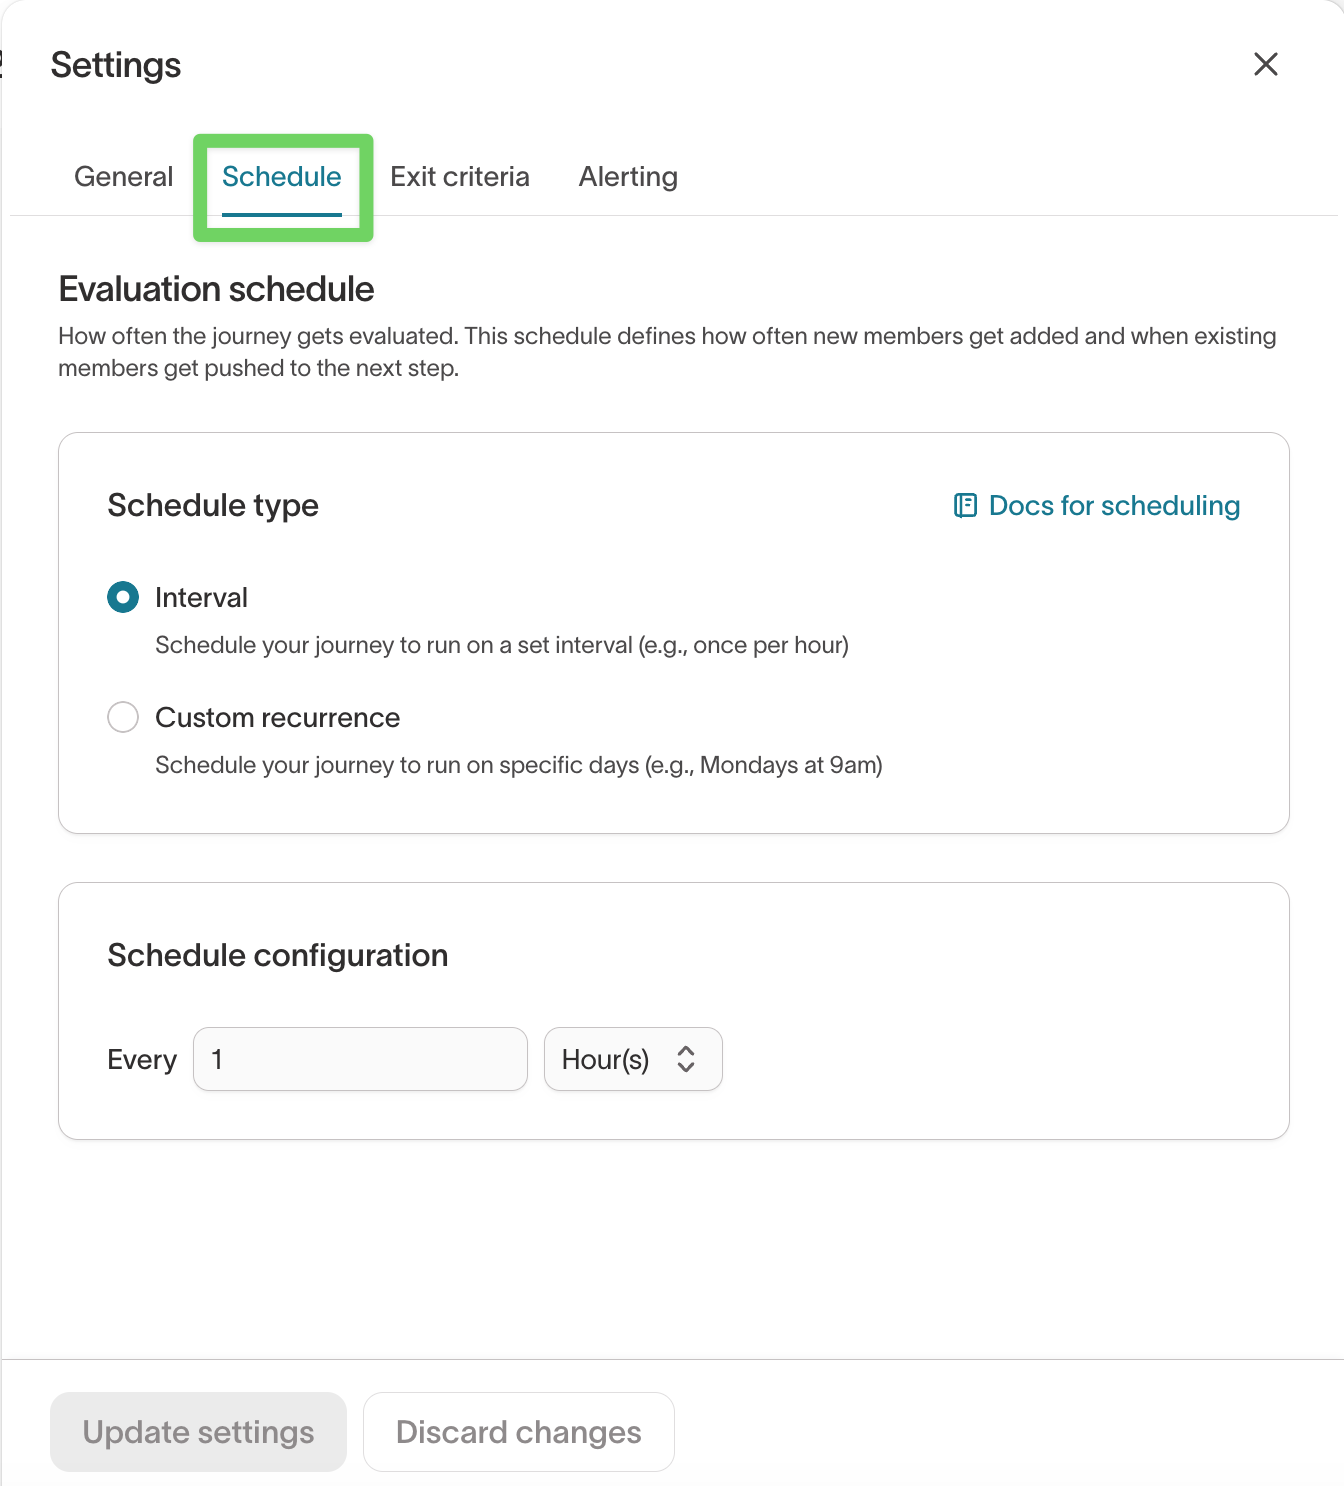
Evaluation schedule
In the Schedule tab, you can edit how frequently your journey evaluates.
Journeys run on a fixed cadence that controls entry, movement, and sync triggering.
How evaluation works
During each run, Hightouch:
- Adds new members who qualify for the Start tile
- Pushes each member forward until a stopping point
- Fires all
Send to destinationsyncs - Marks progress on all branches
Schedule types
| Type | Description | Examples |
|---|---|---|
| Interval | Run on a repeating interval | Every 1 hour, every 30 minutes |
| Custom recurrence | Run at specific days/times | Weekdays at 9 AM |
Interval
Configure using the Every control.
Custom recurrence
Choose one or more day/time combinations.
First run timing
- Interval schedules run a few seconds after you click
Start. - Custom recurrence runs at the next matching time.
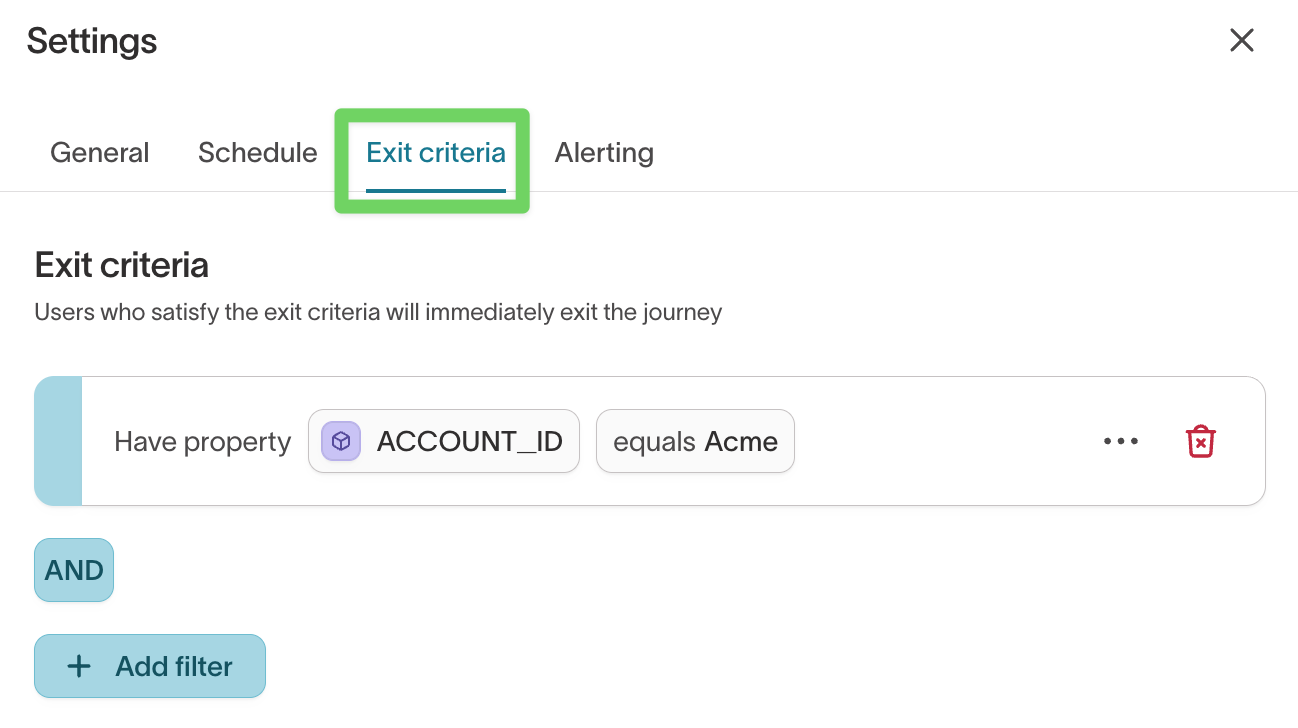
Exit criteria
In the Exit criteria tab, you can remove members early based on conditions.
Examples:
- “Exit if user makes a purchase”
- “Exit if user unsubscribes”
- “Exit if user enters audience X”
Members leave the journey immediately once conditions match during evaluation.
Alerting
In the Alerting tab, you can edit alerting rules.
Alerting notifies you when a journey run fails so you can investigate issues quickly. Journeys inherit default alert settings from your workspace, and you can override those settings at the journey level.

Recipients
Recipients determine where alerts are sent. Alerts can be delivered by email, Slack, PagerDuty, SMS, webhook, or any channel your workspace has configured.
To add a recipient, click Add new recipient to open the recipient modal.
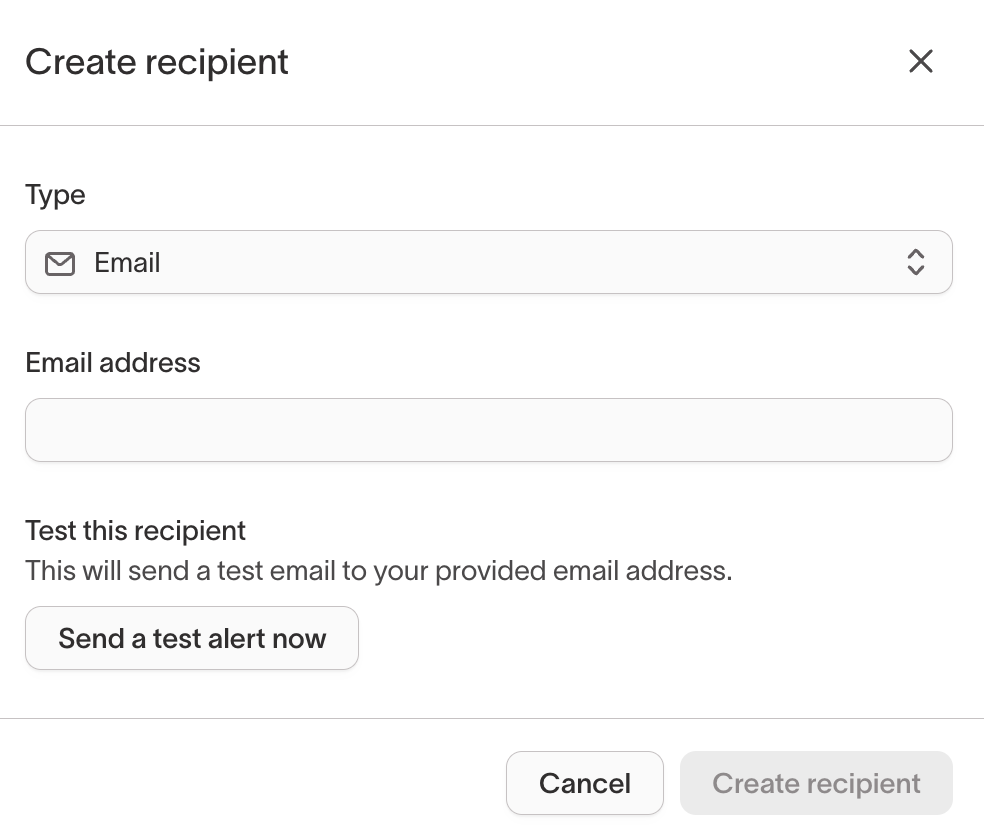
When creating an email recipient, you can send a test message using Send a test alert now to confirm delivery before saving.
Triggers
Under Triggers, you can specify when alerts should fire.
Currently, journeys support alerts for:
- Fatal errors — Runs that fail during execution
If no trigger is configured, alerts will only appear in the Hightouch UI and will not be sent externally.
Global defaults (Integrations → Alerting)
Journey alerting inherits defaults from your workspace’s global alerting configuration, available under:
Integrations → Alerting → Journeys
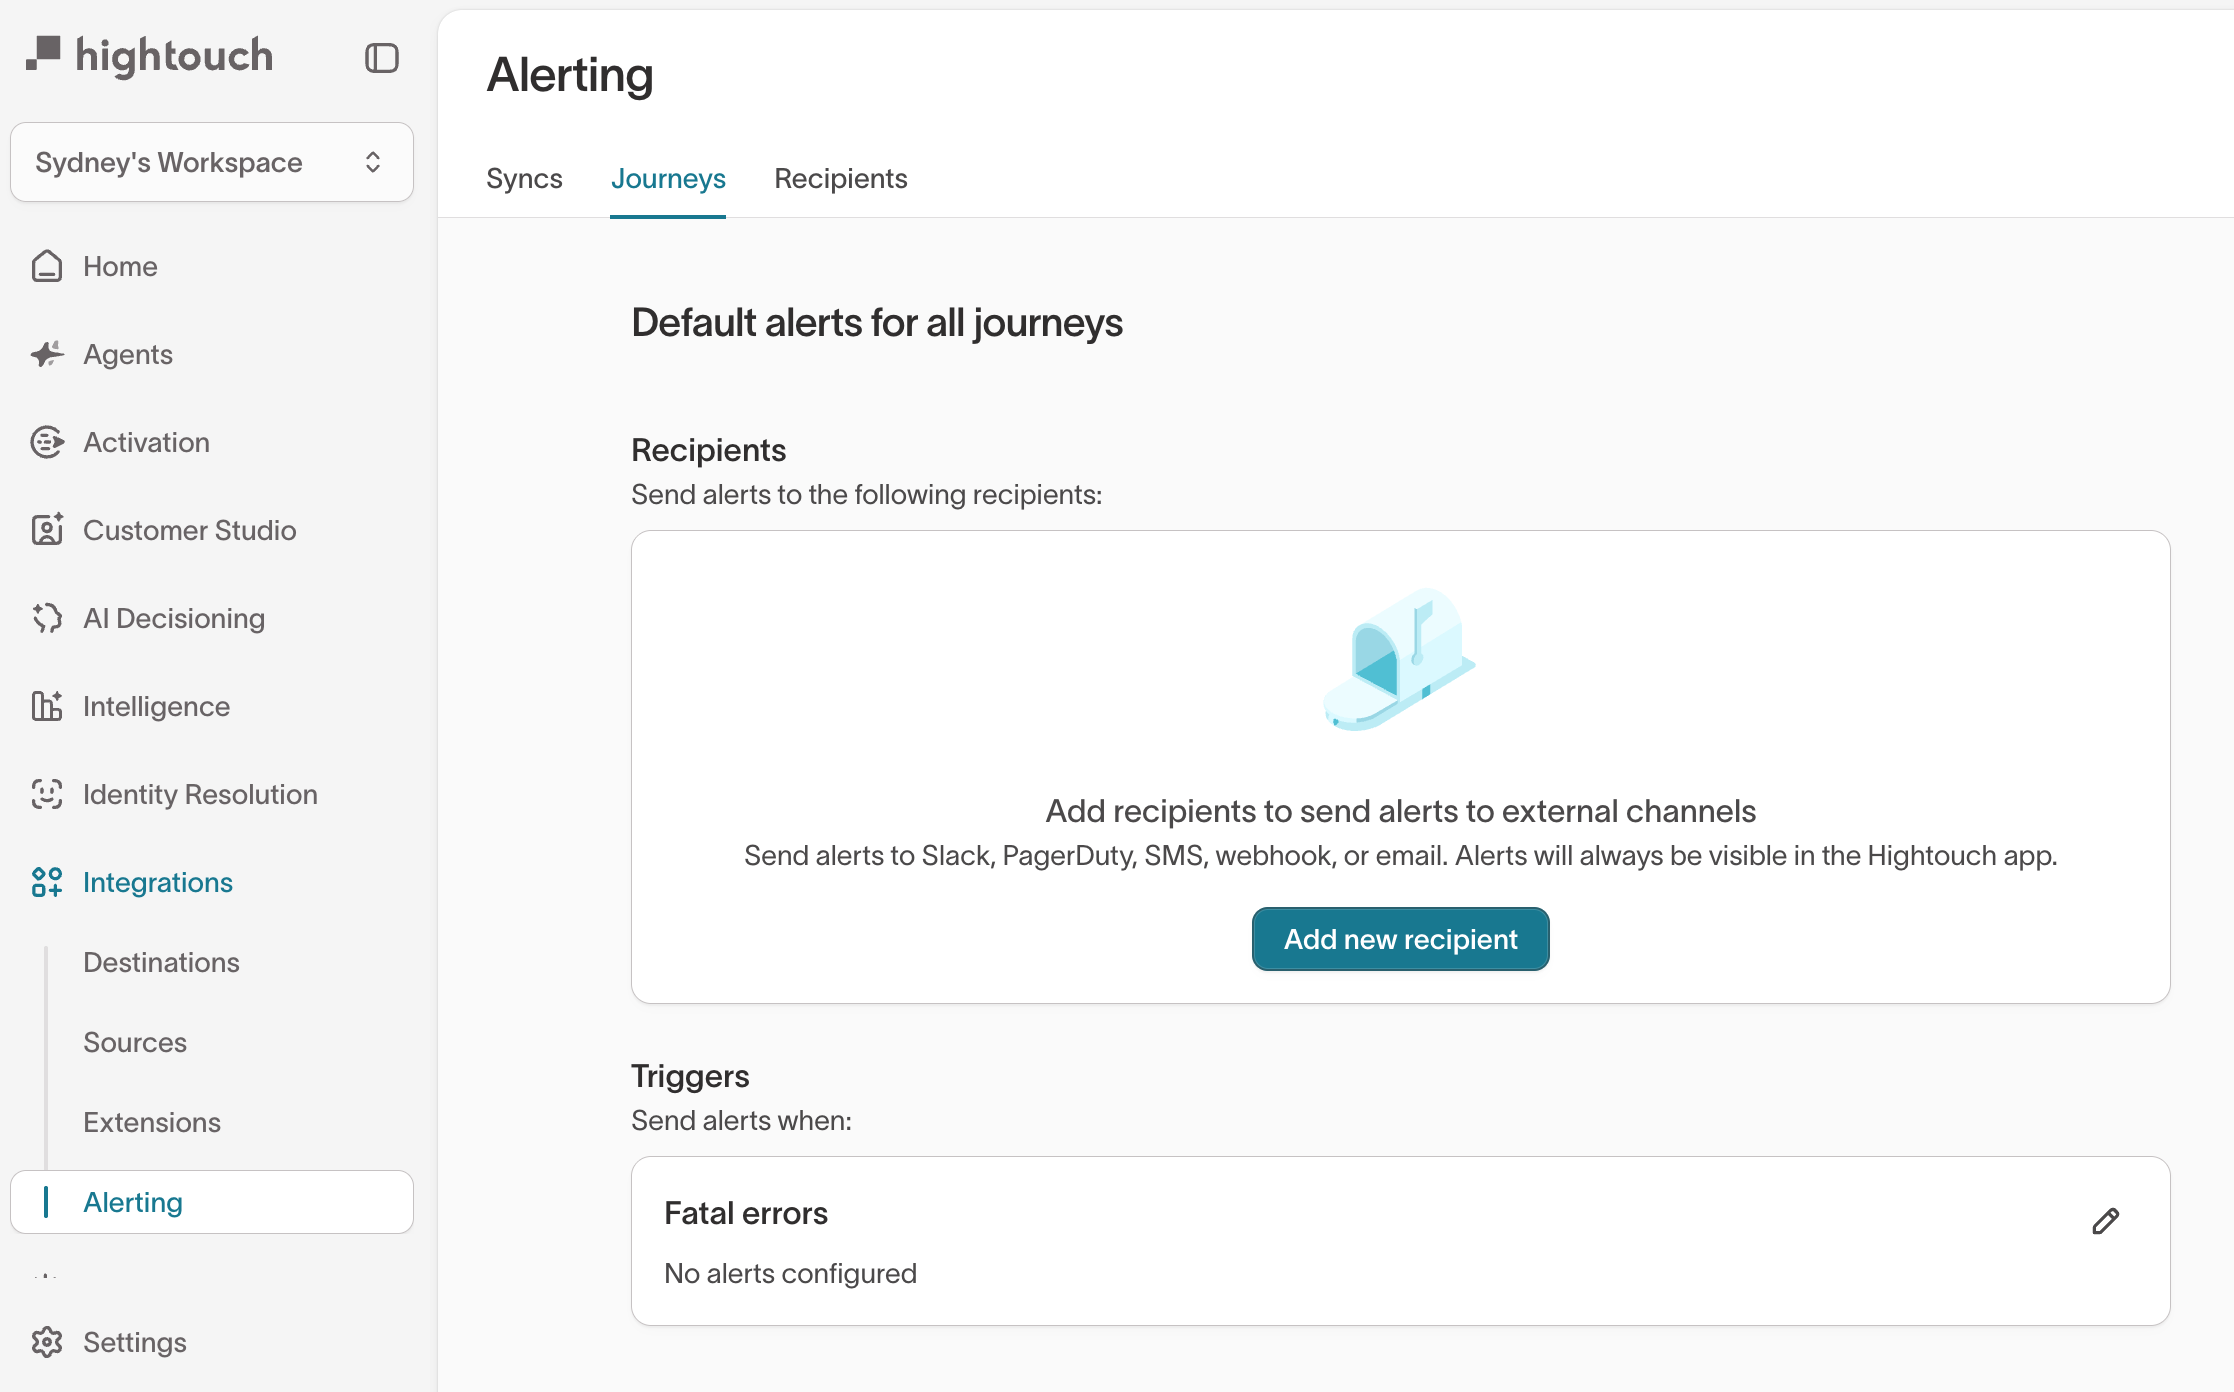
From this page, you can:
- Configure default recipients for all journeys
- Set global triggers for fatal errors
- Manage shared alert channels (Slack, PagerDuty, email, etc.)
You can also manage your workspace’s full list of recipients under the Recipients tab and view destination-specific alerting under the Syncs tab.
Notification behavior
You receive one alert per status change, not per run. For example:
- A run fails → one warning alert
- The next run fails → no additional alert
- The next run succeeds → one recovery alert
- The next run fails → one new warning alert
To learn more about alerting across Hightouch, see
Sync alerting →.
Test a journey
Use Run test to simulate how members move through your journey before you publish it.
Tests help you verify logic, branching, and timing without sending data to any destinations.
All time delays are skipped during simulation.
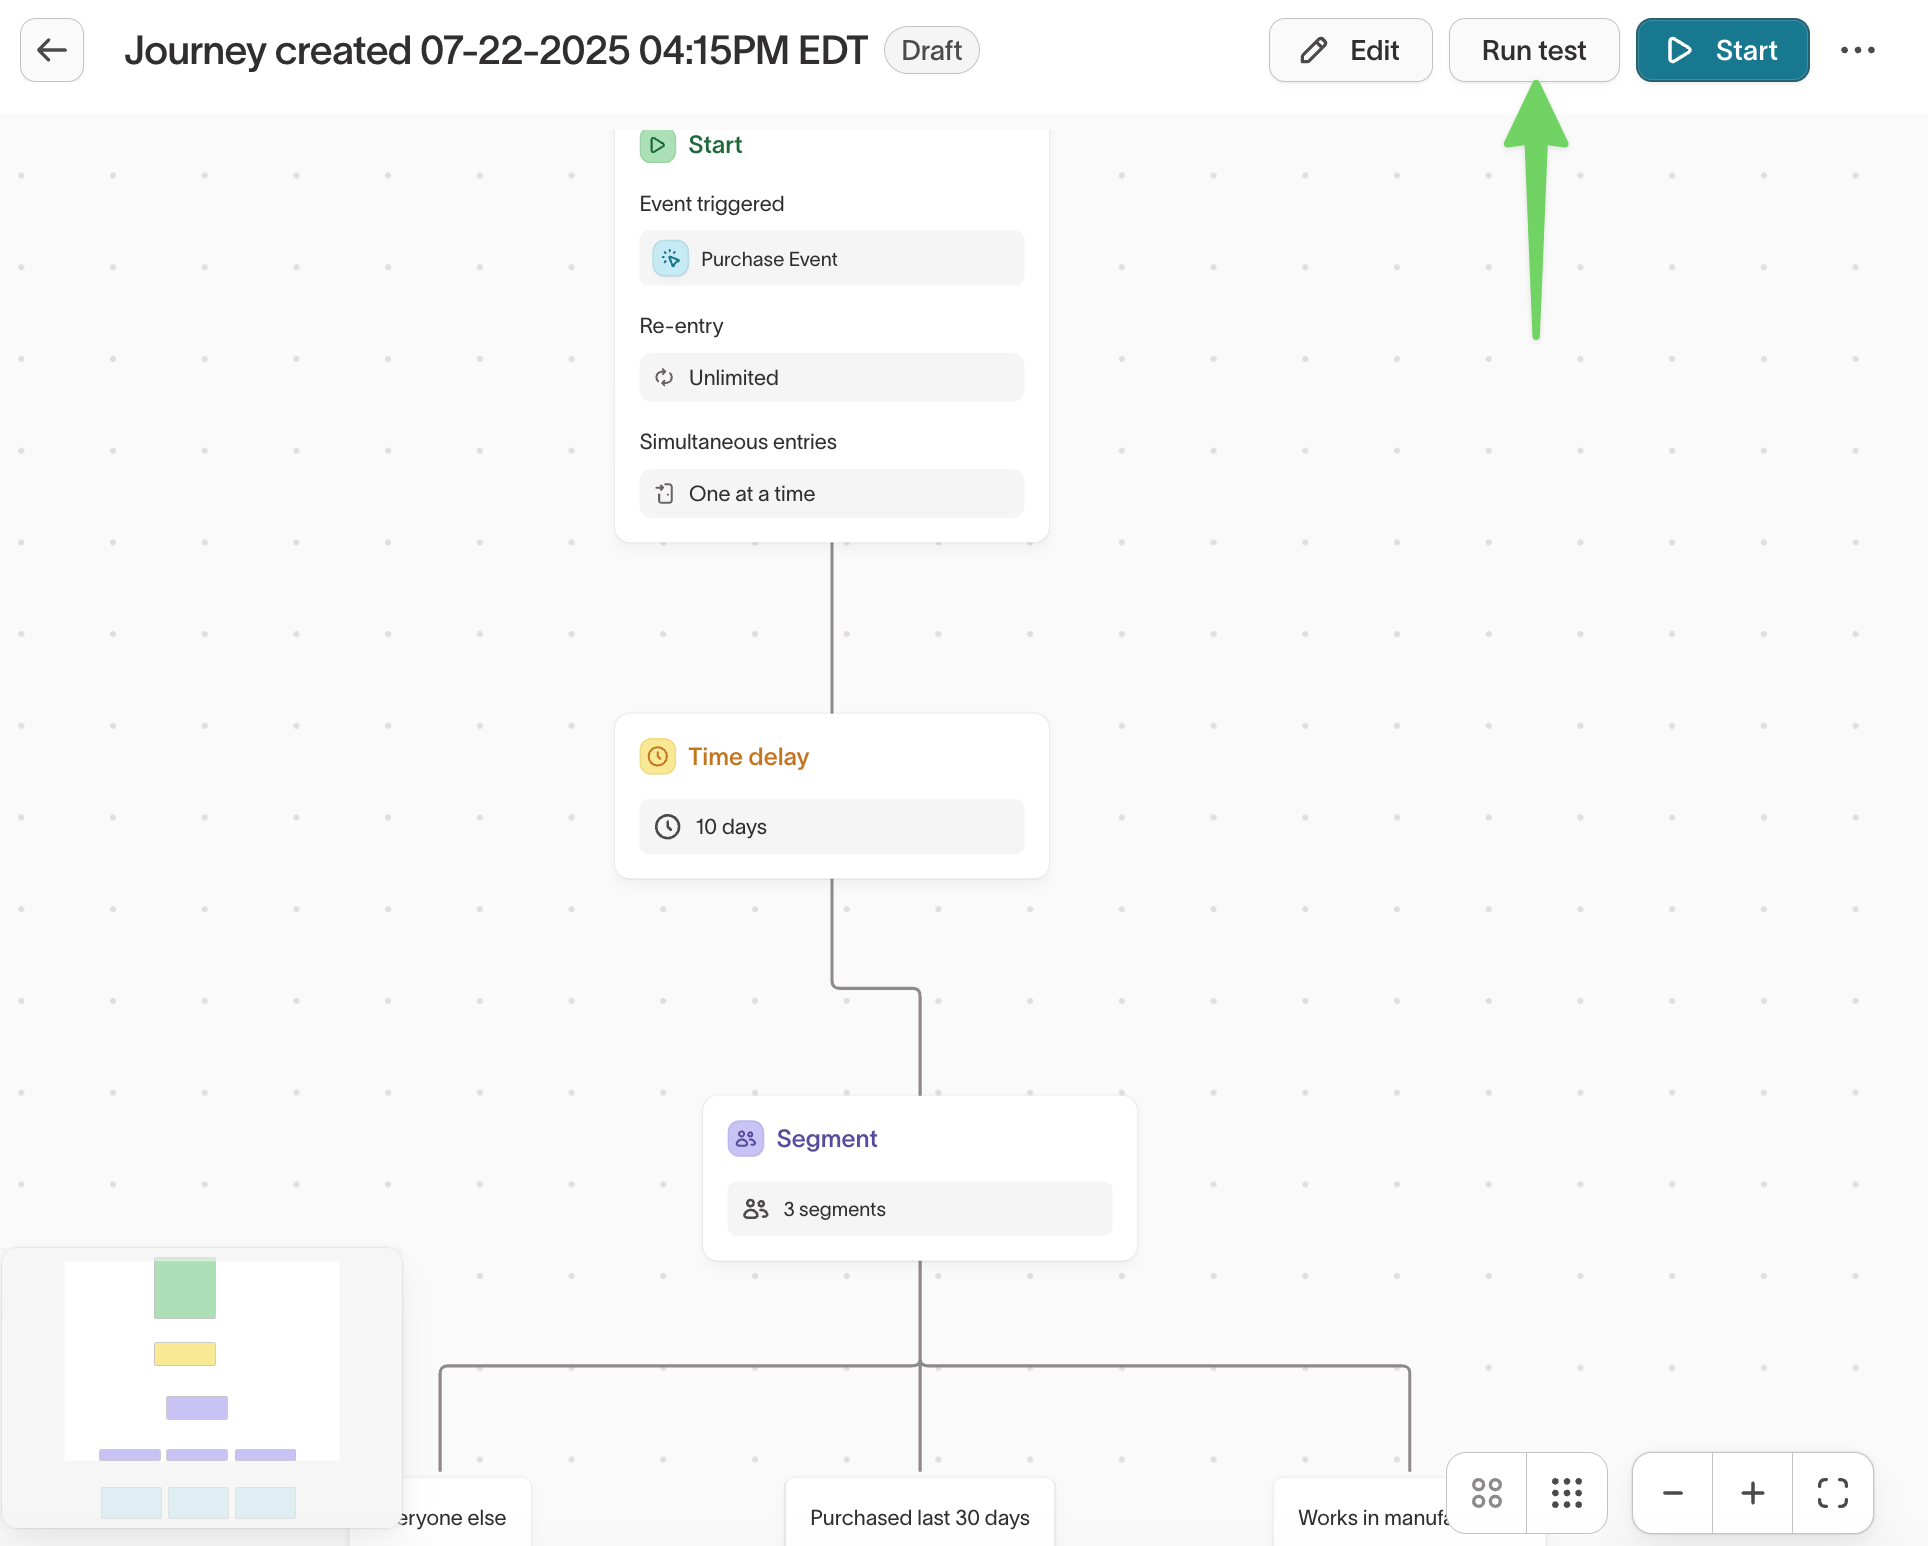
Step 1: Open the test modal
- Open your journey.
- Click
Run testin the upper-right corner. - The Configure a journey test modal appears.
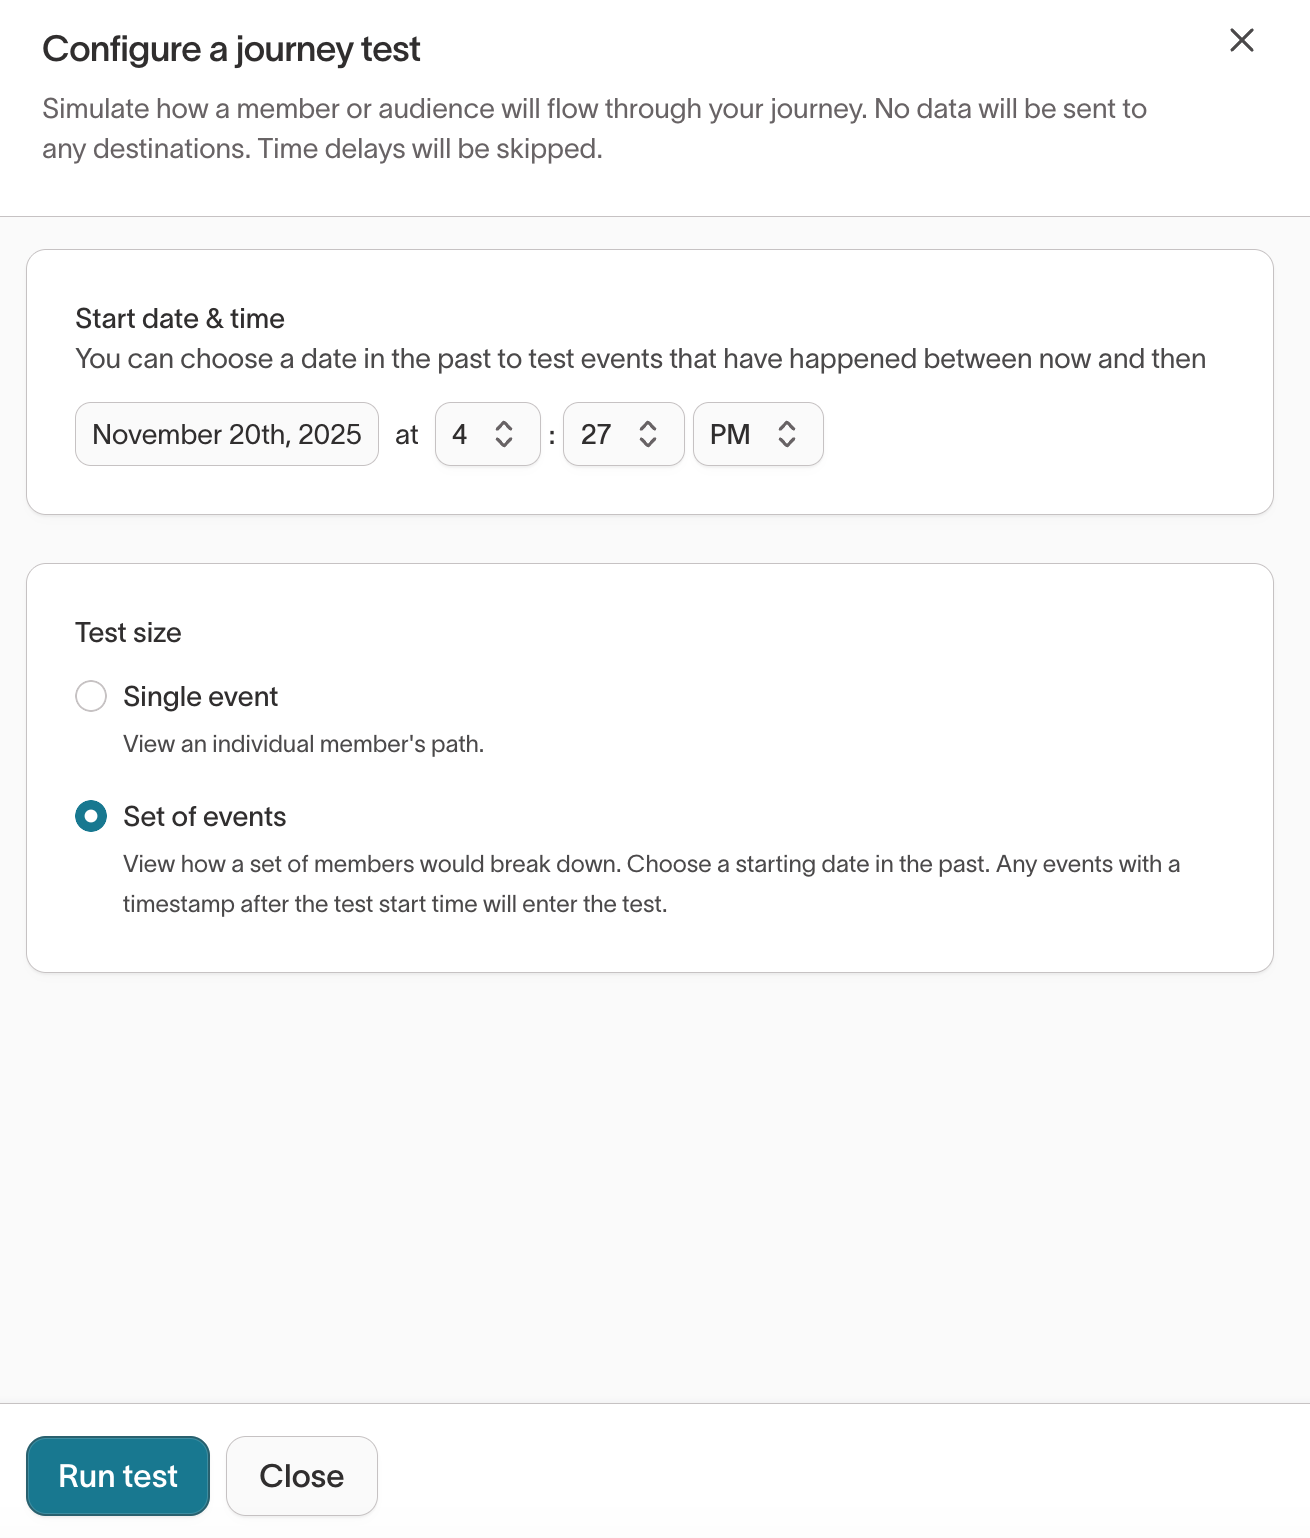
Test simulations do not trigger syncs or update downstream systems. They only show how members would progress based on your configuration.
Step 2: Choose a start date and time
Set the Start date & time to define when the test begins.
- Choose Now to simulate new entries.
- Choose a past date/time to test event-based journeys using real historical events.
Events with timestamps after the selected start time are evaluated in the test.
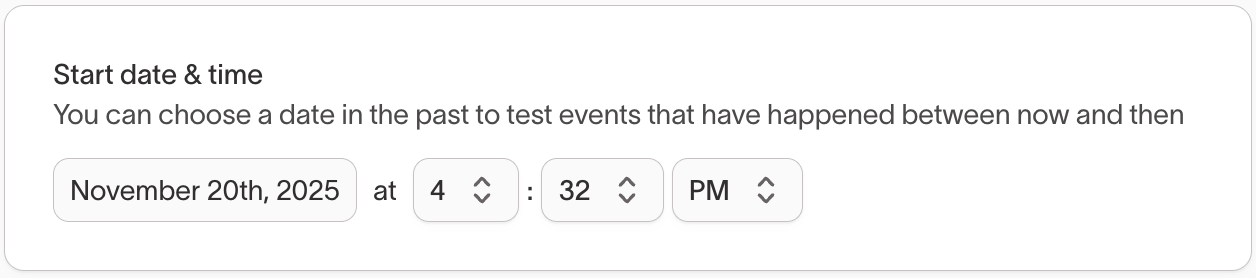
Use a past start time when testing "Performs events" journeys to validate real-world event flow.
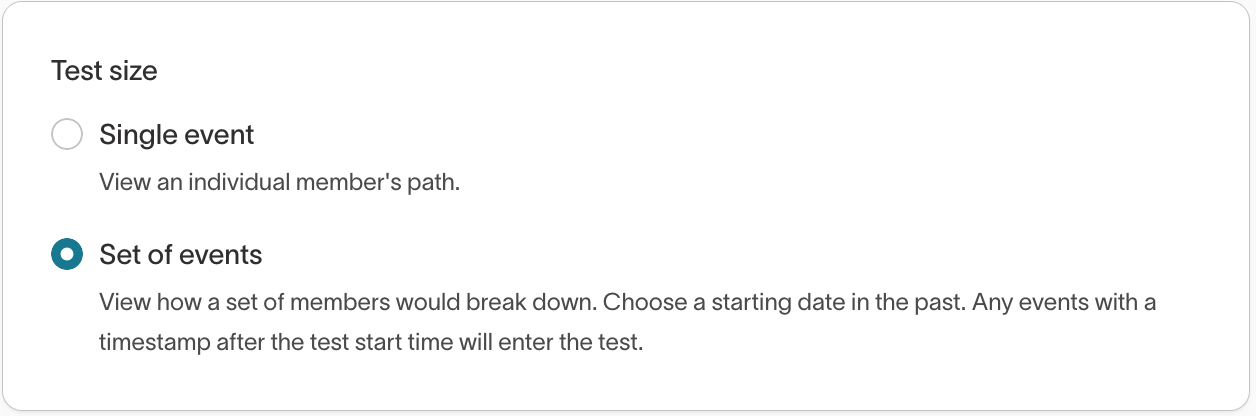
Step 3: Select a test size
Choose how many members or events to include:
Single event
Simulates the path for one member.
Set of events (default)
Simulates all qualifying events and members since the chosen start time.
Useful for validating branch percentages and logic at scale.
Step 4: Run the test
Click Run test to start the simulation.
The test displays:
- When members enter via the Start tile
- How they move through each tile
- Which branches they follow
- How many members reach each step
- Tiles that do not trigger due to unmet conditions
Time delays are skipped so members proceed immediately.
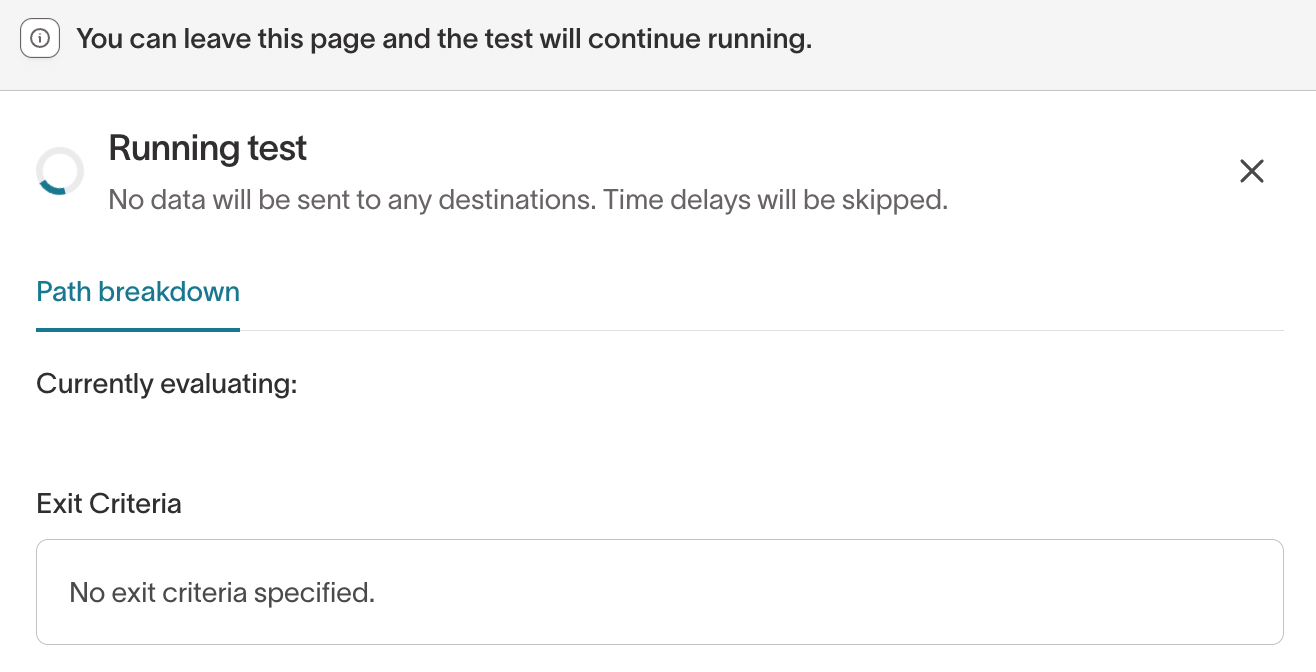
Testing does not affect journey membership, logs, syncs, or evaluation cadence. It is a safe pre-launch validation step.
Publish, pause, and resume a journey
Publish
Click Start to activate the journey.

Pause
Pause stops evaluations and sync triggering.

Resume
Restart the journey without losing member progress.
Turn off a journey
Click Turn off to stop all future evaluations for a journey.
You must choose how to handle current members:
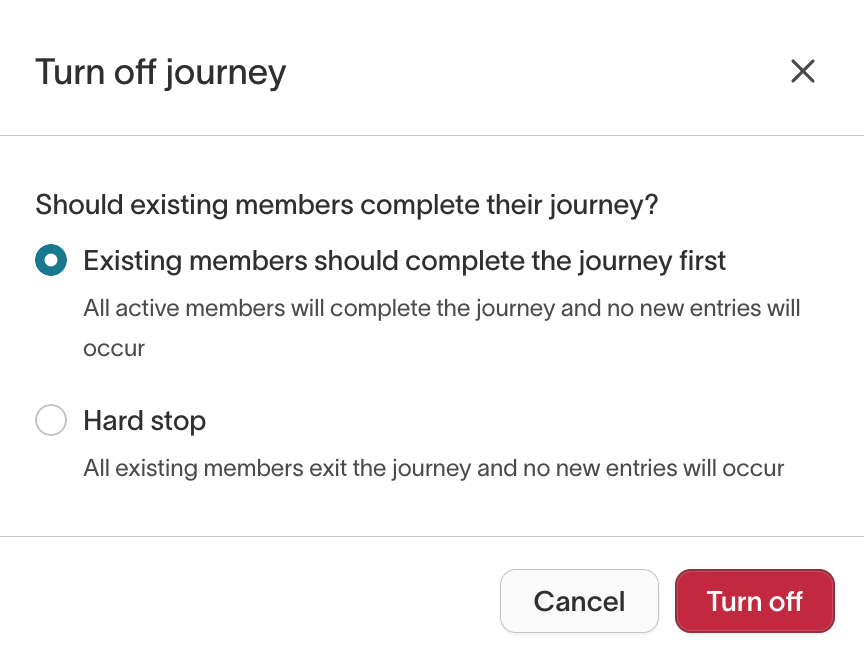
-
Existing members should complete the journey first (default)
All members currently in progress will complete the journey and no new entries will occur. -
Hard stop
All members are removed on the next evaluation run and no new entries will occur.
Journey templates
Journey templates let you save and reuse common journey structures so teams can create consistent lifecycle flows without rebuilding them from scratch.
To learn how to create, manage, and apply templates, see Journey templates →.
Journey performance
Once your journey is running, the canvas updates to show how members move through each step. Line thickness reflects the volume of members flowing through a path. Hover over any line to see counts for that branch.
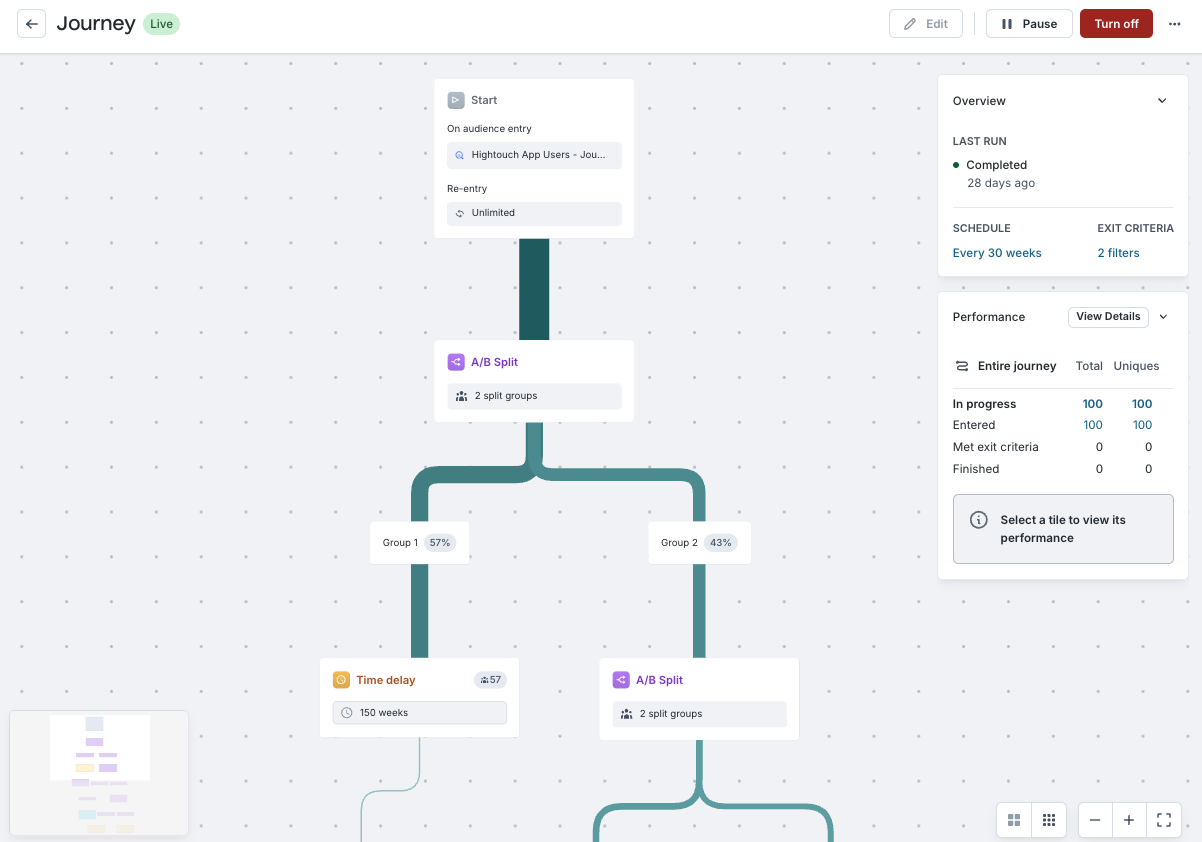
The Performance panel provides high-level metrics across the full history of the journey (unless you reset it):
- In progress — Members currently waiting in a tile
- Entered — Total members who have ever entered the journey
- Met exit criteria — Members removed due to global exit rules
- Finished — Members who reached the final step of the flow
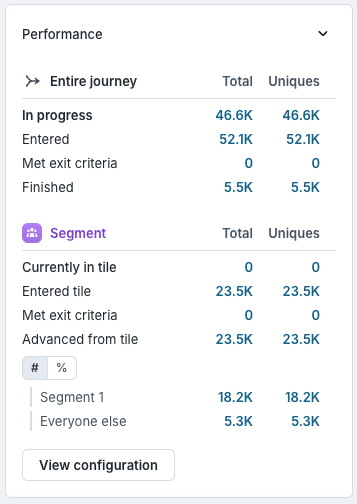
Tile-level performance
Select any tile on the canvas to view metrics specific to that step:
- Currently in tile — Members waiting at this tile (commonly nonzero for Time delay and Hold until)
- Entered tile — Members who have ever reached this tile
- Met exit criteria — Members removed from this tile due to global exit rules
- Advanced from tile — Members who moved to the next step
For Segment, A/B split, and Hold until tiles, you can also view per-branch counts and percentages.
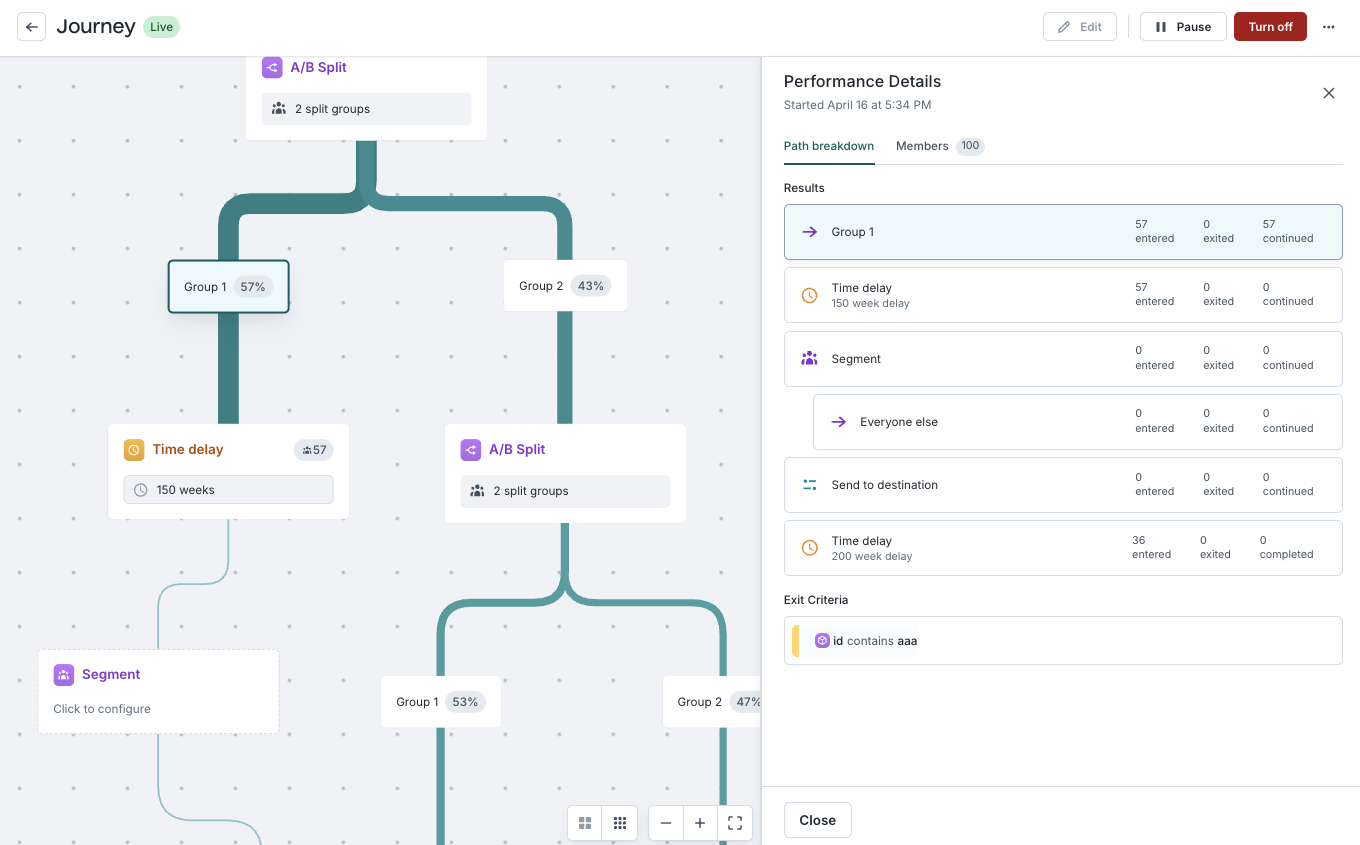
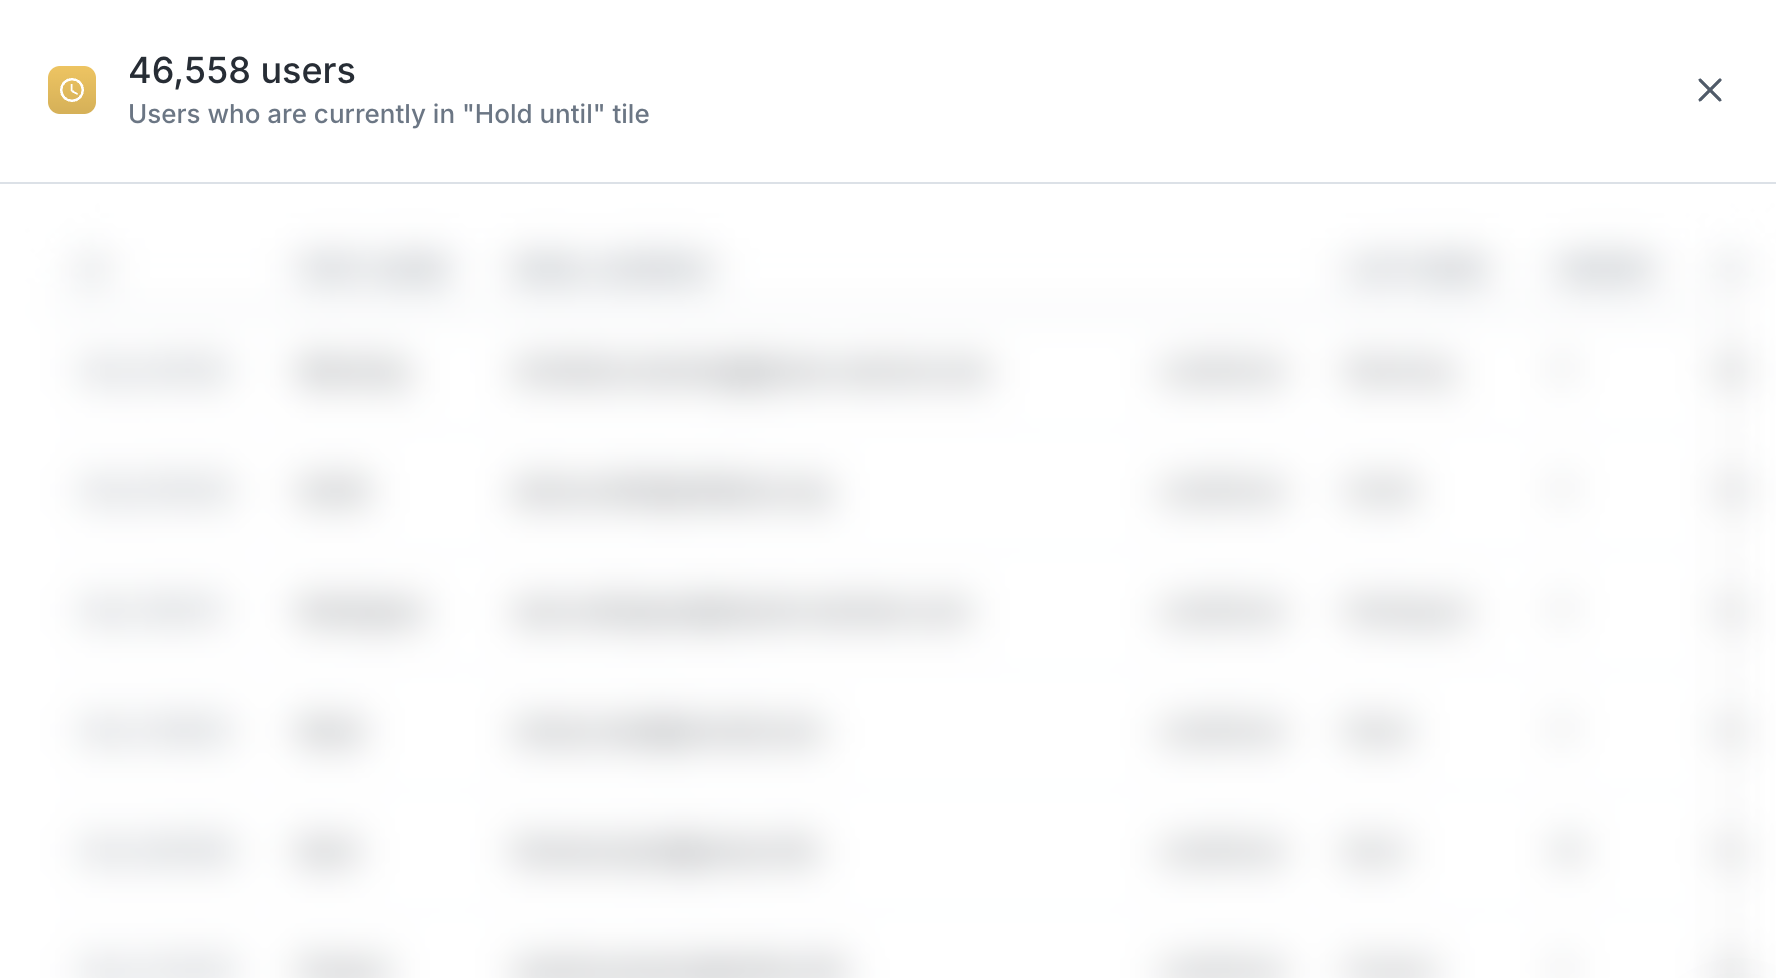
Member-level details
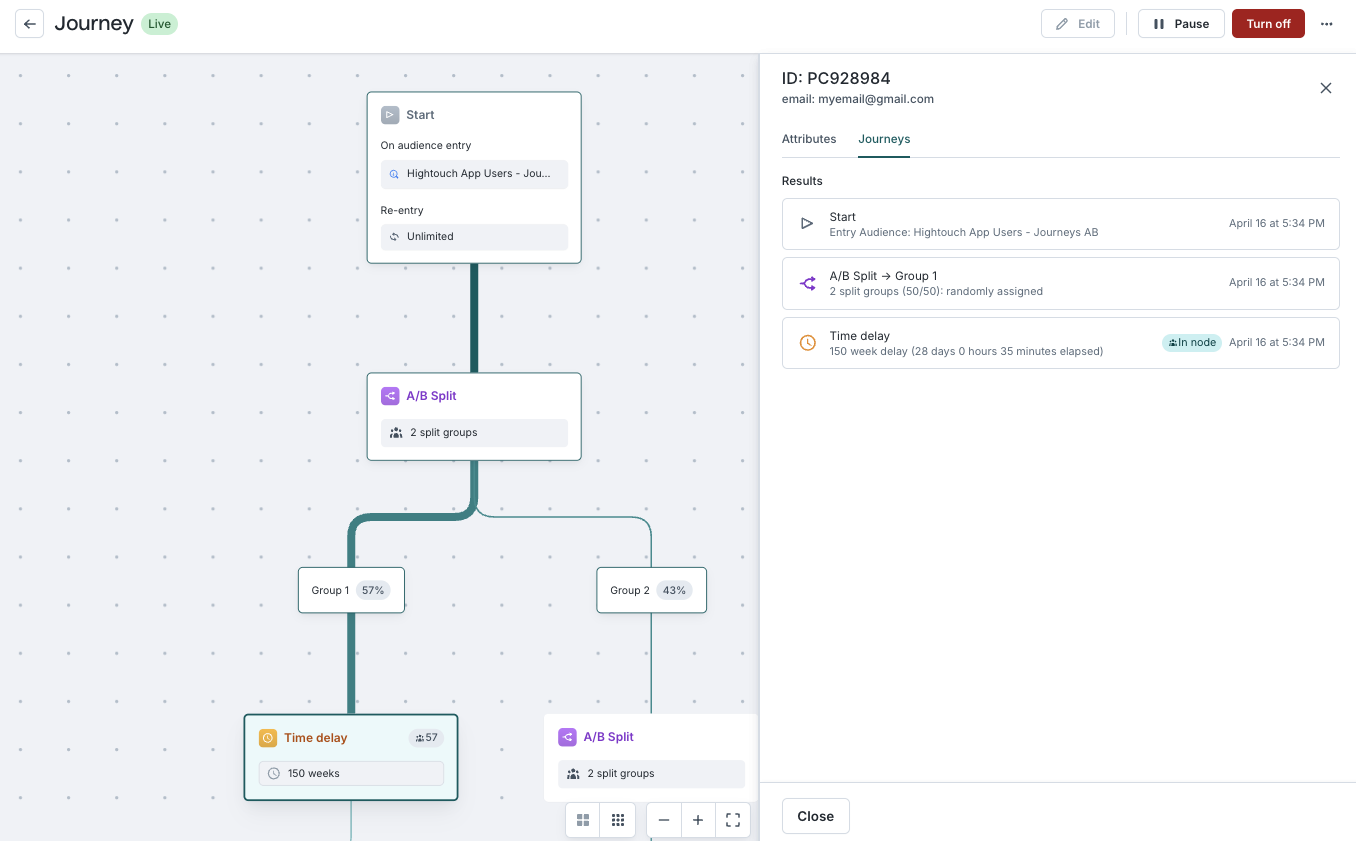
Select a count in the Performance panel to open the member drawer. This shows a sample of 100 random members who meet the criteria, with the option to search by primary key.
Select a member to view their complete attributes and a step-by-step visualization of their movement through the journey.
Journey Logs
The Journeys system creates tables in your data warehouse to enable journey observation, reporting, and debugging.
Each journey has two individual tables created in the HIGHTOUCH_PLANNER schema, where journey_id in the naming scheme is the UUID of the journey with the dashes removed.
JOURNEY_LOG_<journey_id>: this table logs the progress of all rows through a given journey.This table is actually used as part of Journey execution, so while it’s safe to read from it to do analysis, please do not insert, update, or delete to/from it, since this might cause the Journey to behave in unexpected ways.
JOURNEY_METADATA_<journey_id>: this table can be used to rebuild the journey graph and to access your node names for easier reporting.
Additionally, two global views are available in hightouch_audit that contain a comprehensive view of all of a workspace’s journeys in the warehouse, giving customers a single read-only point to monitor their journeys. These tables have the same schema as their underlying tables in addition to a reference to the source table that the row came from. We recommend that you use these global views rather than the individual journey_log and journey_metadata tables for your warehouse reporting.
JOURNEY_LOG_VIEW_<workspace_slug>JOURNEY_METADATA_VIEW_<workspace_slug>
Locate your workspace slug under Settings > Workspace > Workspace slug.
All dashes in the slug should be replaced with an underscore. For example, if
your slug is my-workspace, use my_workspace in your query.
Journey Log Table Schema
The JOURNEY_LOG_<journey_id> logs the progress of all rows through a given journey.
Each time a row enters the journey, moves from one node to another, or exits the journey, we create an entry in the log table. Note that since a row can enter a journey more than once, we also have a ROW_INSTANCE_ID column on the table, which is used to uniquely identify each time a row enters the journey. That instance ID will be consistent for that particular instance of the row as it moves through the journey.
| Column | Type | Description |
|---|---|---|
| row_id | string | The primary key from the journey’s parent model that this row represents. |
| row_instance_id | string | A UUID to uniquely identify a row_id each time it enters the journey. |
| run_id | string | The ID of the journey run that executed this operation. This is an internal detail. |
| from_node_id | string | The ID of the node that this action originates with. For moves or exits, it’s the node that the row moved or exited from. For enters, it’s NULL. |
| to_node_id | string | The ID of the node that this action targets. For moves and enters, it’s the node the row moved into. For exits, it’s NULL. |
| timestamp | timestamp | The effective timestamp of this operation. Note that this does not always represent the actual time the operation occurred - for example, if a user moved from one node to another due to an event, this will be the timestamp of the event rather than the timestamp we actually ran the warehouse query. |
| event_type | string | What type of event this log line represents. One of moved-to-node, entered-journey, exited-journey-by-criteria, or exited-journey. |
Journey Metadata Table Schema
The JOURNEY_METADATA_<journey_id> contains the positions of the nodes in a journey, and the customer-defined names of nodes.
Each time a change is saved to the Journey this table is updated.
| Column | Type | Description |
|---|---|---|
| journey_id | text | The id of the journey. |
| journey_name | text | The customer-defined name of the journey. |
| node_name | text | The customer-defined name of the node. |
| node_type | text | The node type (entry-cohort, entry-event, sync, segments, segment-branch, time-delay, splits, split-branch, wait-until-event, wait-until-event-branch) |
| node_id | text | The ID of the journey node. |
| to_nodes | text[] | An array of the outbound node ids from the given node. |
Global Journey Log View Schema
The JOURNEY_LOG_VIEW_<workspace_slug> view shows the progress of all rows in all journeys.
Each time the journey is added or removed from your workspace, this view is updated.
| Column | Type | Description |
|---|---|---|
| source_table | string | The name of the table this row came from: journey_log_<journey_id>. |
| row_id | string | The primary key from the journey’s parent model that this row represents. |
| row_instance_id | string | A UUID to uniquely identify a row_id each time it enters the journey. |
| run_id | string | The ID of the journey run that executed this operation. This is an internal detail. |
| from_node_id | string | The ID of the node that this action originates with. For moves or exits, it’s the node that the row moved or exited from. For enters, it’s NULL. |
| to_node_id | string | The ID of the node that this action targets. For moves and enters, it’s the node the row moved into. For exits, it’s NULL. |
| timestamp | timestamp | The effective timestamp of this operation. Note that this does not always represent the actual time the operation occurred - for example, if a user moved from one node to another due to an event, this will be the timestamp of the event rather than the timestamp we actually ran the warehouse query. |
| event_type | string | What type of event this log line represents. One of moved-to-node, entered-journey, exited-journey-by-criteria, or exited-journey. |
| journey_id | text | The id of the journey. |
Global Journey Metadata View Schema
The JOURNEY_METADATA_VIEW_<workspace_slug> view contains the positions of the nodes across all journeys in the workspace and the customer-defined names of those nodes.
Each time the journey runs, this view is updated.
| Column | Type | Description |
|---|---|---|
| source_table | string | The name of the table this row came from: journey_log_<journey_id>. |
| journey_id | text | The id of the journey. |
| journey_name | text | The customer-defined name of the journey. |
| node_name | text | The customer-defined name of the node. |
| node_type | text | The node type (entry-cohort, entry-event, sync, segments, segment-branch, time-delay, splits, split-branch, wait-until-event, wait-until-event-branch) |
| node_id | text | The ID of the journey node. |
| to_nodes | text[] | An array of the outbound node ids from the given node. |
Best practices
Priority lists and entry audiences
If your entry audience is inside of a priority list, the priority will be respected when determining who should enter the journey. For example, if your entry audience, Audience B, is prioritized underneath Audience A, and user 1 meets the criteria for both audiences, the user will only fall into Audience A. This means they will not enter the journey until they drop out of Audience A (while remaining in Audience B).
Sync execution inside journeys
Failed syncs and retries
If a record fails to get synced inside of a journey, Hightouch will attempt to retry that record upon subsequent runs.
- For cohort syncs, Hightouch will stop retrying when the record is removed from the sync
- For trigger syncs, Hightouch will continue to retry the record until it’s synced successfully
Sync sequencing
All Send to destination tiles trigger at the same time: the end of each journey evaluation.
If you need strict sequencing between two syncs, include a Time delay tile between them.
Choosing sync configurations for journeys
Sync mode affects how users are added, updated, or removed from downstream tools. Use these guidelines to select the right configuration.
Trigger mode syncs
Best for triggered messages (email, SMS) where you want one event per user per step.
- Works best with Insert mode to ensure that members don't receive the same message multiple times.
- Users are never removed from the destination.
- Avoid Upsert, Update, Mirror, and Diff to prevent duplicate sends.
| Sync Mode | Trigger Mode behavior |
|---|---|
| Insert |
|
| Upsert |
|
| Update |
|
| Mirror |
|
| Diff |
|
Cohort mode syncs
Best for audiences, lists, or situations where a downstream destination should maintain a stable membership list.
- Works best with Upsert and Mirror.
- Removal behavior is determined by journey configuration.
- Avoid
deleteMode: do nothingwith cohort syncs, since removals may not be applied.
| Sync Mode | Cohort Mode Journeys | Cohort Removal Behavior |
|---|---|---|
| Upsert |
|
|
| Update |
|
|
| Insert |
|
|
| Mirror |
|
|
| Diff |
|
|
Troubleshooting
| Issue | Likely Cause | Recommended Fix |
|---|---|---|
| Journey moves slower than expected | Delay duration is shorter than the evaluation interval | Increase the delay or reduce the evaluation interval. |
| Syncs not firing | Journey is paused or the sync tile isn’t fully configured | Ensure the journey is active and the sync is connected. |
| Members not entering | Entry conditions are too restrictive (audience filters, event filters, exclusions) | Review Start tile logic and time windows. |
| Branches appear unbalanced | A/B split percentages changed after launch | Avoid editing split ratios once the journey is running. |
If a journey behaves unexpectedly, check both the Start tile logic and the evaluation schedule. Most issues come from misalignment between time windows and the evaluation cadence.
What’s next?
Explore related Customer Studio features: