Sync your warehouse with Slack and push business metrics and user activity data to Slack in real-time
Overview
With the Slack destination, Hightouch can serve as a notifier for various data-related events or changes. This is a very flexible integration that you can use for many different use cases, such as:
- notifying your Customer Success teams when product usage for a key account suddenly drops
- notifying an Account Executive when product usage surpasses a certain threshold
- sending a daily summary of the number of sign-ups compared to the same day in the previous month
- sending a daily summary on the adoption of a core feature
Supported syncing
| Sync type | Description |
|---|---|
| Message | Sends individual messages for each row that was added, changed, or removed since the last sync. There will be no messages for the initial run. |
| Batch Message | Sends a formatted message (or multiple messages) of all the rows in the query results. |
| Table | Sends a formatted table of all rows in the query results as a single message. |
| CSV | Sends a CSV file of all rows in the query results attached to a single message. |
The order of rows in messages may differ from how they appear in your model. This is expected behavior and applies to all sync modes. Learn more about row ordering →
Slack error alerting
To learn more about setting up Slack as your error alerting tool, see the Alerting page.
Connect to Slack
Authenticating with OAuth
Use OAuth to connect Slack by navigating to Destinations > Create New > Slack. Click Connect and log in with your desired Slack account. Once you have selected your desired workspace, click Allow and you will see an Authorization successful screen in Hightouch. Finish your setup by clicking the continue button and naming your destination.
Adding the Hightouch bot to a channel
In order for Hightouch to message your channel, you need to ensure the Hightouch bot is added as an integration. Follow the steps below to add the bot to your channel.
You can add the Hightouch bot both to public and private Slack channels.
Adding the Hightouch bot can be done by typing /invite @hightouch in the Slack composer. If that doesn't work you can also add the Hightouch bot by following these steps:
-
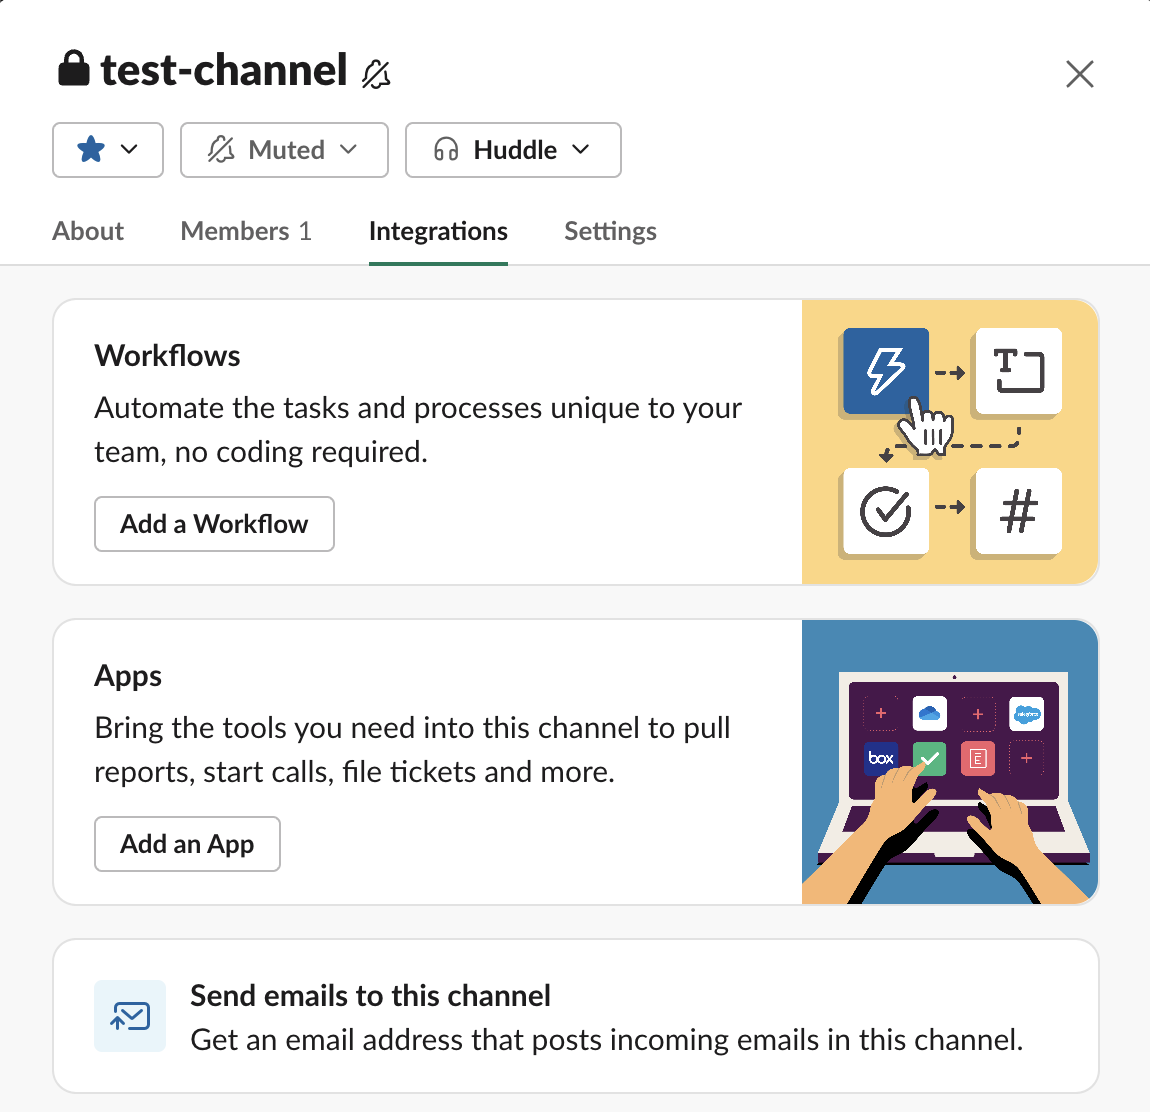
Go to your channel and click the dropdown button (∨) next to the channel name.

-
Click Integrations > Add an App.
-
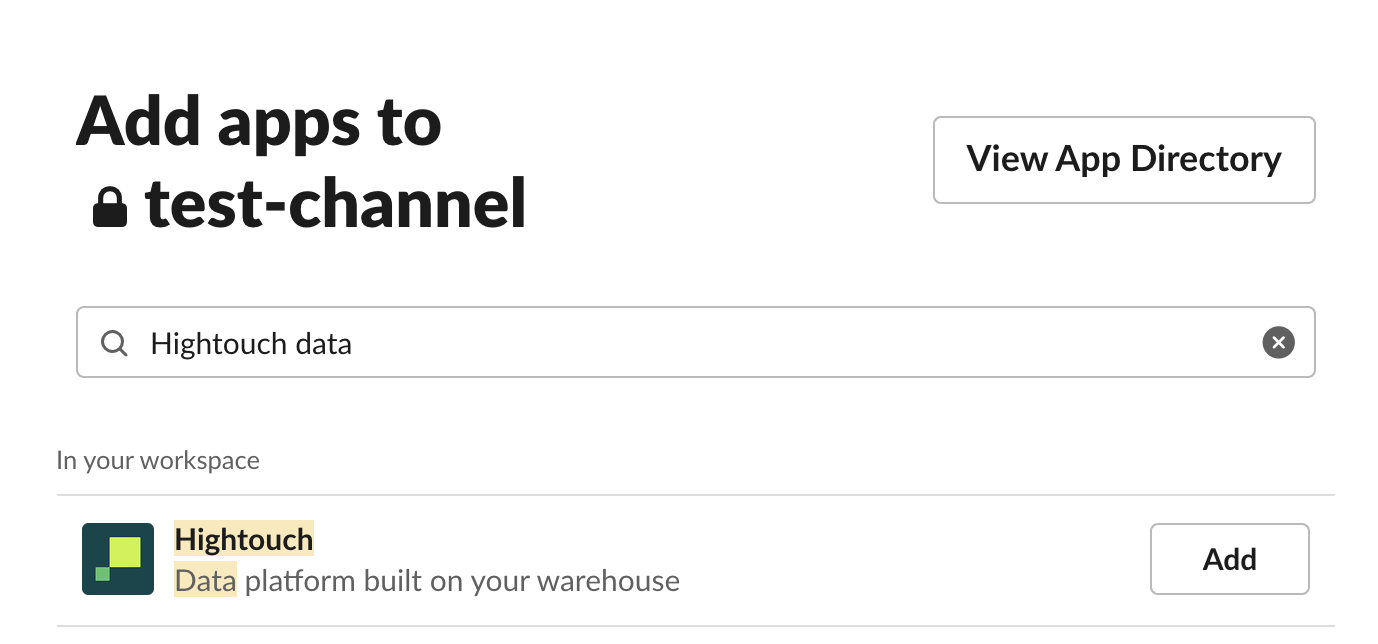
Search for Hightouch and click Add next to the Hightouch app name.
-
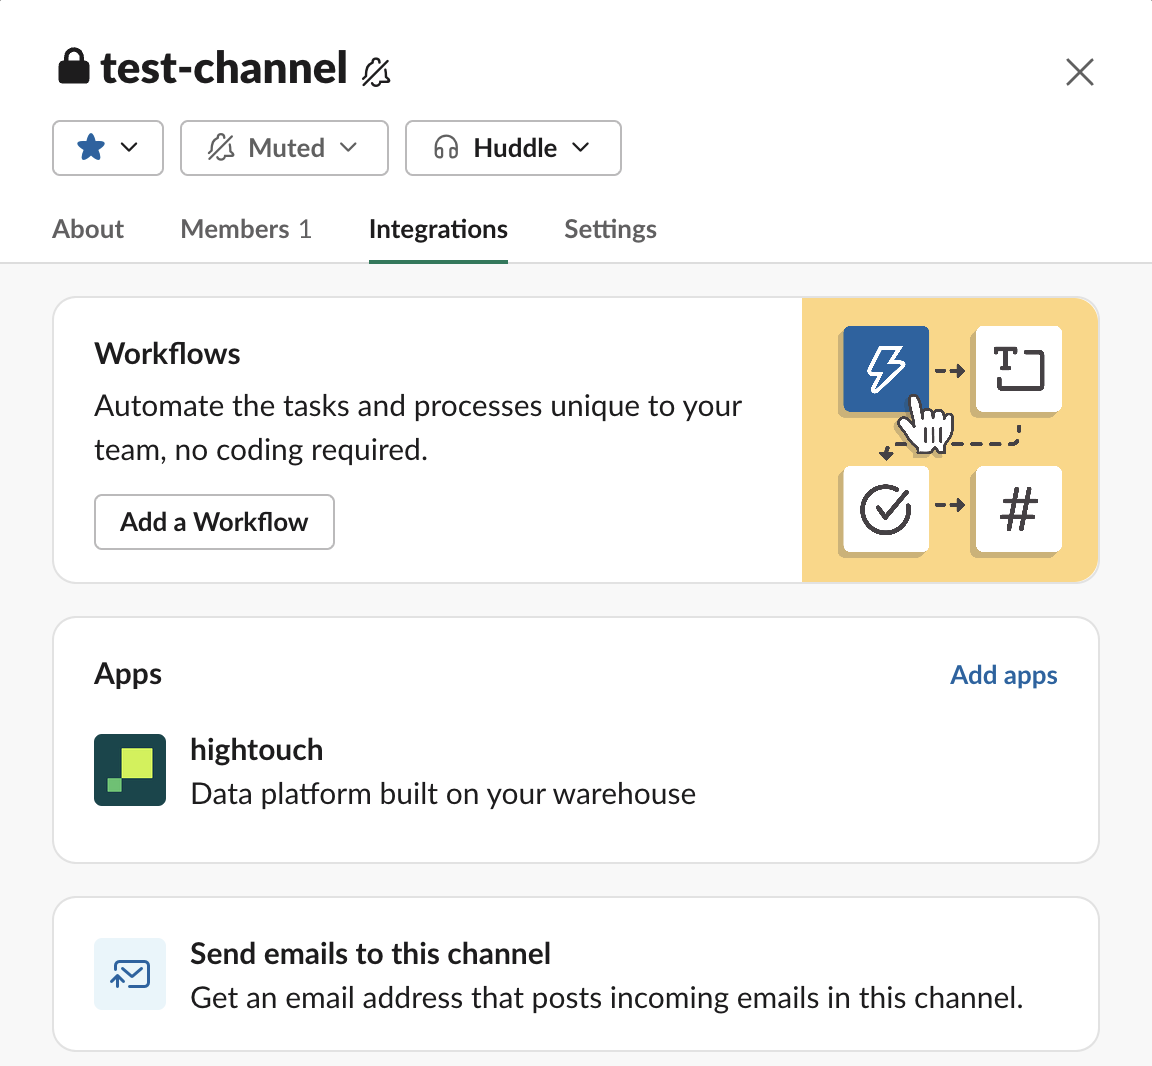
The Hightouch bot should now appear in the channel settings.
Sync configuration
Once you've set up your Slack destination and have a model to pull data from, you can set up your sync configuration to begin syncing data. Go to the Syncs overview page and click the Add sync button to begin. Then, select the relevant model and the Slack destination you want to sync to.
Syncing messages
Hightouch supports sending messages based on rows that have been added, changed, or removed since the last sync run.
Hightouch doesn't send any messages on the initial sync run to prevent a flood of messages to your channel. Messages start appearing after the initial sync run. The same behavior applies to full resyncs as well.
If you want avoid this behavior, modify your model query to return only one "test" row. Hightouch processes this row during the first sync run and doesn't send it as a message to Slack. Afterward, update your model query to include all rows from your source. Hightouch syncs all subsequent rows to Slack during the second sync run.
Channel selection
After adding the Hightouch bot to a Slack channel, you can select it from this dropdown menu or enter a channel ID manually. You can also enable the Use column toggle to select a model column instead of a Slack channel name. The model column selected in the dropdown menu must contain the correct Slack channel ID for every row in your model. This also allows you to dynamically set the target channel, by inserting different Slack channel IDs for different rows in your model.

Private channels
Private channels are hidden from the dropdown. To send to a private channel you can manually enter the channel ID.
Check out the Common errors section if you don't see your Slack channel in this menu.
Added, changed, and removed messages
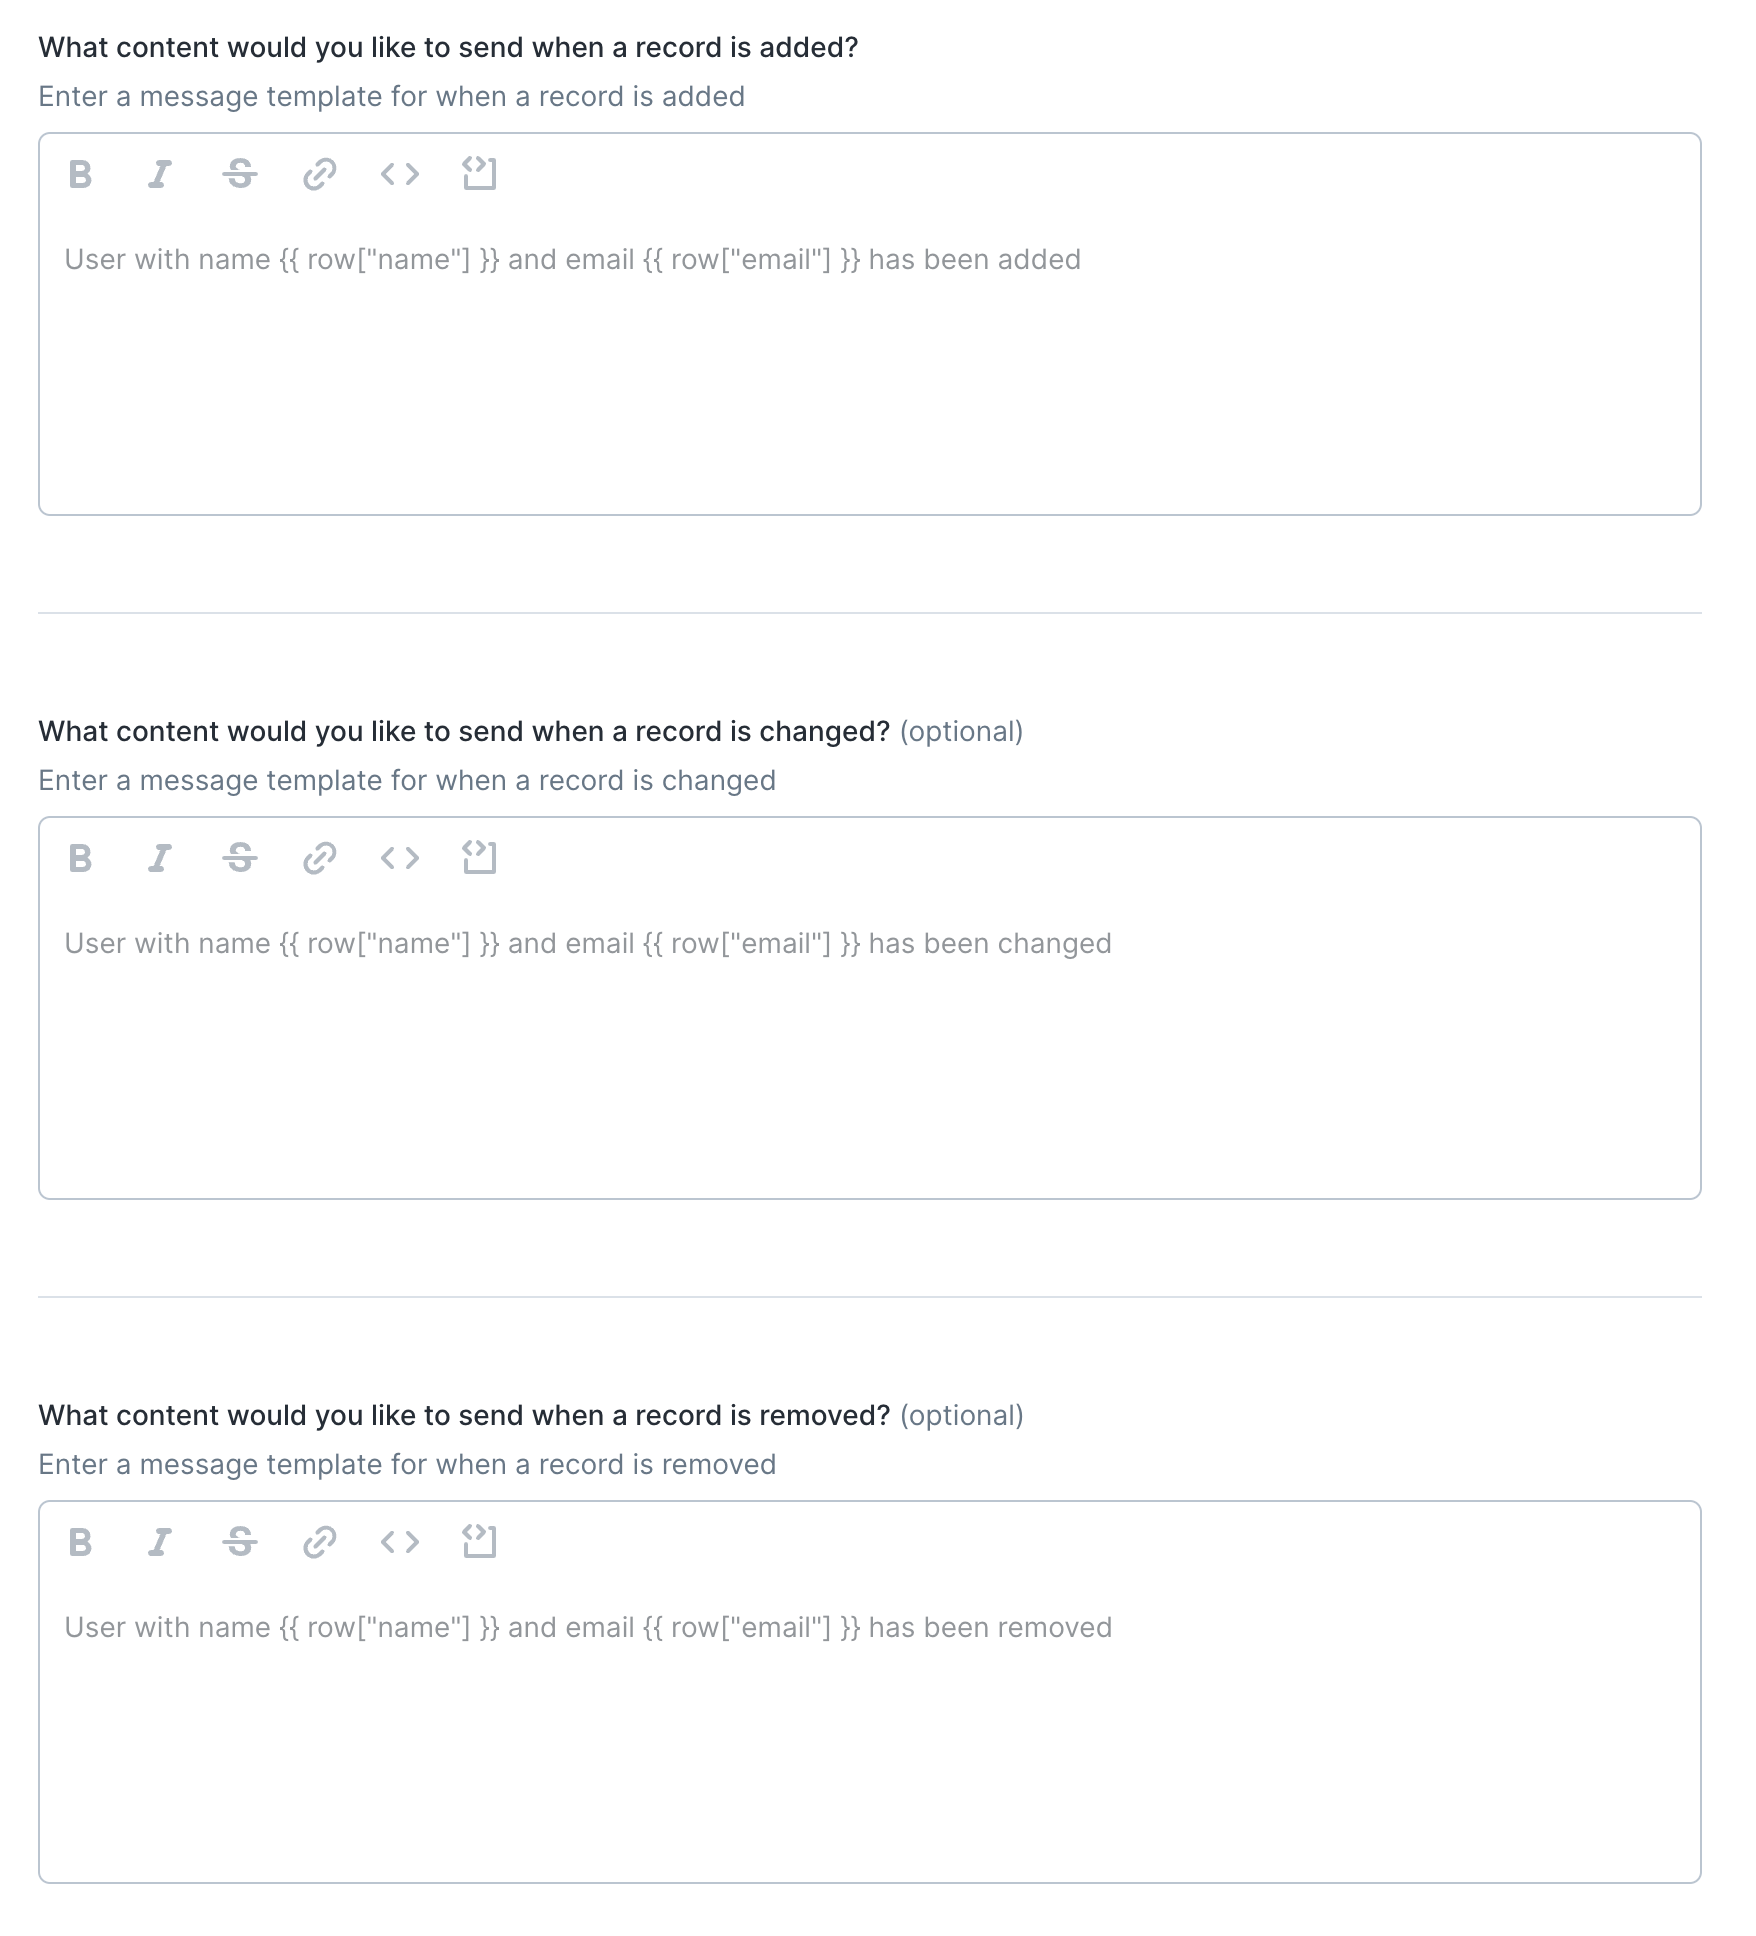
Hightouch allows you to send different messages based on the row type:
- when a row is added to your query results, Hightouch will send the row added content.
- when a row is changed in your query results, Hightouch will send the row changed content.
- when a row is deleted from your query results, Hightouch will send the row deleted content.
This content can be templated and also supports the Slack Block Kit.
Check out the Common errors section if your column name contains spaces.
Syncing batch messages
The batch message sync mode is similar to the normal message mode, except it sends all rows in the query result rather than only added, changed, or removed rows. This sync mode is ideal if you want to write a template and have Hightouch push a message containing all rows to Slack, formatted as a single message.
This mode also allows you to specify how many rows are sent per message, which can range from 1 to 50. With 1 row per message, it behaves similar to the message sync mode since it creates multiple messages in Slack. Whereas 50 rows per message is similar to the table sync mode.
Channel selection
The batch message sync mode only supports sending your messages to a single channel, unlike the message mode.

Private channels
Private channels are hidden from the dropdown. To send to a private channel you can manually enter the channel ID.
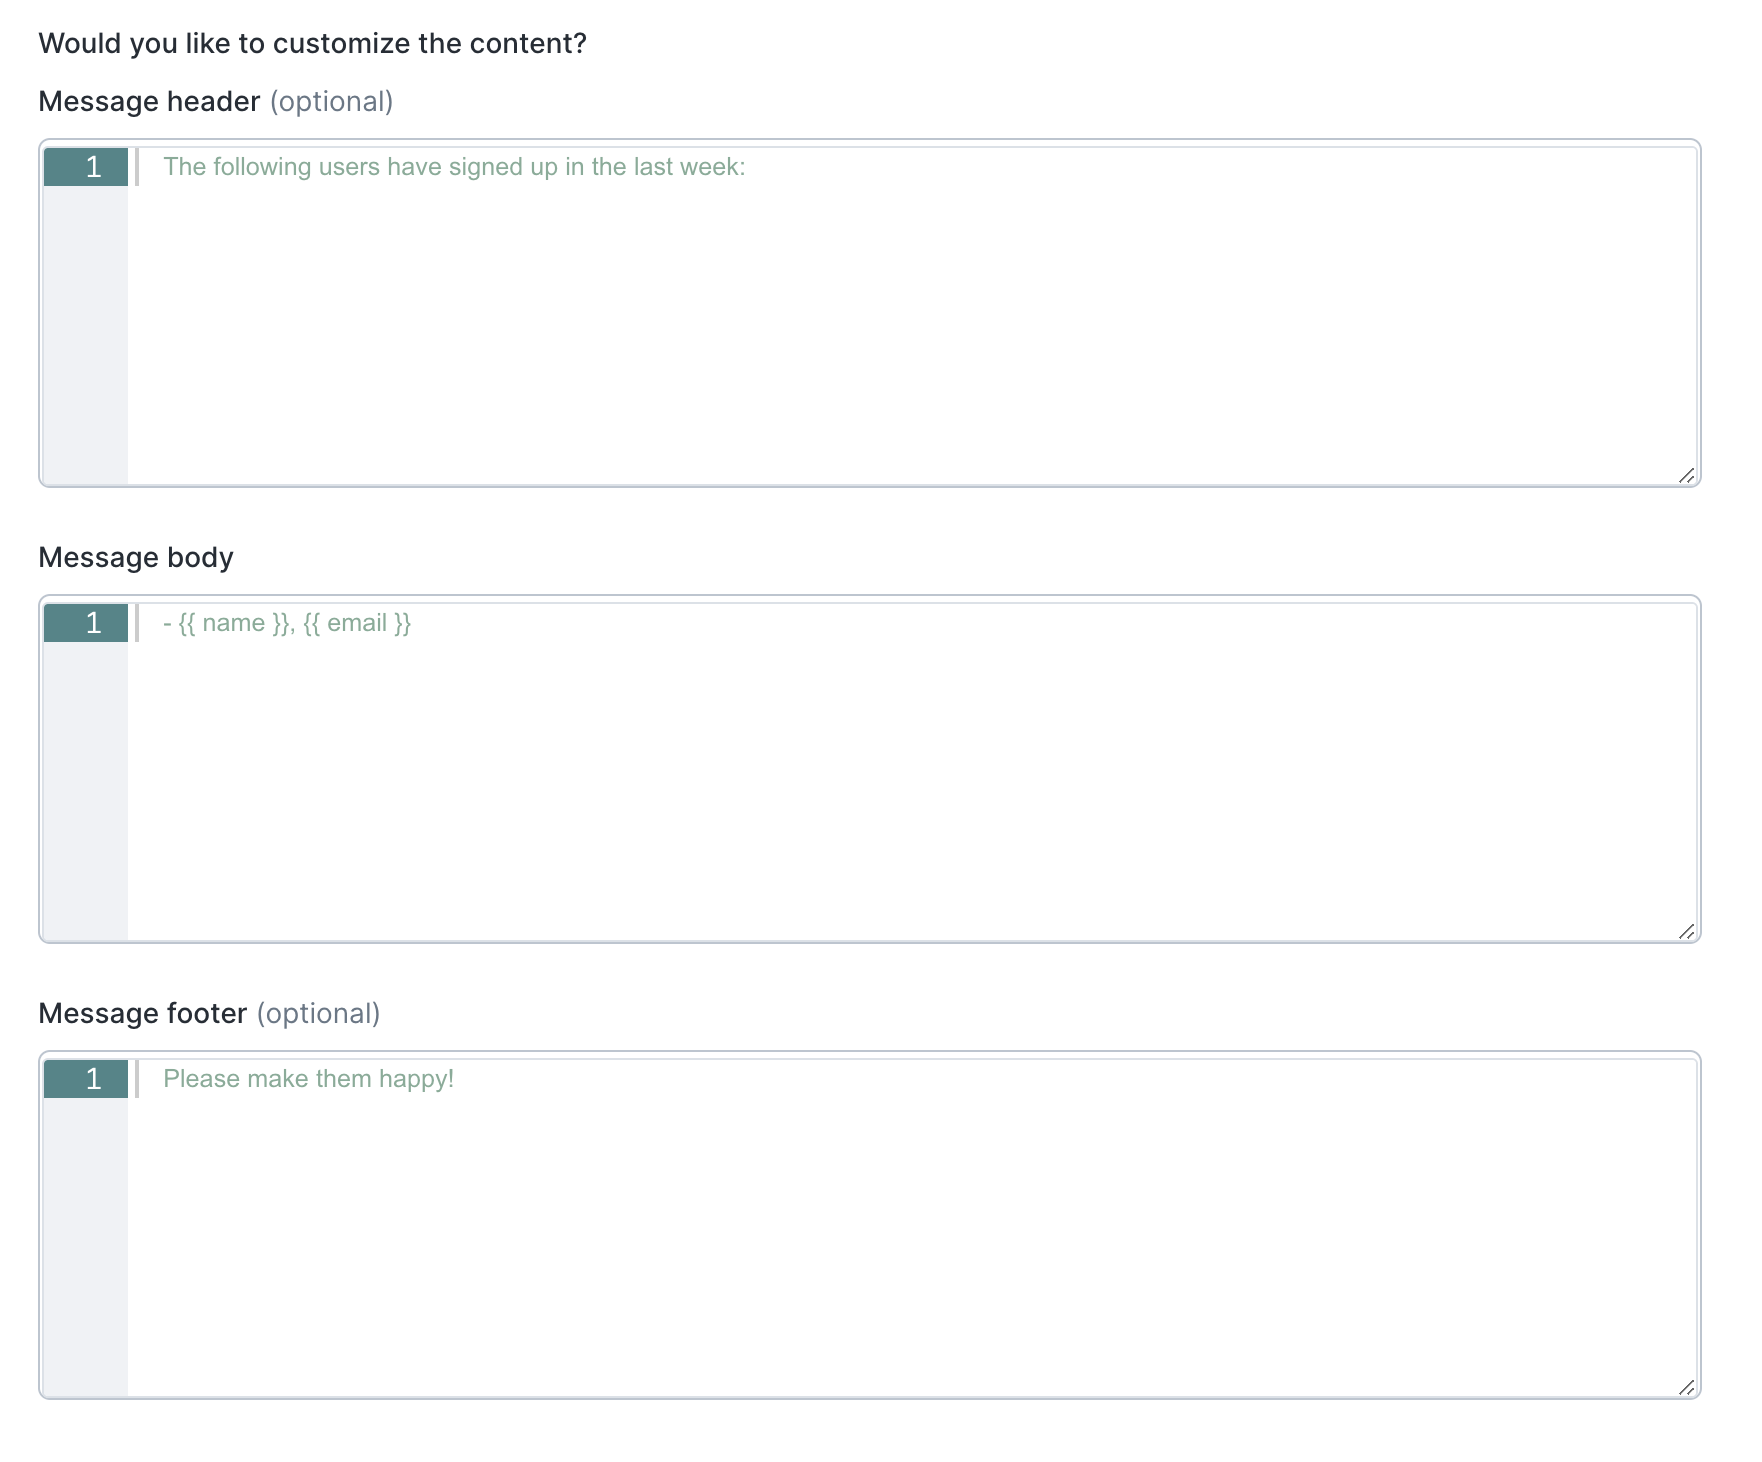
Header, body, and footer content
For each message, Hightouch allows setting the header, body, and footer content. The header and footer are optional, whereas the message body is required. The body is repeated for every row in your model.
This content can be templated and also supports the Slack Block Kit.
Check out the Common errors section if your column name contains spaces.
Syncing tables
The table sync mode is similar to the batch message mode. It sends all of your query results as a table-formatted message to Slack. This mode is only recommended for small datasets.
Syncing CSV files
The CSV sync mode is similar to the batch message and table modes. It sends all of your query results as a CSV file attached to a Slack message.
Templating messages
Liquid templating is supported for the message and batch message sync modes. This allows you to include model columns as part of the message body to insert dynamic values in your Slack messages. Here is an example message making use of Liquid to include model columns in a message:
User with name {{ row['first name'] }} and email {{ email }} has signed up
Check out our Extended Liquid use cases section to learn how to format dates, strings or currency amounts.
Tagging Slack users (@...)
Hightouch supports tagging users by either their Slack User ID or by email:
- Tagging by User ID: tag by user ID by writing
<@{{ userId }}>whereuserIdis the column that contains the user's Slack ID. If theuserIdis a static value, you can write something like<@UL53466SY>. - Tagging by Email: tag by email by writing
<@{{ email | slack_user_lookup }}>where email is the column that contains the user's email used in Slack. If the email is a static value, you can write something like<@{{ "example@gmail.com" | slack_user_lookup }}>.
Inserting URLs
You can insert URLs by highlighting a section of your template and pasting the URL.
Otherwise, you can build URLs directly by following this format: <URL link|URL text>.
For example, a URL that points to a Salesforce organization's page could look like this: <https://www.salesforce.com/organization/{{ org_id }}/view|Salesforce Organization>
We recommend using the second method when building dynamic URLs with liquid templating.
Unfurling links and blocking unfurl
By default, Slack automatically unfurls (displays a preview of) URL links in your messages.
To prevent automatic unfurling, surround the URL with backticks (`), for example:
`https://www.hightouch.com/`
The backtick is usually located above the tab key on the left-hand side of the keyboard.
Blocking URL unfurling isn't possible when using the Slack Block Kit. Please if you would like to request this feature.
Formatting text for app for Slack surfaces
Slack provides an extensive guide to formatting surfaces in the app for Slack with instructions on how to:
- format text
- insert emojis
- mention users and channels
- format dates, quotes, and lists
Slack Block Kit
To enable the Slack Block Kit, select Slack Block Kit for the content type. Make sure to use Slack's Block Kit Builder to draft your message content.

Each message content must be an array of Slack blocks, here is an example of a valid configuration.
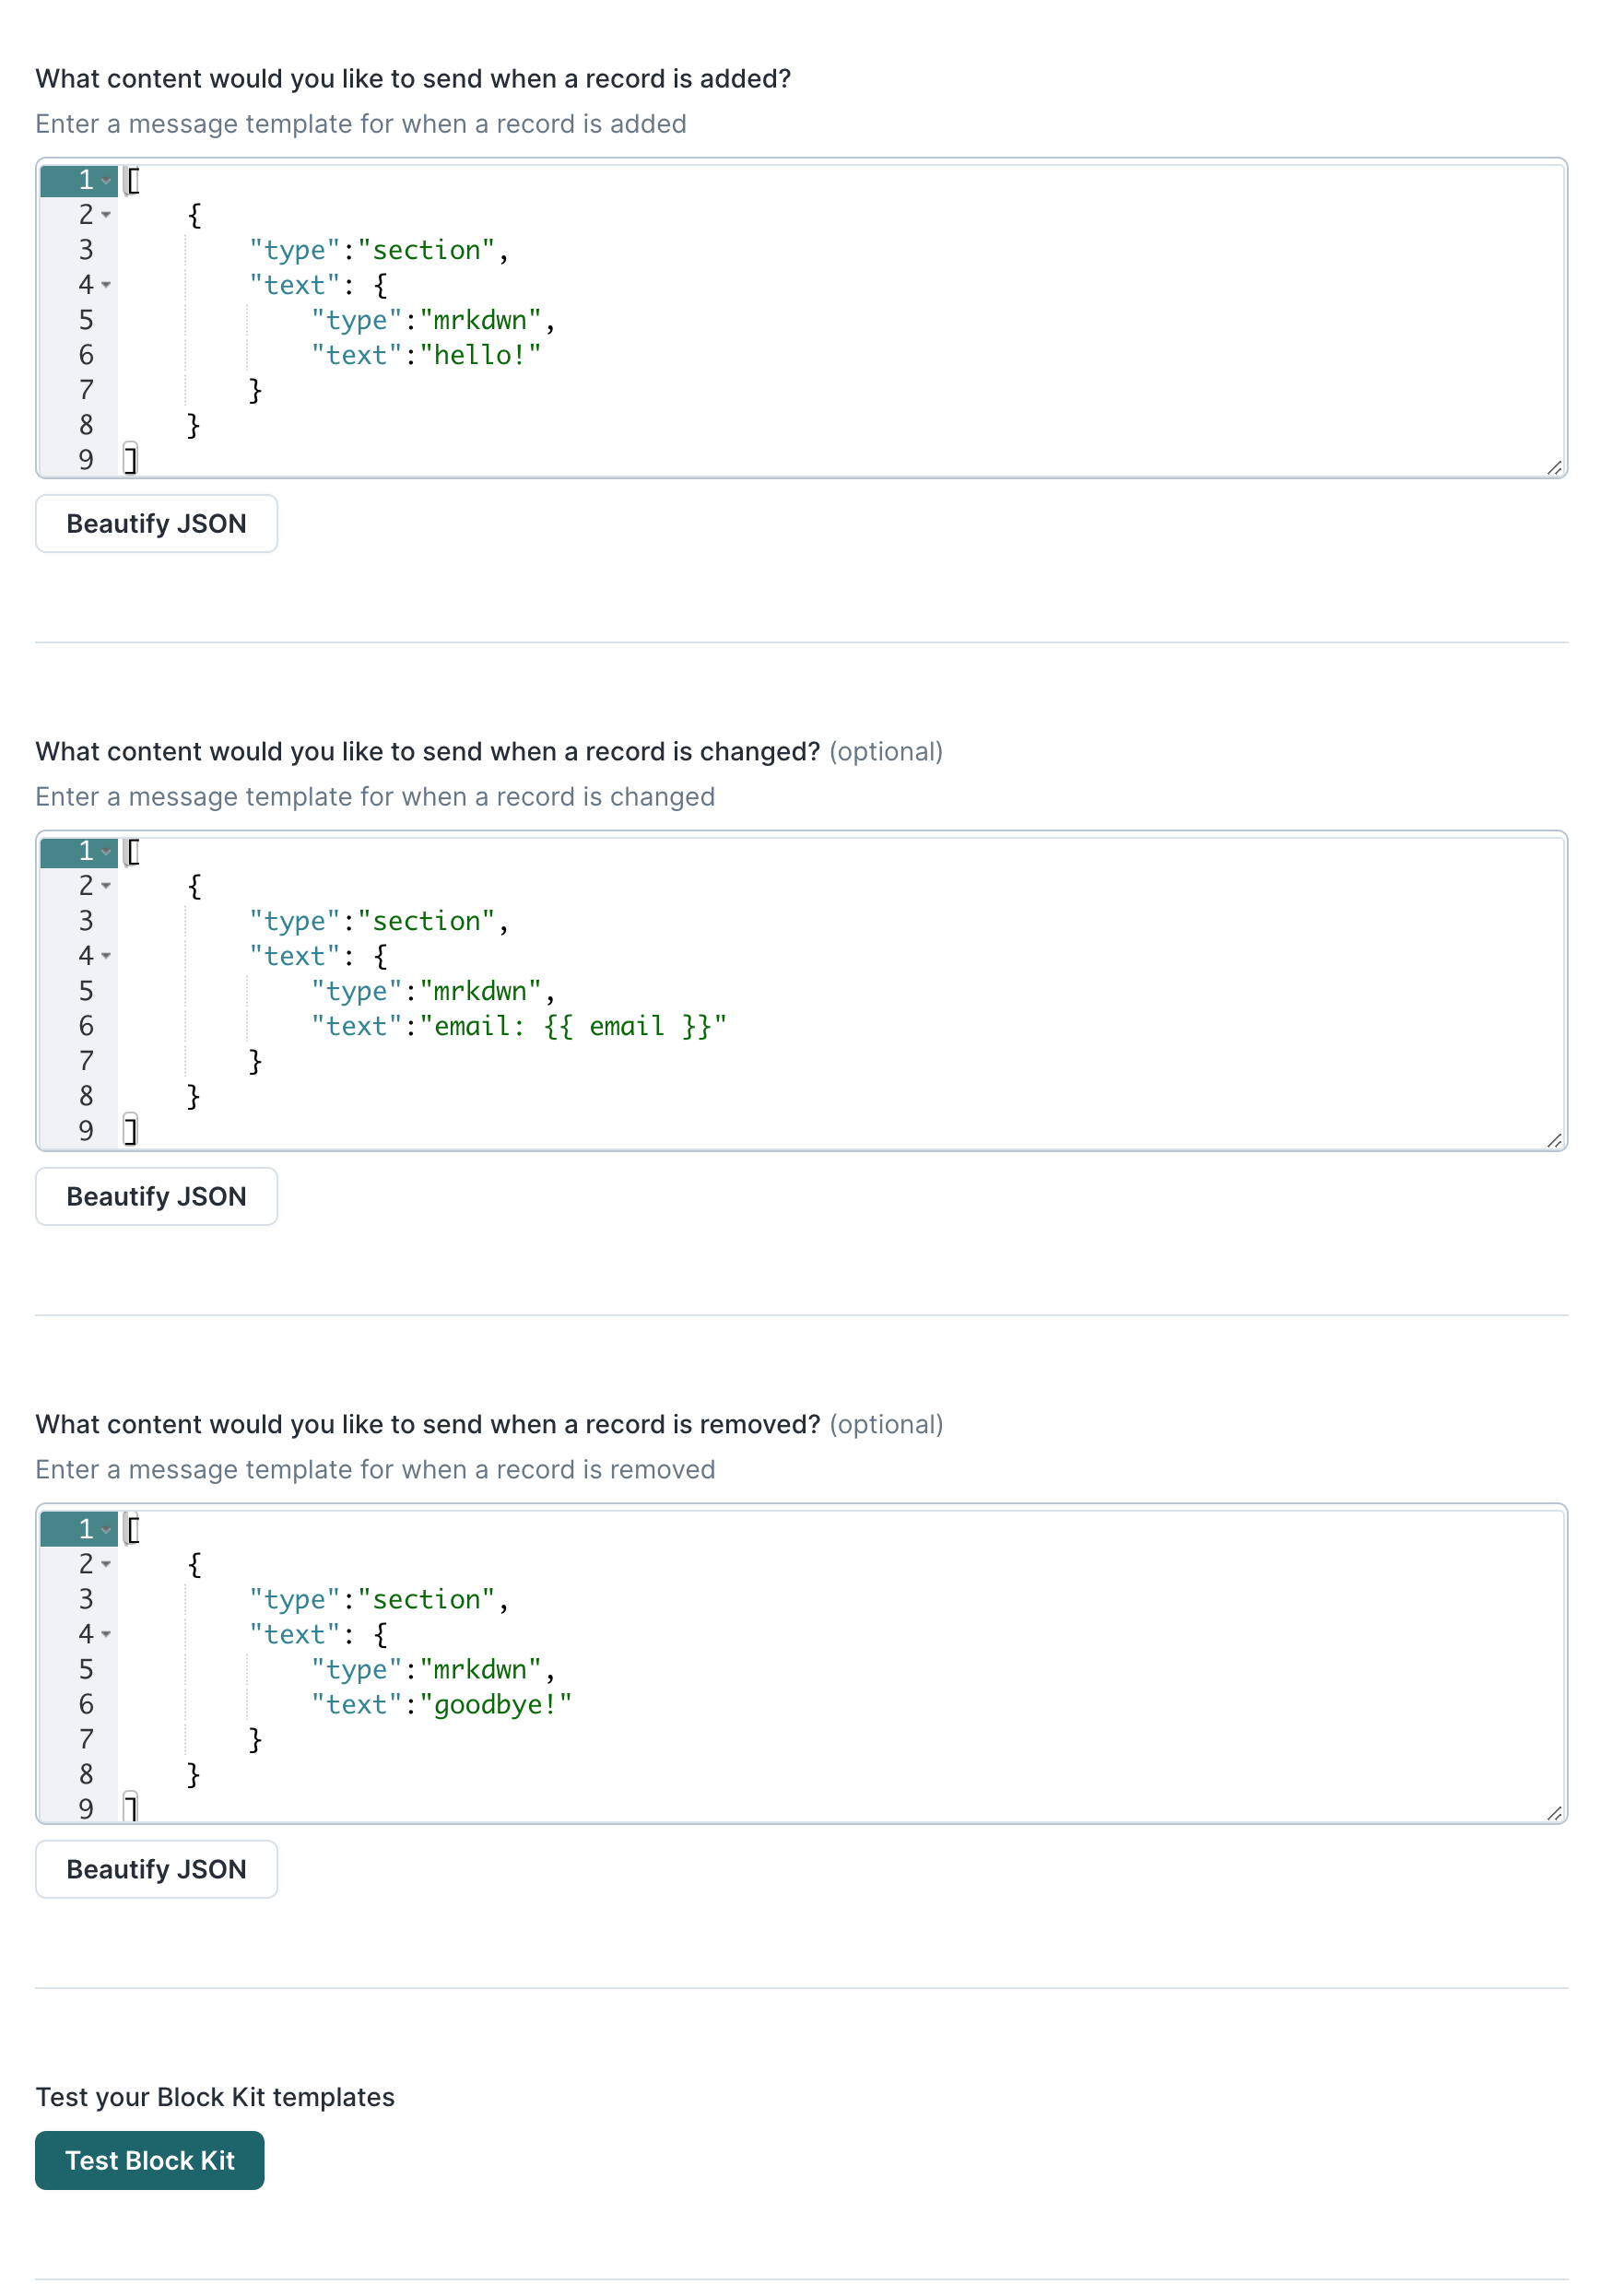
The Test Block Kit button under the message content allows you to view your templates as a Slack message (view an example).
Customizing bot appearance
Hightouch also allows you to customize how the Hightouch bot is displayed when sending messages to your Slack channel. You can find these fields in your sync configuration:
| Name | Description |
|---|---|
| Display name | Display name of the Hightouch bot |
| Icon URL | URL of a 48x48 image that you wish to use as the bot icon |
| Emoji | Slack emoji to use instead of an icon image (for example, :sweat_smile:) |
Keep in mind that users in the channel will be able to see the real bot name and image by clicking on it.
Tips and troubleshooting
Common errors
If you encounter an error or question not listed below and need assistance, don't hesitate to . We're here to help.
Slack channel not appearing in sync configuration
If your Slack channel isn't appearing in the channel selection menu, make sure that you added the Hightouch bot to the channel. If this still doesn't work, try reauthorizing your Slack destination in Hightouch. As a next troubleshooting step, remove the Hightouch app for Slack from your Slack workspace by visiting the Hightouch app page, opening the Configuration tab, and clicking Remove App.

Then set up a new Slack destination and add the Hightouch bot to your Slack channel once more.
Invalid_blocks
Using "plain_text" instead of "mrkdwn" in your Slack Block Kit syntax is the most common cause of this error.
You can find examples of the correct syntax to use in the Slack Block Kit section of this page.
Cannot read properties of undefined (reading 'length')
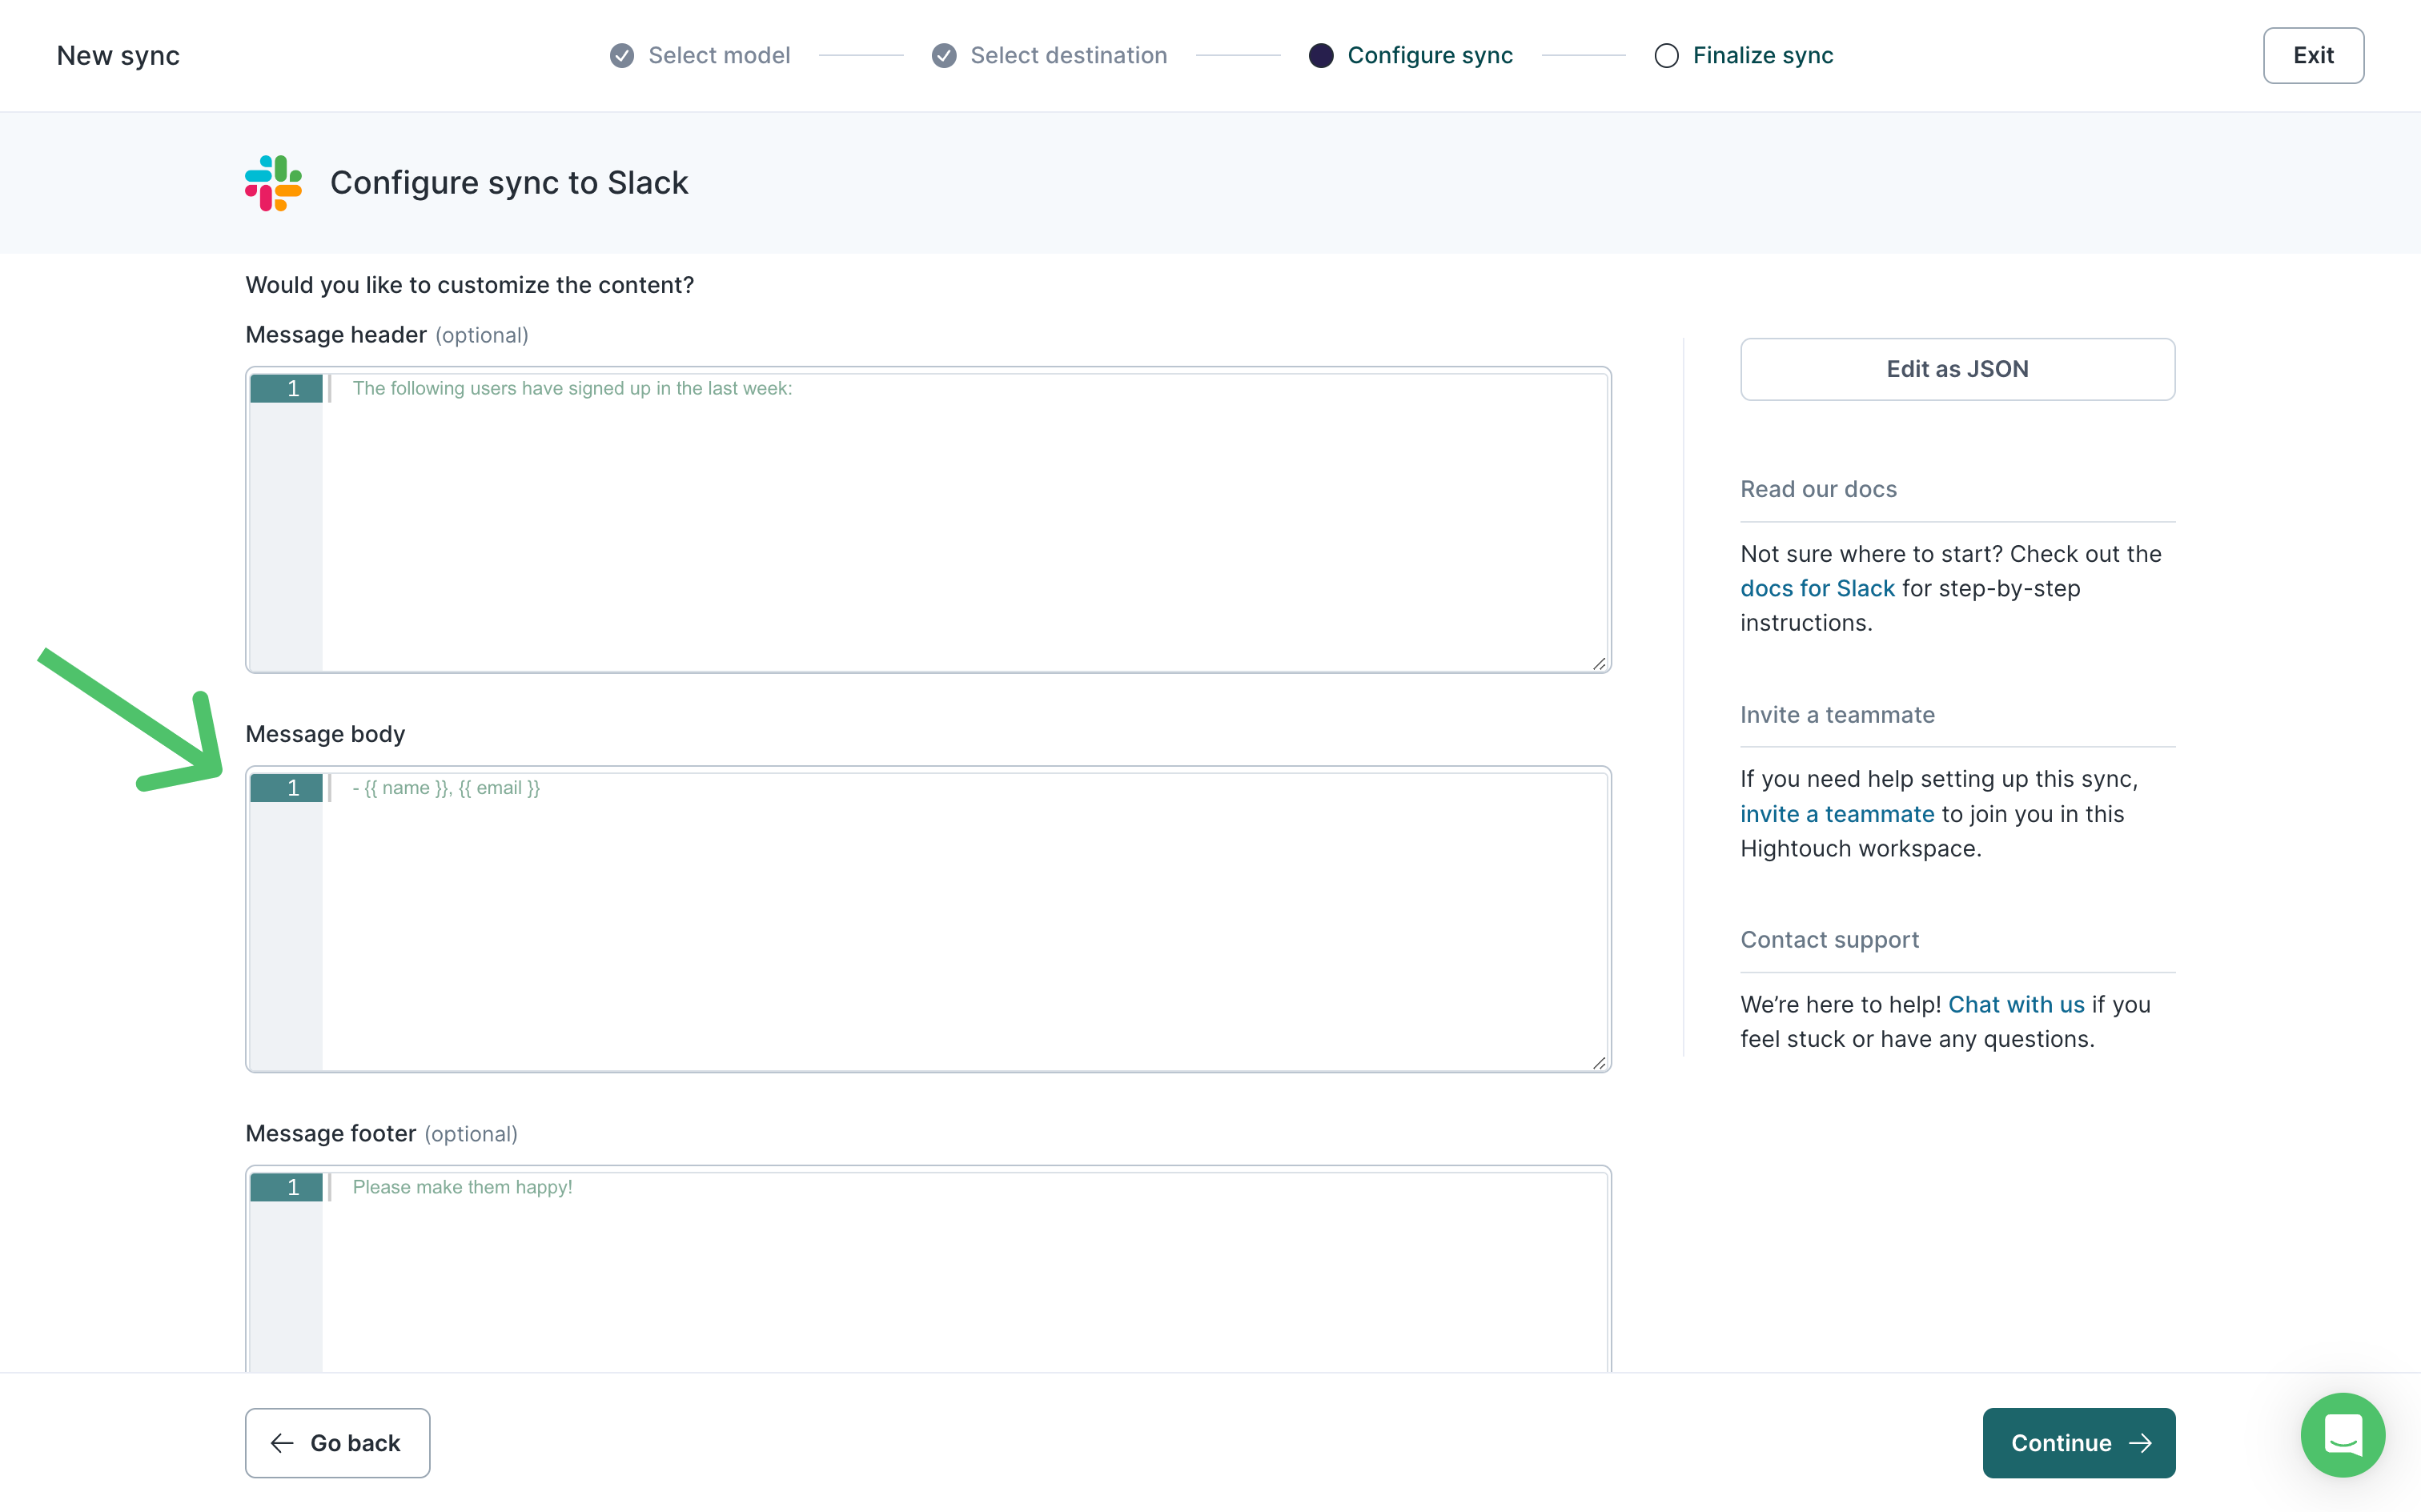
You may receive the Cannot read properties of undefined (reading 'length') error when syncing batch messages.
If you're using the Slack Block Kit as the content type, your sync might return this error instead:
Parsing failed with error SyntaxError: Unexpected end of JSON input.
In either case, make sure to insert body content in the sync configuration. Header and footer content is optional.
ParseError: unexpected token
The full error message may look like, unexpected token at "name", line:1, col:13. You may receive this error because a column header that is being referenced in your message contains a space. For example:
First Name: {{ first name }}
To resolve this error you can try the following options:
- Rename your column so that the name does not contain spaces, for example,
firstNameorfirst_name. An example will look like:
First Name: {{ first_name }}
- If you cannot change the column's name then you can use this language of liquid templating. An example will look like:
First Name: {{ row['first name'] }}
Live debugger
Hightouch provides complete visibility into the API calls made during each of your sync runs. We recommend reading our article on debugging tips and tricks to learn more.
Sync alerts
Hightouch can alert you of sync issues via Slack, PagerDuty, SMS, or email. For details, please visit our article on alerting.
